
How to use Review Tagging
Discover how review tagging can help you effectively organize your ratings. Learn about the options of manual and automatic tagging in Trustindex.
What is review tagging?
Review tagging in Trustindex involves labeling reviews based on specific keywords or criteria. This process helps you organize the feedback more effectively. We offer two main options: manual tagging and automatic tagging.
Manual tagging
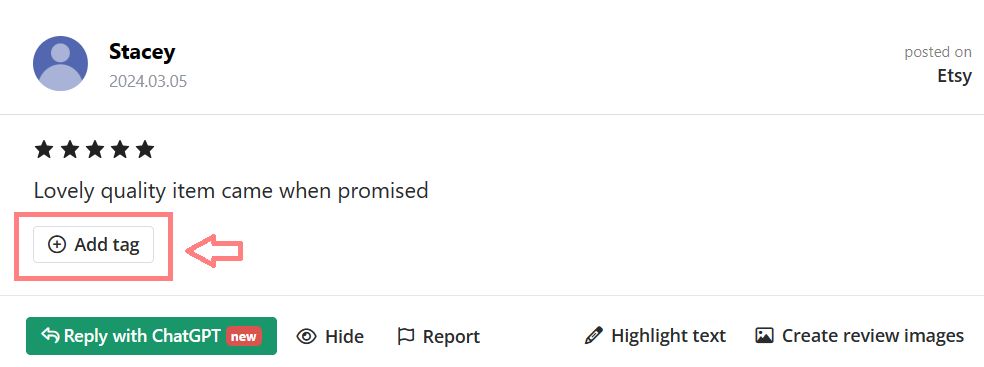
Under the Review Management menu, where all your reviews are listed, you have the option to assign tags under each one manually to quickly organize your feedback.
Automatic tagging
Using automatic tags can make this process a lot easier than manual tagging.
This way, your reviews containing the keywords/expressions you set up under the tag will automatically be assigned to that tag.
How to tag reviews easily
Step 1
First, create your tag. This is a fairly simple process:
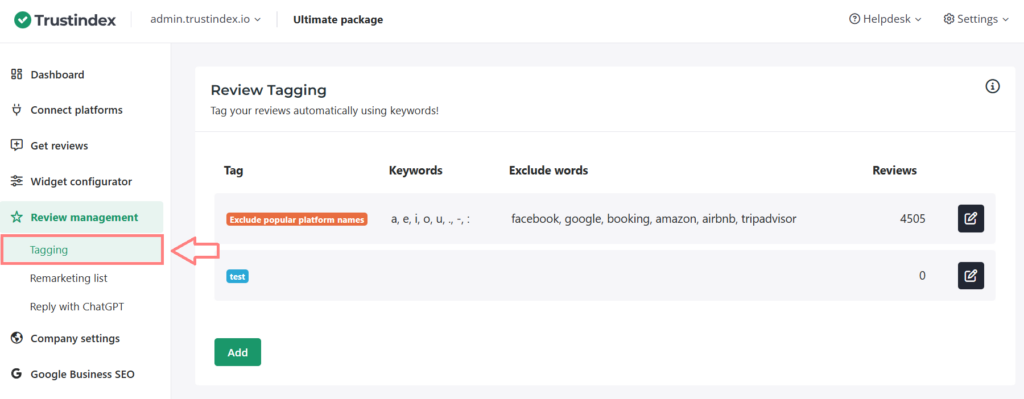
Simply go to Review Management > Tagging menu and click on Add.
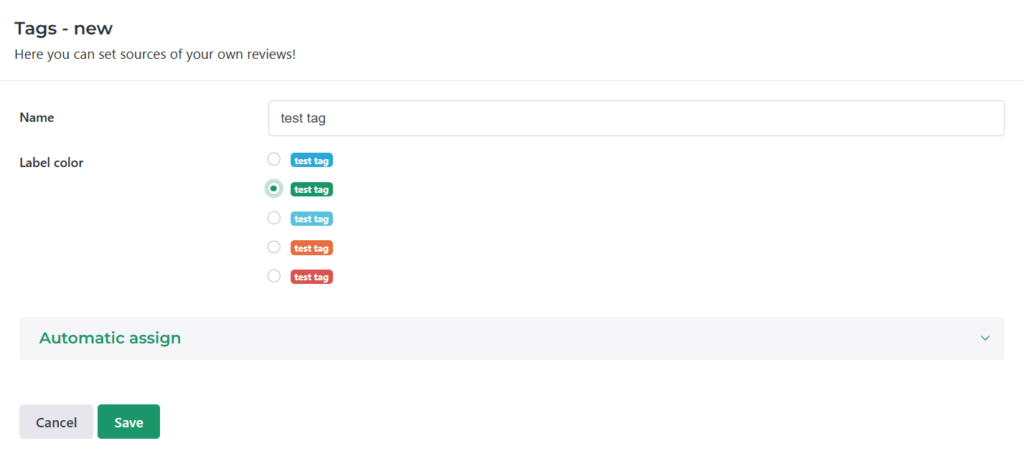
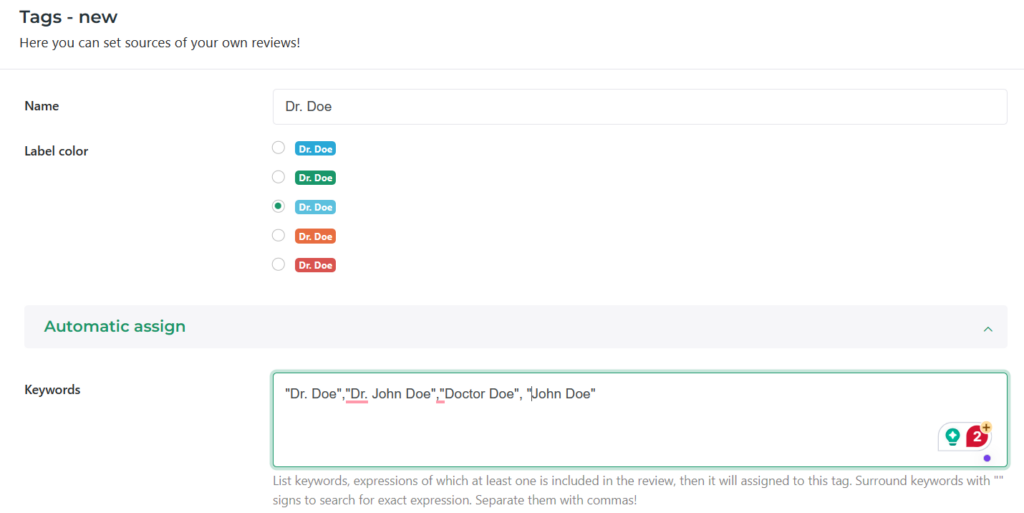
When setting up your tag, you can add a name and choose a color for the tag.
Step 2A
For manual tagging, stop here and Save.
Step 2B.
For automatic tagging, set up the criteria below these main settings under Automatic assign.
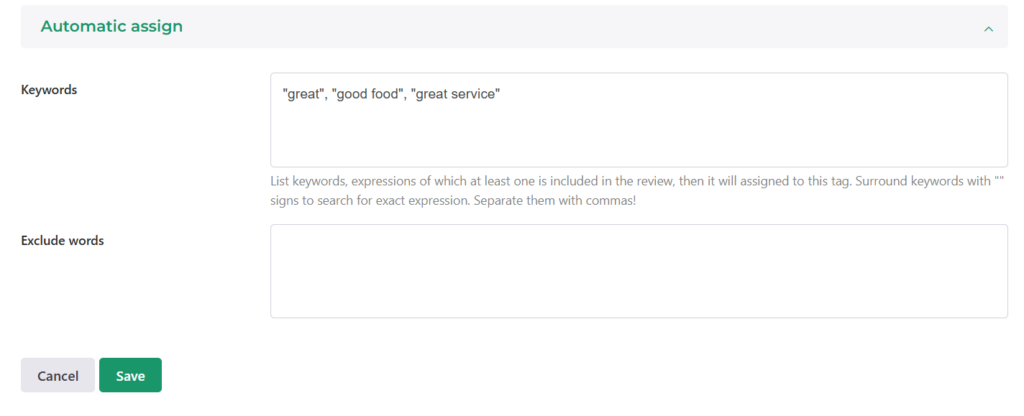
In Keywords, add words you want your tagged reviews to contain.
For example, a clinic might want to separate their reviews by the doctors who are mentioned in them, so they can add different keywords under their tags such as ‘Dr. Chan’, ‘Dr. Maryland’, Dr. Doe’, etc.
Exclude keywords is the opposite: when you define Excluded keywords in a tag, then a review that contains such expressions, will not be automatically added under the tag.
For example: a company could add their most popular competitors’ names here so reviews that include anything about said competitors will not be listed when the tag is applied.
Step 3
Save and you’re done! Either start tagging manually in Review Management or let automatic tagging take care of the rest for you.
How to use tags in widgets
Tagging not only makes it easier to manage and look through your feedback but can help you out when creating the perfect review widget as well.
Step 1
Create a tag you intend to use in your website widget – it is up to you if you use manual or automatic tagging. Save after you’re done.
Step 2
Go over to the Widget configurator menu. Add a new widget or click on Edit on an already existing one.
Step 3
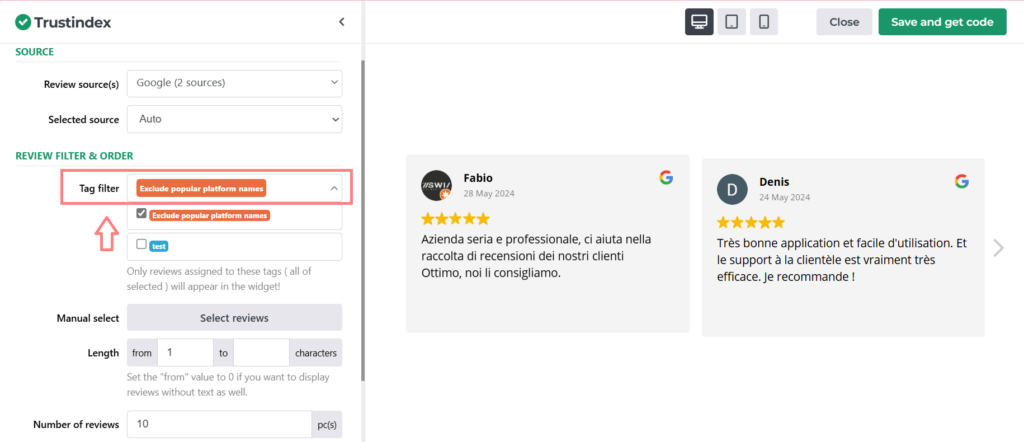
In the widget’s Style Editor, scroll down to Review filter > Review filter & Order > Tag filter.
Check off the tag in the drop-down menu. Only reviews assigned to these tags will appear in the widget!
Step 4
Save the widget after you’re done setting it up.
Copy the code from the pop-up window and paste it into your webpage.
Not sure how? Here’s some help:
Free workshop for more success
If you’d like to get to know more about Trustindex’s other features, then sign up for our free, 20-minute workshop where our Expert will show you:
- Why Google Reviews are important for your business success
- How to rank higher on Google Maps and search results with the help of reviews
- How to manage your online reputation with the Trustindex system
- Modern, automatic solutions for review management
- And how to collect 15+ new reviews every day.