Fix WordPress Stuck in Maintenance Mode in 3 Easy Steps [2023]
- Why does WordPress get stuck in maintenance mode?
- How to fix WordPress stuck in maintenance mode
- Reduce the chances of WordPress getting stuck in maintenance mode
- Conclusion
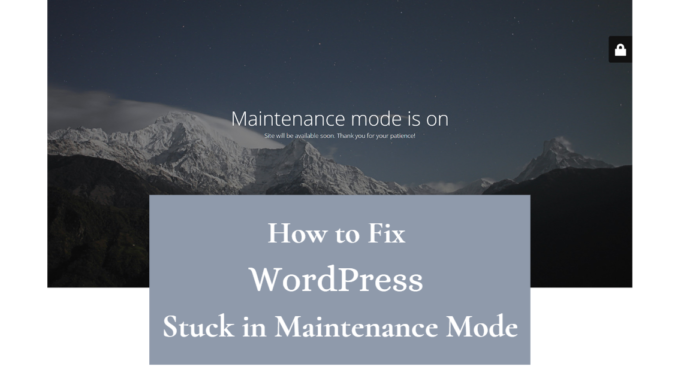
Occasionally, you get the error WordPress stuck in maintenance mode, which can cause issues.
But don’t worry, resolving this problem is straightforward.
You can manually reverse the WordPress maintenance mode by accessing your site files and making a small adjustment.
In this article, we’ll explore the reasons behind WordPress sites getting stuck in maintenance mode.
Furthermore, we’ll guide you through three simple steps to fix this issue.
Let’s jump right in and get your site back on track!
What are the reasons behind WordPress getting stuck in maintenance mode?
Let’s begin by examining what happens when your WordPress site becomes stuck in maintenance mode.
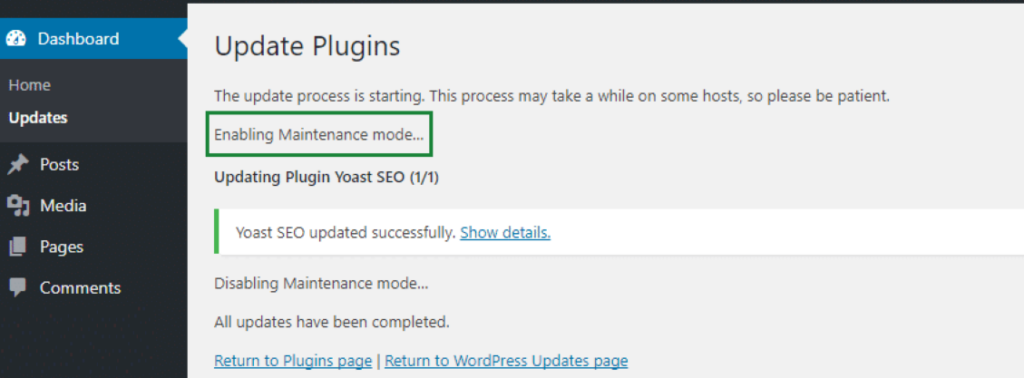
When you attempt to access your site while performing plugin updates, you’ll likely encounter the following message:

“Briefly unavailable for scheduled maintenance. Check back in a minute.”
Typically, this WordPress maintenance mode message disappears within a few seconds, then you can access your site again once the updates are complete.
However, in some cases, your site may remain stuck in maintenance mode even after the updates are finished.
Several factors can trigger this error, including a compatibility problem with the software.
For example, if you update your WordPress core and the new version is incompatible with your current theme, your site may enter maintenance mode.
The “WordPress stuck in maintenance mode” error can also occur if important updates are interrupted before completion.
This could happen if you lose internet connection or accidentally close the update page while updating WordPress files like themes or plugins.
While maintenance mode safeguards your site during crucial updates, getting stuck in this mode can negatively impact the user experience (UX) and potentially lead to a loss of visitors.
Now, let’s move on to resolving this issue and getting your WordPress site out of maintenance mode.
How to fix WordPress stuck in maintenance mode
Now that we’ve discussed the reasons behind WordPress getting stuck in maintenance mode, let’s move on to the steps for fixing it.
We will resolve the issue using File Transfer Protocol (FTP) client. You can also do this by using the file manager or with your hosting account if your hosting provider offers a tool like cPanel.
Keep in mind that manually editing your site files requires caution to avoid unintended changes.
#1 Make a backup of your WordPress site
Fixing the “WordPress stuck in maintenance mode” issue involves making modifications to the maintenance file in the WordPress root folder.
While the process is simple, it’s crucial to back up your website beforehand to avoid any accidental damage or issues.
To create a backup of your site, you can use a free plugin called UpdraftPlus, which provides an easy and reliable solution for WordPress maintenance.
How to back up your WordPress site using UpdraftPlus:
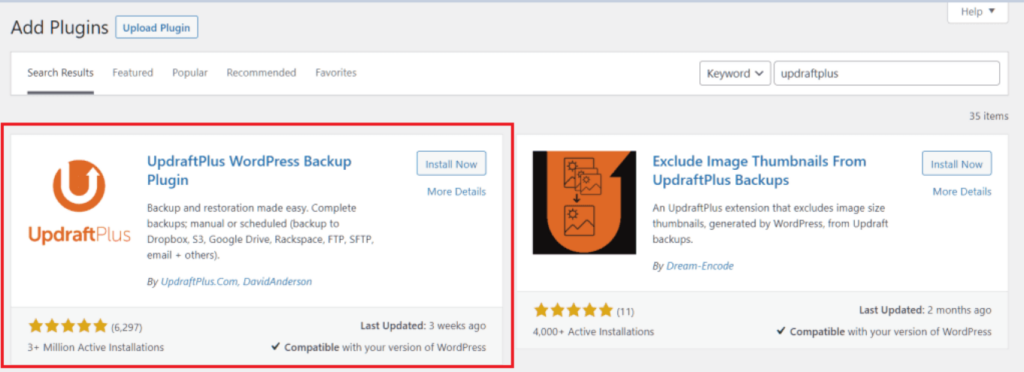
After installing and activating UpdraftPlus, you will be redirected to the plugin’s page on your WordPress dashboard.
1.) To begin the backup process, simply click on the “Press here to start!” button.

This will initiate the backup of your WordPress website using UpdraftPlus.
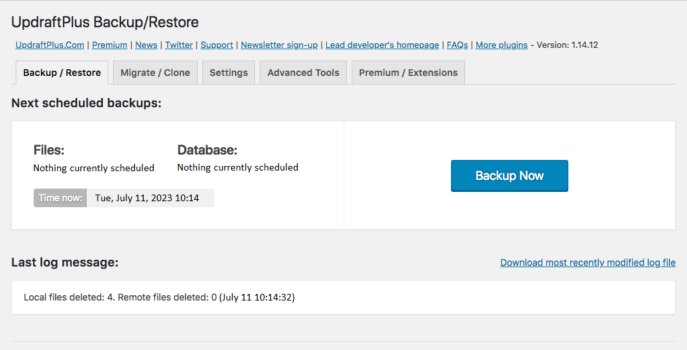
2.) Alternatively, you can access the same page by navigating to Settings > UpdraftPlus Backups.
This will take you to the Backup / Restore tab in the plugin’s settings.
3.) Once there, simply click on the “Backup Now” button to initiate the backup process.
Then, a pop-up will appear where you can customize your backup settings.
4.) Make your desired selections, and then click on the “Backup Now” button once again to start the backup process.
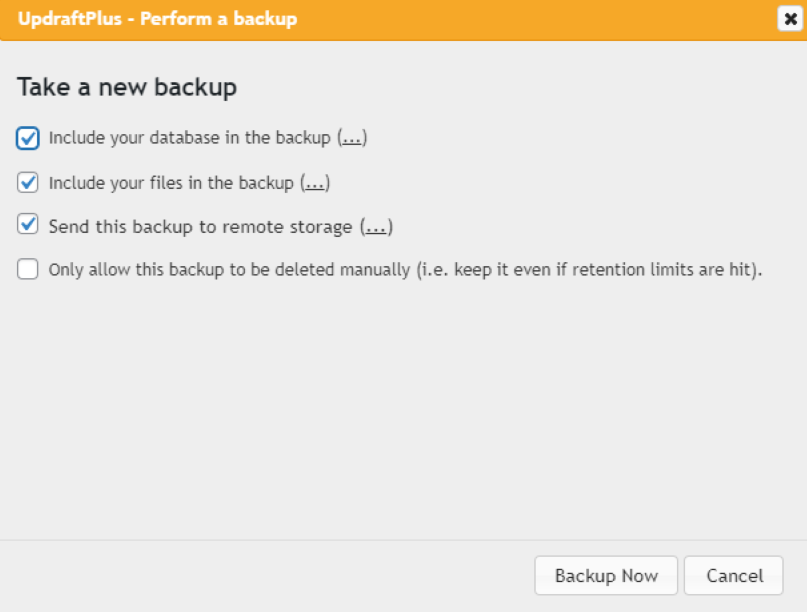
The backup process may take a few moments. Once it’s complete, you’ll see a pop-up message confirming that the backup is ready.
That’s all there is to it!
If you wish to customize your backup settings, you can go to the settings tab from the WordPress dashboard and make any desired changes.
#2 Connect your website to an FTP client
Now that you have created a backup of your website, it’s time to connect to an FTP client.
This tool will allow you to safely access and modify your WordPress site files in the root folder.
For this step, we recommend using FileZilla, a popular and reliable FTP client that is also free to use.
1.) To begin, visit the FileZilla website and download the latest version for your operating system.
2.) Once the download is finished, launch the program and enter the necessary information to connect to your site.
This includes your host (e.g., your domain name), username, password, and port number
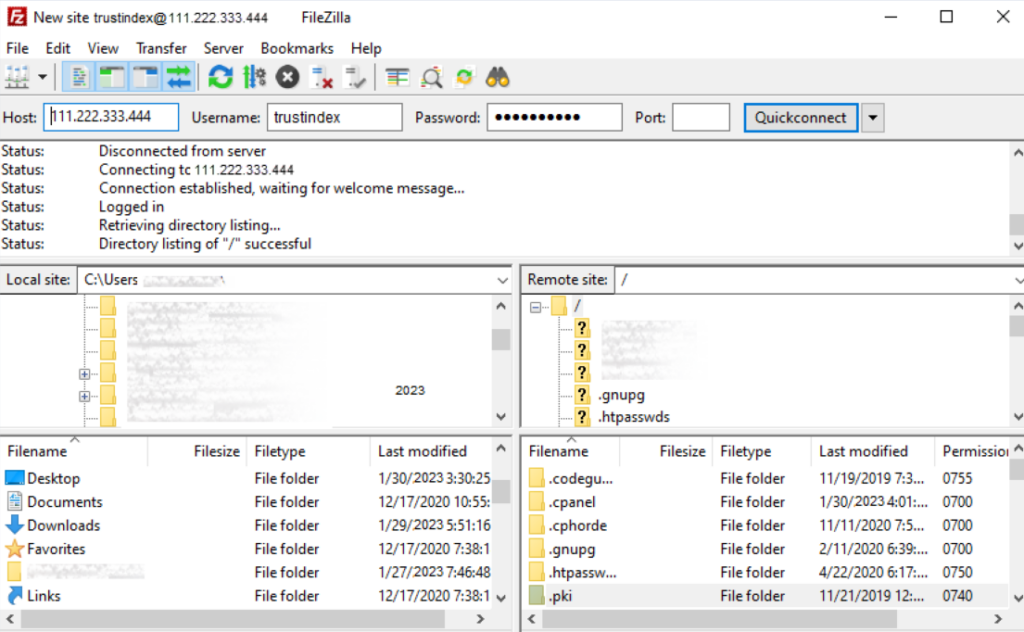
To find the necessary FTP details for your hosting account, you can usually locate them in your hosting account’s dashboard.
Look for an option like “FTP details” or “FTP settings.”
Once you have entered the FTP details, you’re ready to proceed to the next step.
#3 Delete .maintenance file
To resolve the issue of WordPress stuck in maintenance mode, you need to locate and delete the .maintenance file.
The maintenance file is created during the update process and WordPress deletes it automatically once the updates are finished.
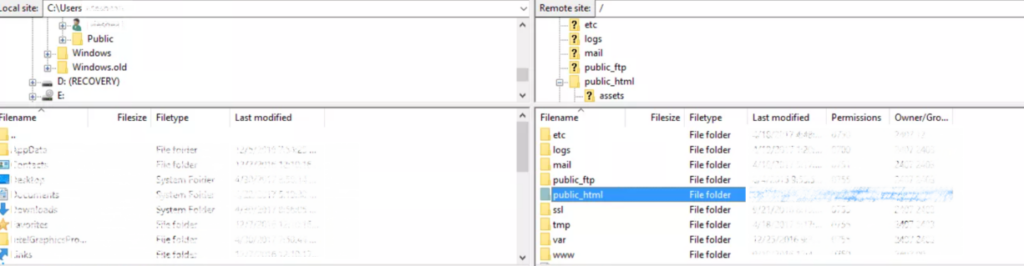
1.) To find the .maintenance file, use FileZilla or your FTP client to navigate to the root folder of your WordPress site.
2.) In the right-hand panel of FileZilla, you should see a file called “public” or “public_html.”
This is typically the WP admin folder where you can find the .maintenance file.
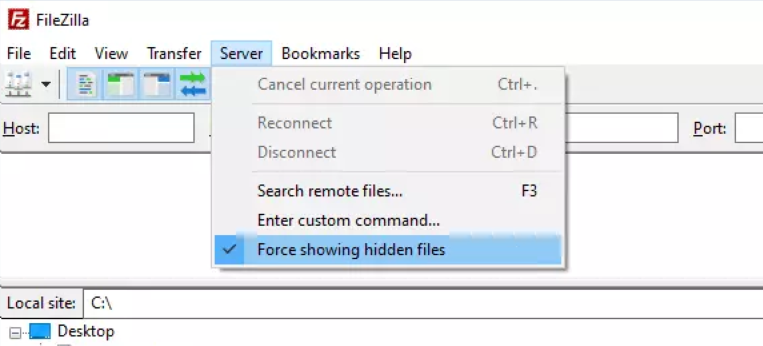
In some cases, certain files are automatically hidden in the file manager, particularly those starting with a period.
If you are unable to locate the .maintenance file in your root folder, you can go to the Server menu and choose the option to Force showing hidden files:
3.) After that, find the .maintenance hidden file and right-click on it.
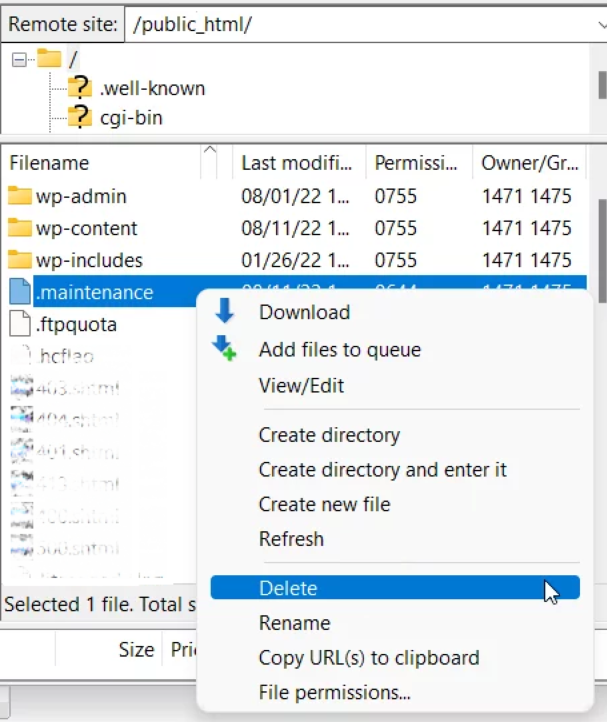
4.) Now, select Delete. That’s all!
After deleting the .maintenance file, you should now be able to access your WordPress site without it being stuck in WordPress maintenance mode.
How to avoid WordPress stuck in maintenance mode error?
To prevent WordPress from getting stuck in maintenance mode in the future, it’s essential to effectively manage your WordPress tools.
5 Tips to prevent WordPress stuck in maintenance mode:
1.) Performance monitoring
If you don’t have performance monitoring in place, it’s best to avoid enabling automatic updates on your site.
Issues during an automatic update can go unnoticed for hours or even days without monitoring.
2.) Update plugins one at a time
Avoid bulk updating plugins simultaneously as it can overwhelm your site and increase the likelihood of encountering maintenance mode errors.
Take a sequential approach and update all your plugins one by one.
3.) Limit the number of plugins
Having an excessive number of WordPress plugins can lead to slower loading times and compatibility issues, resulting in maintenance errors.
Be selective and only install the necessary plugins for your site to avoid being stuck in maintenance mode.
4.) Verify theme and plugin compatibility
Before updating, ensure that your WordPress theme is compatible with the latest version.
Similarly, double-check the compatibility of any new WordPress plugins with the latest WordPress version.
5.) Contact your web host
If your site frequently gets stuck in maintenance mode and you’re unsure of the cause, it could be related to your web host.
Reach out to their support team for assistance and inquire about any known issues.
If necessary, consider upgrading to a more reliable and powerful hosting provider.
Aside: Error still persists – debugging WordPress
Debugging in WordPress is an essential part of the development process, ensuring the quality and interoperability of your code.
This section explores the debugging tools available in WordPress and provides guidance on resolving common issues.
Using the wp-config.php File for Debugging
To enable debugging, you can make modifications to the wp-config.php file in your WordPress installation.
By inserting the following line of code, you can log errors, notices, and warnings to a debug.log file and hide them from interrupting page generation:
// Enable WP_DEBUG mode
define( 'WP_DEBUG', true );

// Enable Debug logging to the /wp-content/debug.log file
define( 'WP_DEBUG_LOG', true );

// Disable display of errors and warnings
define( 'WP_DEBUG_DISPLAY', false );
@ini_set( 'display_errors', 0 );

// Use dev versions of core JS and CSS files (only needed if you are modifying these core files)
define( 'SCRIPT_DEBUG', true );
Remember to place this code snippet before the /* That’s all, stop editing! Happy blogging. */ line in the wp-config.php file.
PHP Errors, Warnings, and Notices
Enabling WP_DEBUG displays all PHP errors, warnings, and notices.
This can help identify any coding issues that are contributing to the maintenance mode error.
Deprecated Functions and Arguments
Enabling WP_DEBUG also reveals notices about deprecated functions and arguments.
These notices can provide insights into outdated code that may be causing conflicts.
WP_DEBUG_LOG and WP_DEBUG_DISPLAY
Understanding these constants allows you to save error logs to a file (debug.log) and control whether debug messages are displayed in the HTML of your site.
Checking the debug.log file can help you identify the specific error or warning that is triggering the maintenance mode.
Debugging Plugins
WordPress offers various debugging plugins that provide additional information about specific components or general internals.
Some popular examples include:
Conclusion
Resolving the “WordPress stuck in maintenance mode” error is a simple process.
Every WordPress website needs to be updated or modified once in a while.
But a WordPress site stuck in maintenance mode raises the chance of losing visitors and potential conversions.
How you can fix the error “WordPress site stuck in maintenance mode”?
- Back up your website using a plugin like Updraft Plus to ensure you can restore your site if anything goes wrong.
- Connect your site to a File Transfer Protocol client like FileZilla, which allows you to access and modify your site’s files safely.
- Locate and delete the .maintenance file in your site’s root directory. This is automatically generated during updates and removing the file tells WordPress to get your site out of maintenance mode.
We hope this article helped you solve the error.
If you have any more questions feel free to ask them in the comment section!