
Favicon WordPress – How to Add a Favicon to Your Site in 3 Simple Ways
- What is a WordPress favicon?
- Why should you use a favicon icon image?
- 3 ways to add a favicon image to your WordPress website
- How to create a custom WordPress favicon
- Improve your experience with WordPress favicons
- Conclusion
Want to know how to add a favicon to your WordPress site?
A favicon, also known as a site icon, is a small image that appears next to your website title in the browser.
It plays a crucial role in helping users recognize your site and builds instant familiarity.
Neglecting to include a favicon is one of the common WordPress mistakes.
In this article, we will guide you through the process of adding a favicon to your WordPress blog.
Let’s get started and make your website more visually appealing and memorable!
What is a favicon?
Favicons are small site icons, usually 16×16 pixels, that appear next to a page’s title in your browser’s tab bar.
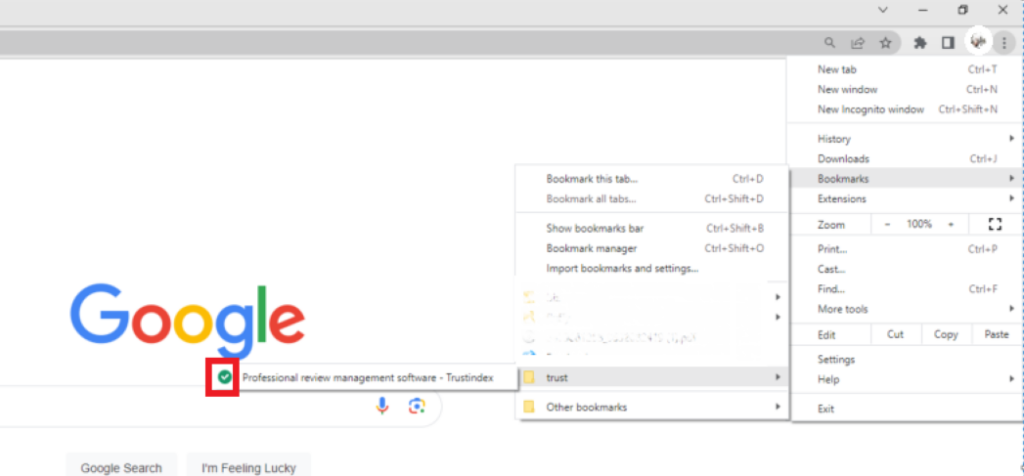
Another place where you will see them is next to your title in Google search results.

While they may seem meaningless, they play a vital role in brand recognition within browsers, bookmarks, and links.
They can also serve as shortcut icons on smart devices.
By using a favicon, you can enhance user experience and maintain control over your brand.
Best of all, implementing a favicon is a simple branding element.
Why should you use a favicon image on your WordPress site?
Have you ever found yourself drowning in a sea of open browser tabs?
If so, you’ll understand the value of a favicon.
It serves as a visual cue, allowing users to easily spot and identify your website among different web browsers or a cluttered tab bar.
Sometimes, when numerous tabs are open, your site’s title may not be visible, making the favicon even more essential for a smooth user experience.

But that’s not all. Adding a favicon to your WordPress website goes beyond enhancing brand recognition.
It adds to site identity, by professionalism and credibility, instilling trust in your visitors.
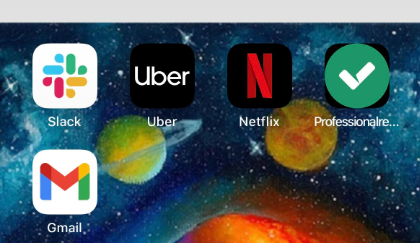
Moreover, when people save your website to their mobile devices, your favicon becomes the mobile app icon they see.
How to add a favicon site icon in 3 simple ways
1.) Upload your favicon using the WordPress customizer
Since WordPress version 4.3, adding a favicon to your WordPress site has become a breeze.
Using the WordPress customizer built-in site icon feature, you can effortlessly upload and crop an image to serve as your favicon.
It’s the easiest and fastest way for most users to get their favicon up and running.
To begin, all you need is an image that’s at least 512×512 pixels.
- Simply head over to your WordPress dashboard, navigate to Appearance -> Customize, and let WordPress handle the rest of the process.
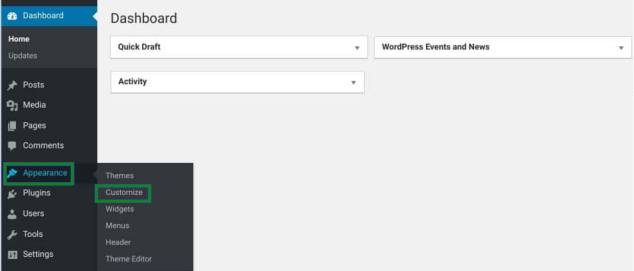
Once you’re in the WordPress Customize area, continue by clicking on the Site Identity tab.

On the site identity tab, scroll down to the bottom until you find the Site Icon section, and then click on the button that says “Select site icon.”

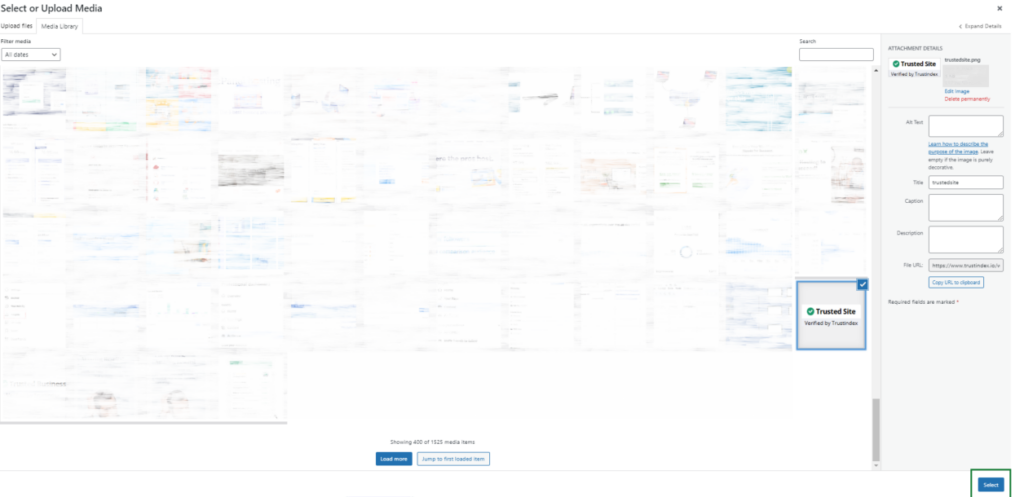
The WordPress Media Library interface will appear, offering two options: selecting an existing image from your media library or uploading a new one.
- Once you have an image that suits your preference, simply click on it and select the “Select” button located in the bottom-right corner.
If your image file isn’t a perfect square, such as 512×512 pixels, WordPress will provide an opportunity to crop it on the following screen.
Once you are satisfied with the preview, click on “Crop Image” to confirm your selection and finalize the process.
- And there you have it! To make your favicon live on browser tabs, simply click on “Save & Publish.” It’s as simple as that.
If you ever wish to change your favicon in the future, you can always revisit this interface and make the necessary adjustments.
2.) Adding your WordPress favicon with plugin installation
If you prefer using a WordPress favicon plugin for adding a favicon instead of relying on the native WordPress site icon functionality, you can opt for the Favicon by Real Favicon Generator plugin.
This popular and free plugin offers the same simplicity as the WordPress Customizer but provides additional compatibility options for different devices and app icons.
- To get started, install and activate the plugin through your WordPress dashboard.

After activating the plugin, navigate to Appearance -> Favicon to begin creating your favicon package.
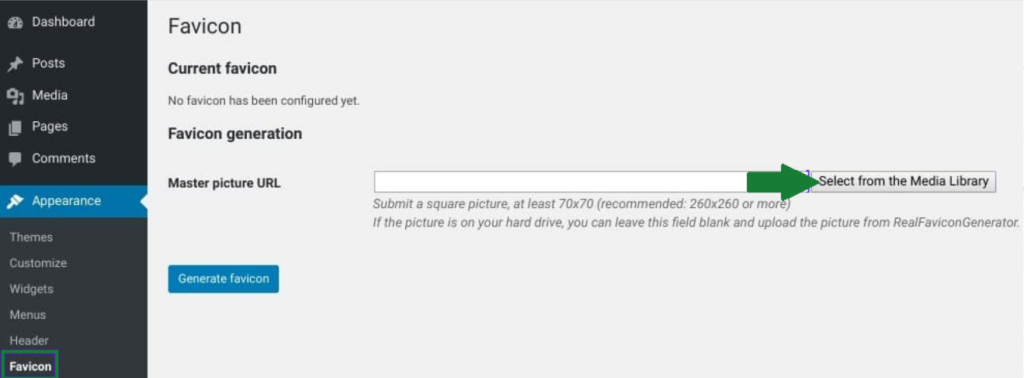
- In this section, simply choose an image from your media library or upload a new one.
It’s recommended to use an image with dimensions of at least 70×70 pixels (ideally 260×260 pixels).
- Once you have selected your desired image, click on the “Generate favicon” button.
This action will redirect you to the website of the favicon generator plugin outside of your WordPress site.
- Scroll down to the bottom of the website of favicon generator and choose “Generate your Favicons and HTML code” as indicated in the previous section.
The tool will process your request, and then you will be redirected back to your WordPress dashboard by RealFaviconGenerator.
After that, your favicon is now set up and ready to import the favicon code.
3.) Adding your favicon to WordPress manually through FTP
If you prefer a manual approach, you can add a favicon to your WordPress site using File Transfer Protocol (FTP) or the File Manager in cPanel (if supported by your hosting provider).
To proceed with this method, you’ll need to create your favicon image beforehand, following the steps mentioned earlier.
For this demonstration, we’ll assume you have the package from Real Favicon Generator, but the instructions are applicable regardless of the tool you used to create your favicon.
- Access your site’s files either through an FTP client or the File Manager in your hosting cPanel.
- Locate the root directory of your site and upload the contents of your favicon package (favicons.zip). Ensure the files are in the same folder as your wp-admin and wp-content folders.
- Next, take the code provided by RealFaviconGenerator and choose one of the following methods:
- Use a plugin like “Insert Headers and Footers” to add the code to your theme’s header.
- Edit your theme’s header.php file and paste the code directly into the <head> section. Using the “Insert Headers and Footers” plugin is recommended as it ensures your favicon remains intact when you change WordPress themes in the future.
To accomplish this, install and activate the “Insert Headers and Footers” plugin.
Then, navigate to Settings -> Insert Headers and Footers and paste your code into the “Scripts in Header” section.
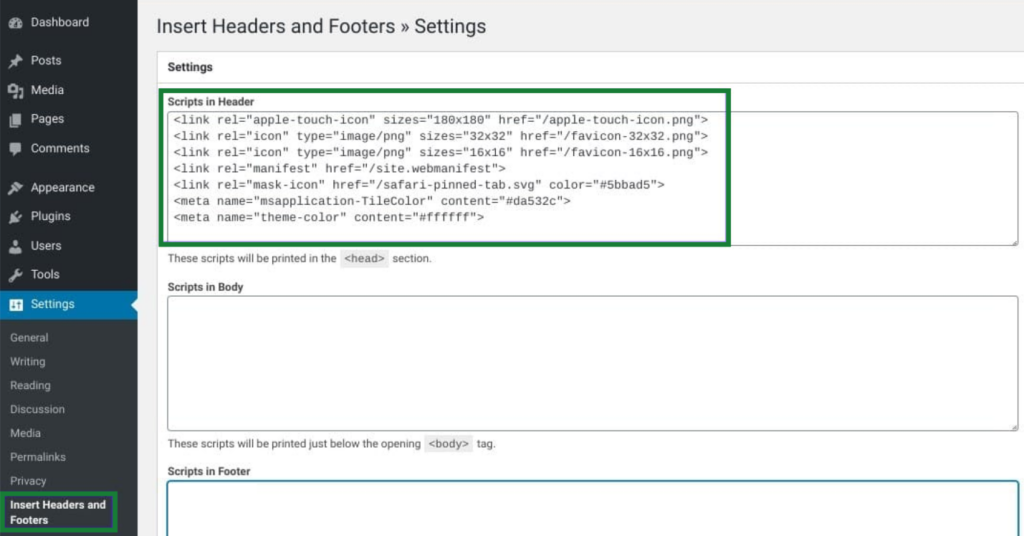
Don’t forget to save the changes, then you are done.
How to create your own Favicon WordPress
If you already have a favicon ready to use, such as your business logo or a variant of it, you can skip to the next section.
However, if you need to create a favicon, let’s explore the process.
In the past, favicons required a specific ICO file format.
Nowadays, modern browsers support ICO, PNG, and GIF file formats for favicons.
JPEG is also supported widely, except in certain versions of Internet Explorer, making it less ideal for favicon usage.
If you’re proficient in Adobe Photoshop, you can manually create a favicon.
However, using a basic cloud-based tool to generate a favicon icon set from an existing image is often easier.
RealFaviconGenerator, the cloud-based version of the plugin we’ll discuss later, is an excellent option for creating favicons because it offers the following advantages:
- It generates app icons as well.
- It provides favicon icons in PNG and ICO formats.
- You can customize your favicon after uploading your image.
- It gives you the necessary code to implement the favicon.
Other useful favicon generators include Favicon.cc, which allows you to create a favicon from scratch or upload an existing image, and Favicon Generator, which functions similarly to RealFaviconGenerator.
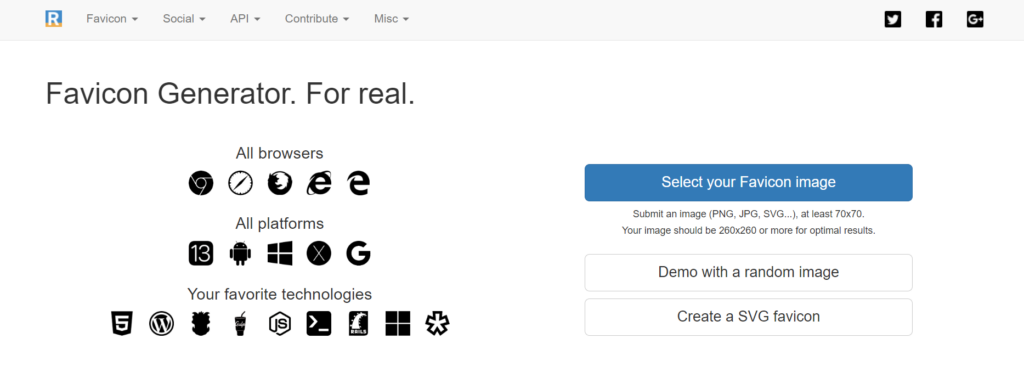
To use RealFaviconGenerator, begin by uploading the image you want to use as your favicon by clicking on “Select your Favicon image.”
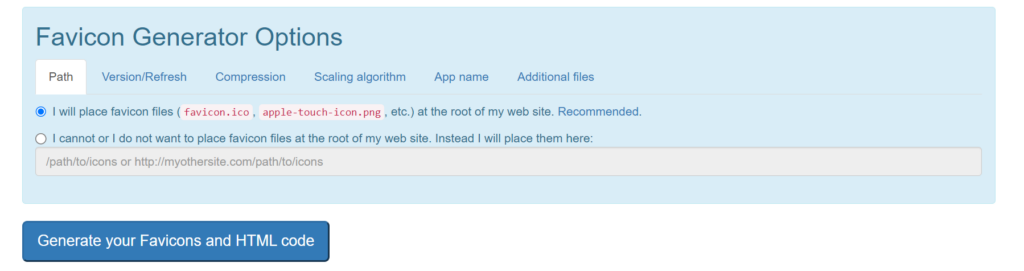
On the following screen, you have the option to configure specific details about your favicon set, if desired.
Take your time to make any necessary adjustments.
Once you’re satisfied, scroll down to the bottom of the page and click on “Generate your Favicons and HTML code.”
On the next page, locate and click on the “Favicon package” button to initiate the download of your favicon images.
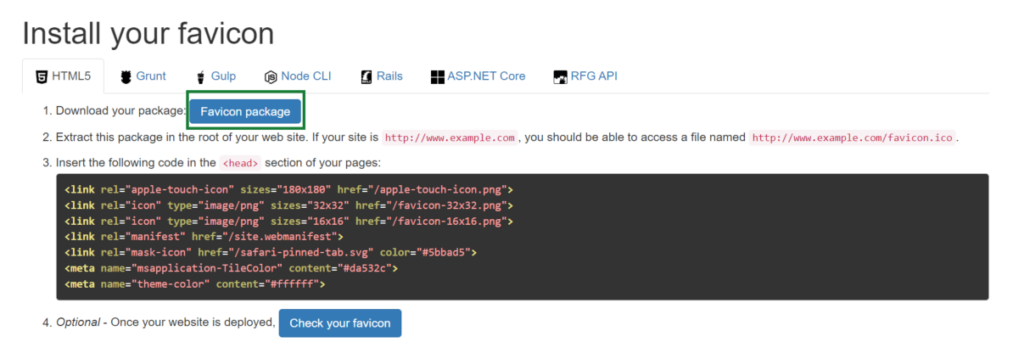
To manually add the favicon to your site, it’s important to keep this web page open for reference.
Tips to improve your experience with WordPress favicons
1.) Use a favicon plugin for unique favicons in multisite networks.
For multisite networks, using a favicon plugin, as mentioned earlier, is the easiest way to assign a unique favicon to each site.
Editing theme files to enable distinct favicons for each network site can be a complex process, whereas using a plugin simplifies the task.
2.) Consider using a Content Delivery Network (CDN) for serving favicon images.
While the methods discussed in this post store favicon images on your server, using a CDN can further optimize your site’s performance.
3.) Optimize your site’s performance by offloading favicon loading to a CDN.
With services like Cloudflare or KeyCDN, visitors’ browsers load the favicon from the CDN instead of your site’s server.
4.) Use plugins like CDN Enabler to automatically rewrite favicon URLs for CDN compatibility.
If you’re using a plugin like CDN Enabler, it should automatically adjust your WordPress favicon URL to align with these methods.
Conclusion
Having a WordPress favicon is essential for enhancing brand recognition and providing a better user experience for your website visitors.
The good news is that you have multiple simple options to add a favicon to your site.
You can choose from the following three main methods:
- Utilize the WordPress Customizer to easily upload a site icon.
- Install a plugin like Favicon by RealFaviconGenerator for hassle-free favicon integration.
- Manually add a favicon using an FTP client or your File Manager, giving you full control over the process.
Before you proceed with uploading the image, it’s important to ensure that it has the correct size and aspect ratio for a WordPress favicon.
We hope that by following our steps you will successfully set up a favicon to your WordPress website.
Frequently Asked Questions
The requirements for a favicon in WordPress are as follows:
1. Image Size: The recommended size for a favicon in WordPress is 512×512 pixels. However, WordPress will automatically resize the image to various sizes for different devices and platforms.
2. File Format: WordPress supports multiple file formats for favicons, including ICO, PNG, GIF, and JPEG. ICO files were traditionally used for favicons, but modern browsers also support PNG, GIF, and JPEG formats.
3. Aspect Ratio: It is best to use a square image for the favicon, as it ensures optimal display across different devices and platforms.
In WordPress, the favicon is typically stored in the root directory of your website.
It is commonly named “favicon.ico” and can be accessed through the following URL: yourdomain.com/favicon.ico.
You can also find the favicon file in your WordPress installation’s root folder via FTP or the File Manager in your hosting control panel.
If you have used a favicon plugin or custom code to set the favicon, it might be stored in a different location specified by the plugin or code.
In WordPress, a favicon is a small icon that represents your website and appears in the browser tab or bookmark bar.
It enhances your site’s visual appeal, reinforces site identity, and provides a consistent user experience.