How To Create an Email Signature Widget
In the following guide I’ll show how you can easily create a breath-taking email signature with Trustindex on your own, in an instant.
How to create the email signature widget
Step 1
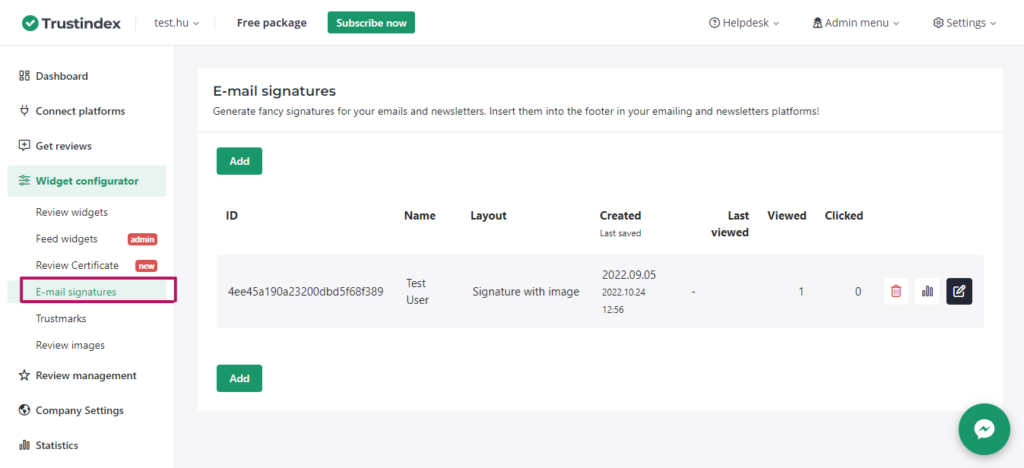
On the dashboard, navigate to the Widget Configurator > Email signatures.
Step 2
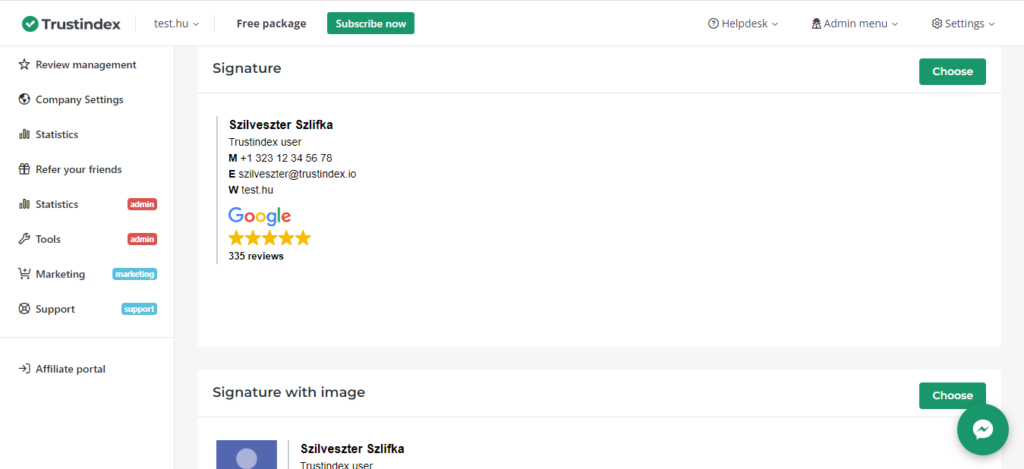
Choose the email signature you like the most from our templates.
Step 3
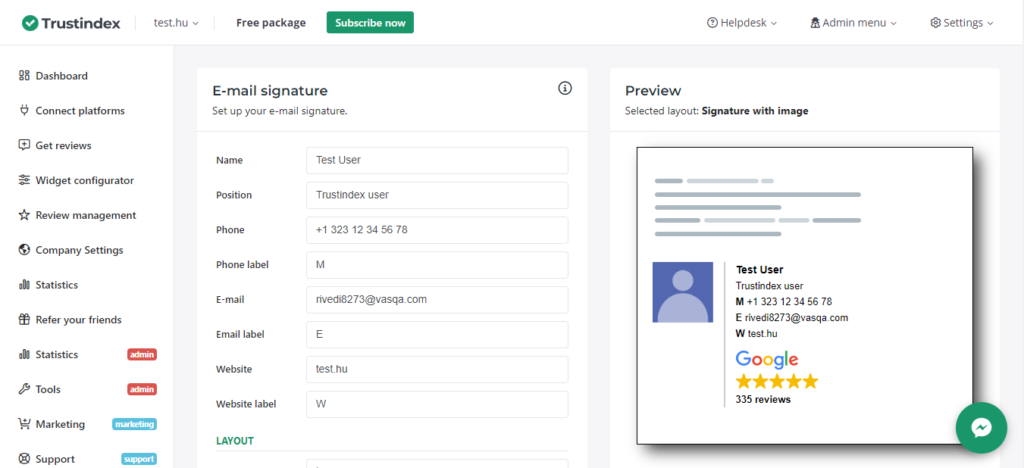
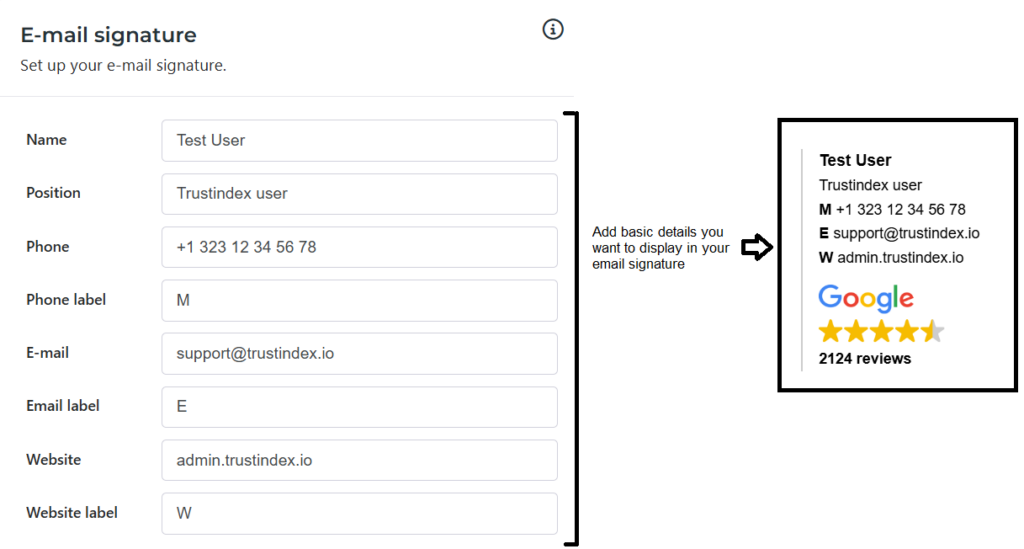
Now you have the opportunity to provide your personal details and your contact information.
Meanwhile, you’ll see in real-time all the changes you make in the Preview on the right.
Basic information:
Layout & Fonts settings:
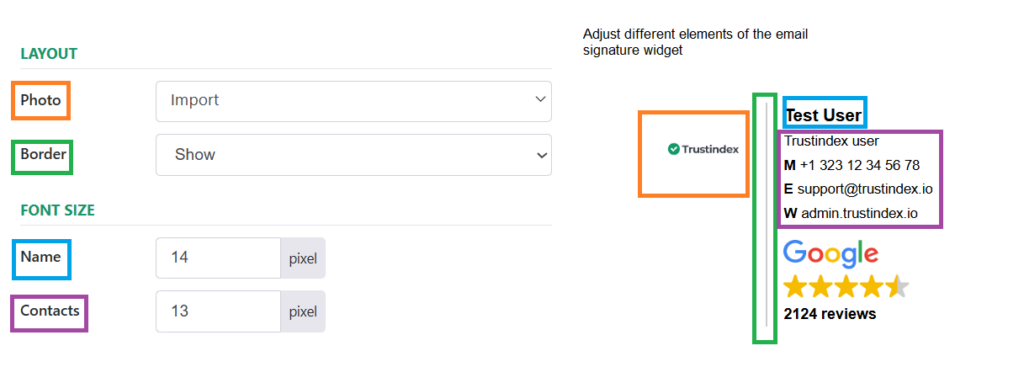
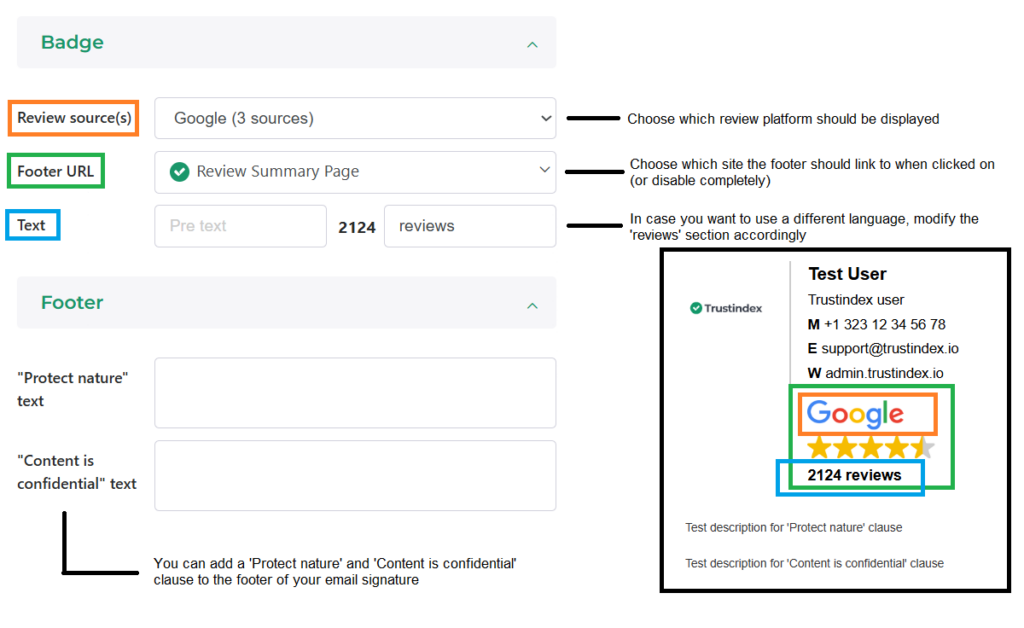
Badge & Footer settings:
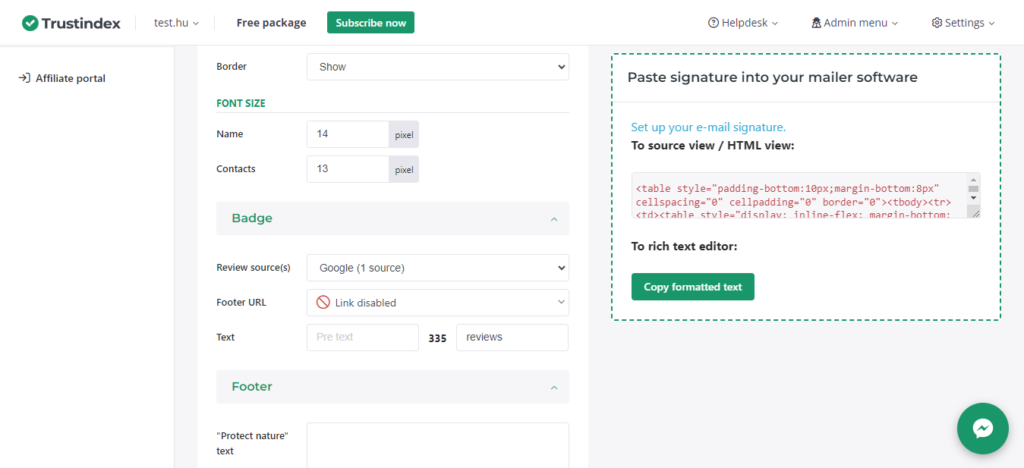
After you click on “Save”, a code will appear on the right. You have to copy and paste this code when you set up your email signature in your email software.
If your email software supports rich text format, click on the “Copy formatted text” button, to quickly and easily copy the code to the clipboard.
How to insert the email signature widget
In the different email softwares, you can add the copied code in different places.
Gmail
- Click on Copy to clipboard button.
- Open Gmail
- In the top right, click Settings > See all settings.
- Paste your signature (Ctrl+V or Command+V) into the “Signature” section.
- At the bottom of the page, click Save Changes.
Outlook
- Click on Copy to clipboard button.
- Open Outlook.
- Settings > Mail > Compose and reply > Signature
- Click New and give name to your signature.
- Click the + icon to add a new signature.
- Mac: Paste your signature into the Signature box (Ctrl+V or Command+V), click on the clipboard that popped-up and select Keep Source Formatting pasting option and press OK.
Windows: Right click the Edit Signature box and choose Keep Source Formatting pasting option and press OK.
Mac
- Click on Copy to clipboard button.
- In Apple Mail Click on Preferences mac-command (or Choose Mail > Preferences > Signatures). Choose Google to add the signature to all accounts OR choose a specific account. Click the + icon to add a new signature and give it a name.
- Uncheck the box “Always match my default message font”. Paste your signature into the Edit Signature box (Ctrl+V or Command+V).
- Important: When you Paste your signature, it may look like a blank image with wrong text. It’s OK. Compose a new email to see your new signature.
Rich Text Email Signature
Rich text signatures are created using basic formatting tools available in most email clients, such as bold, italic, font color, and alignment.
They’re generally simpler to create and work well across various email clients, but they lack the advanced design capabilities of HTML signatures.
Pros
- Easy to create: You can format your signature using the built-in tools of your email client.
- Consistency: Rich text signatures tend to display consistently across various email clients.
- Less prone to rendering issues: They are less likely to face rendering problems in different email clients.
Cons
- Limited design: Rich text signatures are limited in terms of design elements and layout options.
- Lack of interactivity: You can’t include interactive elements like clickable icons or social media buttons.
- Less professional appearance: Rich text signatures might not convey a highly professional image.
How to insert the email signature – Rich Text
- Open your email client’s settings or preferences.
- Look for the “Signature” section.
- Use the provided formatting options to style your text, add lines, and include any relevant contact information.
- Save your changes.
HTML Email Signature
HTML signatures allow for more complex designs, including images, clickable links, social media icons, and custom layouts.
They provide a professional appearance and can be tailored to match your branding, but they might not render consistently across all email clients.
Pros
- Design flexibility: HTML signatures offer extensive design possibilities, including images, icons, and customized layouts.
- Professional appearance: HTML signatures can give a polished and branded look to your emails.
- Interactive elements: You can include clickable links, social media icons, and other interactive elements.
Cons
- Rendering issues: HTML signatures might render differently in various email clients, potentially leading to a broken or distorted appearance.
- Complex creation: Creating HTML signatures requires coding knowledge, even if it’s basic HTML and inline CSS.
- Inconsistent experience: Some recipients may have images or HTML blocked in their email settings, affecting how your signature displays.
How to insert the email signature – HTML
- Use inline CSS for styling (external stylesheets won’t work reliably).
- Copy the HTML code.
- Open your email client’s settings, find the “Signature” section, and paste the HTML code.
How often are email signatures updated?
We refresh the signatures every day in the Trustindex system. However, the image in the email signature is managed by the mailing software you use, aka Google, OutLook, etc. We do update the signatures, but Google needs to refresh the image as well. The mailing softwares (ie.: Google, Outlook) cache the images in the signature when they are created and those softwares manage the cache (they refresh approximately every ~2 weeks).
Free workshop for more success
If you’d like to get to know more about Trustindex’s other features, then sign up for our free, 20-minute workshop where our Expert will show you:
- Why Google Reviews are important for your business success
- How to rank higher on Google Maps and search results with the help of reviews
- How to manage your online reputation with the Trustindex system
- Modern, automatic solutions for review management
- And how to collect 15+ new reviews every day.