
How to Create a WordPress Membership Site? [Step-by-step Guide]
- What Do You Need for a WordPress Site?
- Step-by-step Guide for Your WordPress Membership Site
- Conclusion
Are you thinking about starting your own membership site on WordPress? In this article, you will find a guide to help you accomplish your goal and have your membership website up and running.
What Do You Need for a WordPress Site?
Creating a website has become incredibly straightforward these days, thanks to numerous platforms and website builders.
However, among them all, WordPress stands out as an exceptionally user-friendly option for building a membership website and commencing sales without requiring extensive technical skills.
To get started, you’ll need three essential components:
- A domain name: This serves as the unique address for your website, ours is trustindex.io.
- A web hosting account: This is where all your website files will be stored securely.
- A membership addon: This addon will transform your ordinary website into a fully functional membership platform.
With WordPress, you can set up a complete membership website in less than an hour, and this guide will help you through each step of the process.
Step-by-step for Your WordPress Membership Site
Step 1: Let’s get started
In order to create a membership site, it is crucial to ensure that you are utilizing the appropriate WordPress platform. Interestingly, there are two types of WordPress available.
We strongly recommend opting for the self-hosted WordPress.org version as it grants you unrestricted access to all the necessary features and tools.
For a self-hosted WordPress site, you will require a WordPress hosting account, a domain name, and an SSL certificate.
Typically, a domain name costs around $14.99 per year, web hosting is approximately $7.99 per month, and an SSL certificate is priced at around $69.99 per year.
These initial costs can accumulate rapidly, particularly if you are just starting out.
Once you have completed the hosting registration process and configured your domain name, it is time to install WordPress. If you choose Bluehost as your hosting provider, WordPress will be pre-installed for you. Most other WordPress hosting companies offer a convenient 1-click WordPress installation option.
Following the installation, you can proceed with finalizing the construction of your blog or website.
Step 2: Time to choose the right WordPress membership plugin
There exists a wide selection of both free and paid WordPress membership plugins at your disposal.
However, each plugin has its own advantages and disadvantages. For a detailed comparison of the best WordPress membership plugins, please refer to our comprehensive guide.
To make the right choice for your WordPress membership plugin, it is important to determine the type of membership website you intend to create and the specific functionalities you require.
If your goal is to simply enable user registration on your WordPress site, WPForms is a highly recommended option. It serves as one of the top WordPress plugins for user registration and contact forms, trusted by over 5 million websites.
With WPForms, you can effortlessly create user registration and login forms and even allow users to submit articles without accessing the WordPress admin area. Furthermore, it facilitates recurring payments for subscriptions, similar to membership software.
On the other hand, if your objective is to sell subscriptions for online courses and members-only content, Thrive Apprentice is a suitable membership plugin. It enables you to protect individual courses, course bundles, and course/digital product combinations from non-paying members.

For selling subscriptions to exclusive content, premium newsletters, online courses, or digital downloads, a more robust WordPress membership plugin like MemberPress is essential.
MemberPress is an all-in-one solution that has helped entrepreneurs generate over $1 billion in revenue.
It offers advanced membership features that allow you to accept payments, create multiple membership levels, protect gated content, restrict access based on different membership levels, establish members-only forums, and more.
Now that you have an understanding of the different options, let’s proceed with setting up your WordPress membership website.
Step 3: Setting up the membership site
For now, we selected MemberPress as our preferred plugin due to its comprehensive feature set and seamless integration with essential third-party plugins that contribute to the growth of your business.
To begin, you should install and activate the MemberPress plugin.
Once activated, navigate to MemberPress » Settings and click on the ‘License’ menu option.
Here, you can enter the license key provided to you, which can be found in your account on the MemberPress website.
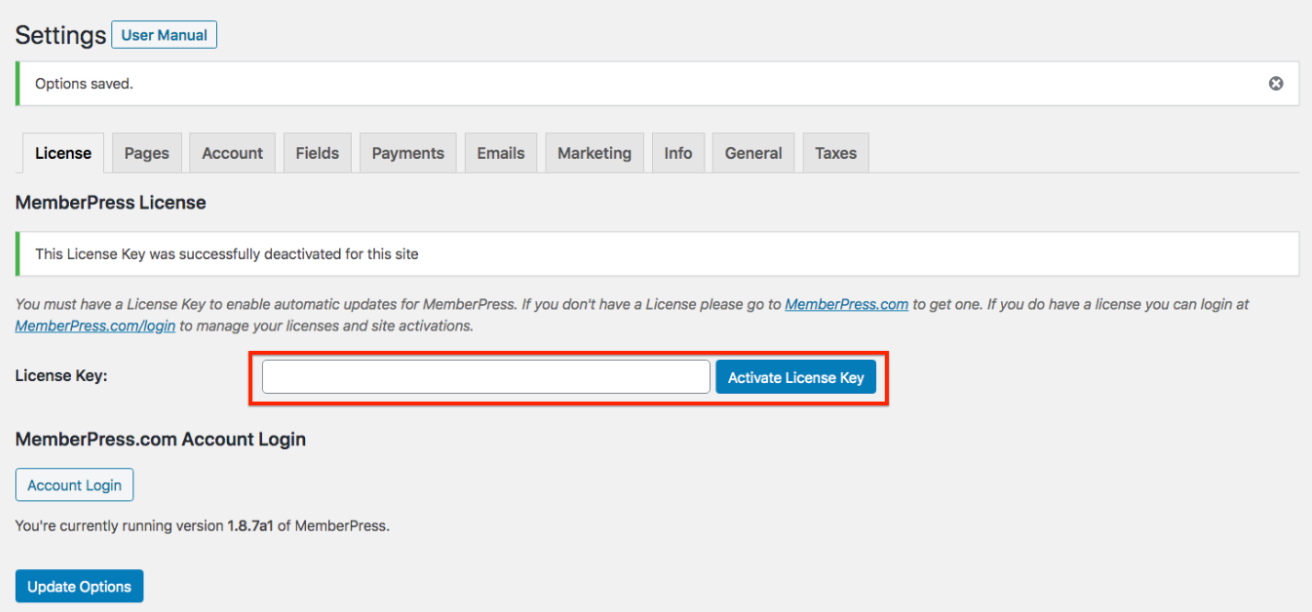
To activate your license key, simply copy and paste it into the designated field, and then click the ‘Activate License Key’ button.
This screen also allows you to configure the settings for the plugin.
Step 4: Add a payment method
To begin, the first step is to set up a payment gateway, as it enables you to accept payments on your membership site.
To do this, follow these steps:
- Go to the ‘Payments’ tab in the MemberPress settings.
- Click on the ‘Add Payment Method’ button.

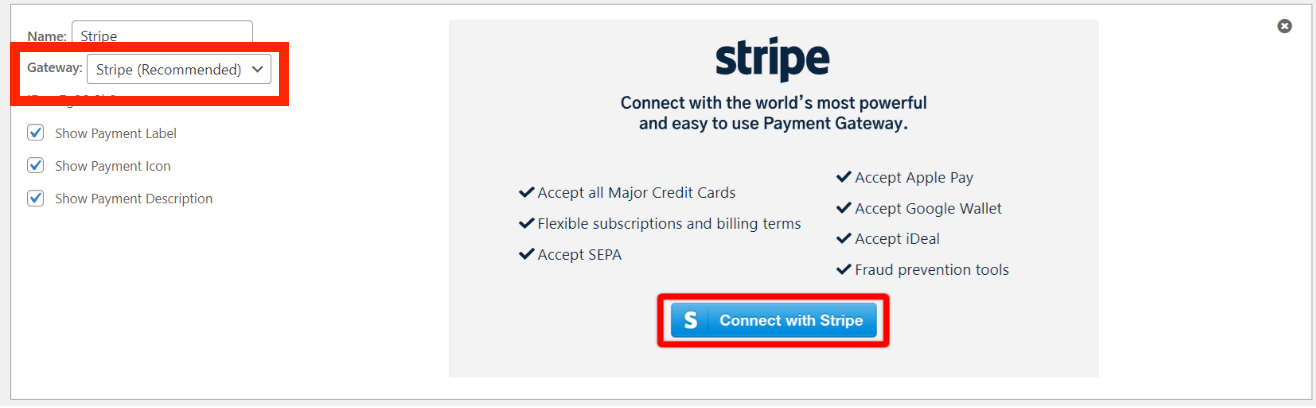
When you click the ‘Add Payment Method’ button, a drop-down menu will appear, allowing you to select a payment method and establish connections with various payment processors.
MemberPress offers built-in support for well-known payment gateways such as PayPal (Standard, Express, and Pro), Stripe, and Authorize.net.
To proceed, select your desired payment method from the ‘Gateway’ drop-down menu and provide the necessary credentials for that particular payment processor.
If you wish to add multiple payment methods, you can do so by clicking the ‘Add Payment Method’ button to include another payment option.
In this case, we utilize Stripe for credit card payments. It is advisable to add PayPal as a secondary choice since some users prefer using PayPal instead of providing credit card details.
Once you have configured your payment methods, remember to click the ‘Update Options’ button located at the bottom of the page to save your settings.
Step 5: Create Membership Levels
Now, it’s time to establish membership levels that users can purchase. Each membership level can offer distinct pricing plans, benefits, and access. You can even include a free membership plan if desired.
To create a membership level, follow these steps:
- Go to the MemberPress » Memberships page.
- Click on the ‘Add New’ button located at the top of the page.

On the subsequent page, begin by entering a title for the specific membership plan. Then, proceed to provide the plan details within the post editor.
Under the ‘Membership Terms’ section, you will be required to specify the pricing and expiration details for this plan.
In the mentioned example, we have generated a yearly membership plan.
Following that, scroll down to locate the membership options meta box situated below the post editor. Within this section, you can customize permissions and membership settings specific to this particular plan.
Subsequently, click on the ‘Price Box’ menu tab.
Within this tab, you can input the details that will be displayed on the pricing page. This includes adding a headline and outlining the benefits of the membership plan.
Once you have finalized the settings for the membership plan, you can click on the ‘Publish’ button to make it available on your website.
Feel free to repeat this process to create as many membership plans as necessary for your website.
Step 6: Restrict Access
Moving forward, you will need to determine which content will be accessible to different membership plans on your website. Fortunately, MemberPress simplifies this process through the use of ‘Rules’.
To configure rules, follow these steps:
- Visit the MemberPress » Rules page.
- Click on the ‘Add New’ button located at the top of the page.
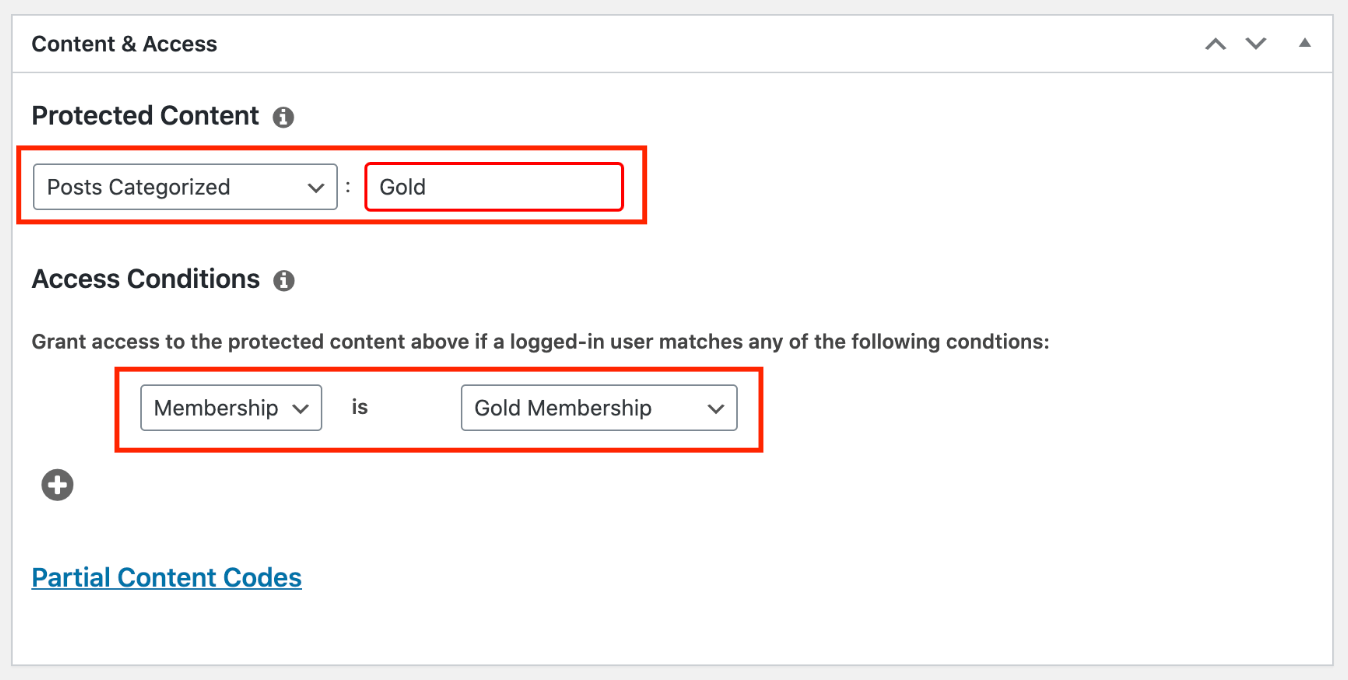
On the rules edit page, you have the ability to choose various conditions and link them to a specific membership plan.
For instance, you can select all content that corresponds to a particular tag or category to be accessible exclusively to members with the gold subscription plan.
In the provided example, we have made content categorized as ‘Gold’ available to users with Gold membership plans.
Furthermore, you have the flexibility to create more specific rules. This includes applying rules to individual posts or pages, child pages, or even a specific URL.
Below the rules editor, you will find the options for drip content and expiration.
Drip content functionality enables you to gradually release content to users over a period of time, rather than providing access to everything at once. The expiration option allows you to set a specific timeframe after which the content becomes unavailable.
If you are unsure about utilizing these options, it is recommended to leave them unchecked.
Once you are satisfied with your rule settings, simply click the ‘Save Rule’ button to save your changes.
Feel free to repeat this process as needed to create additional rules for your membership site.
Step 7: Adding Members Only Content
Creating members-only content using Rules is a breeze with MemberPress.
In the previous example, we established a rule that restricted access to all content categorized as ‘Gold’. Now, the next step is to simply create your paid content and assign it to the ‘Gold’ category.
MemberPress includes a helpful feature called the ‘MemberPress Unauthorized Access’ meta box, conveniently positioned below the post editor.
This feature enables you to determine what non-members (logged-out users) will encounter when they try to access this particular content.
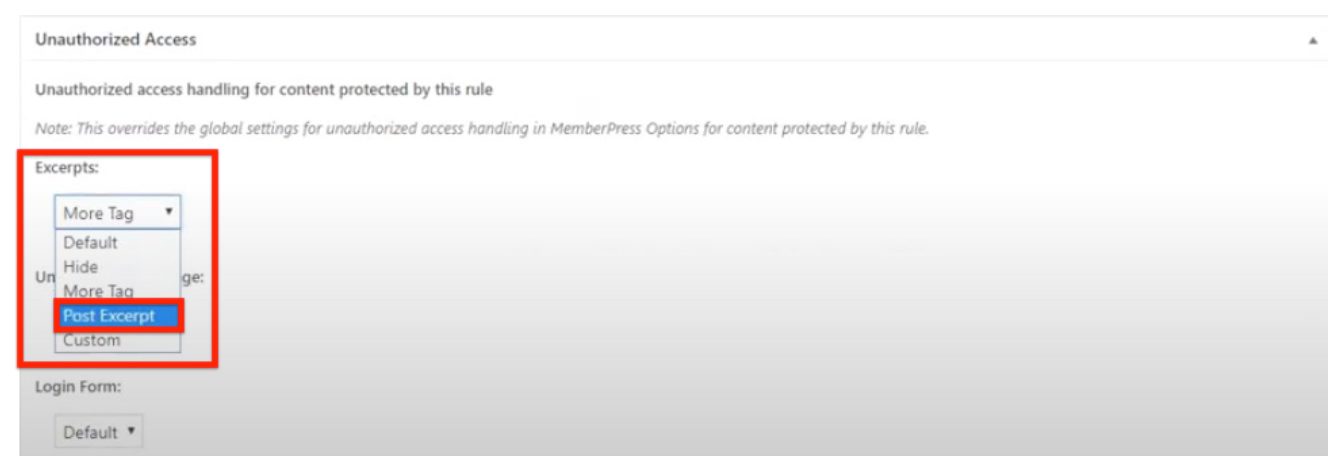
For the unauthorized access settings, you have the option to utilize the global default settings or choose from alternatives such as displaying excerpts, a login form, or a custom message.
After you have added the members-only content and configured the unauthorized access settings, simply click the ‘Publish’ or ‘Update’ button.
As a result, only users with the appropriate membership level will have the ability to view your content.
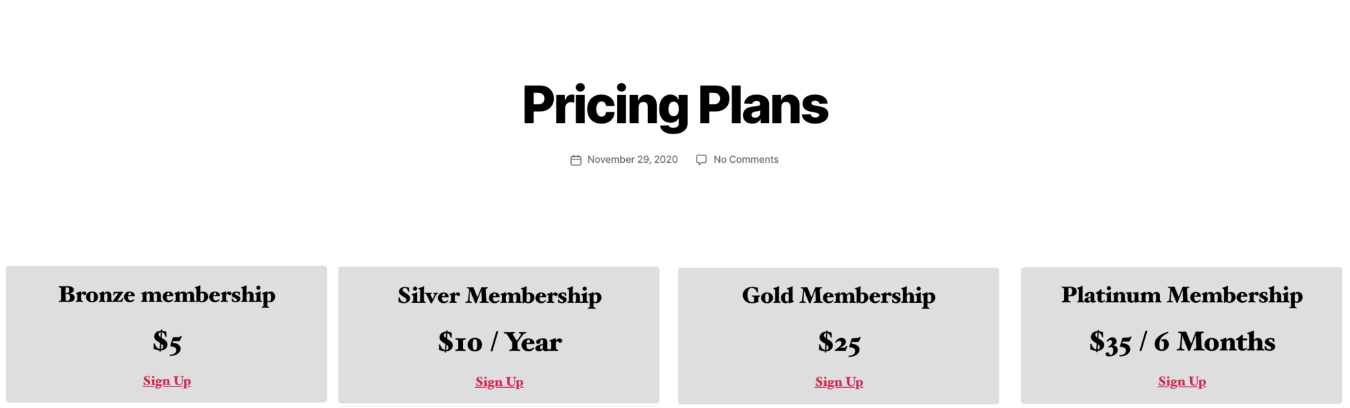
Step 8: Creating a pricing page
This page serves as the registration page where users can sign up for a membership plan. Here, users will have the option to select a desired membership plan and proceed to the payment page.
Additionally, if users attempt to access restricted or paid areas of your website, they will be automatically redirected to this page.
To configure this setup, navigate to the MemberPress » Groups page and click on the ‘Add New’ button located at the top.
Begin by providing a suitable title for the group plan page. This title will also be displayed as the heading on the plans page that users will encounter.
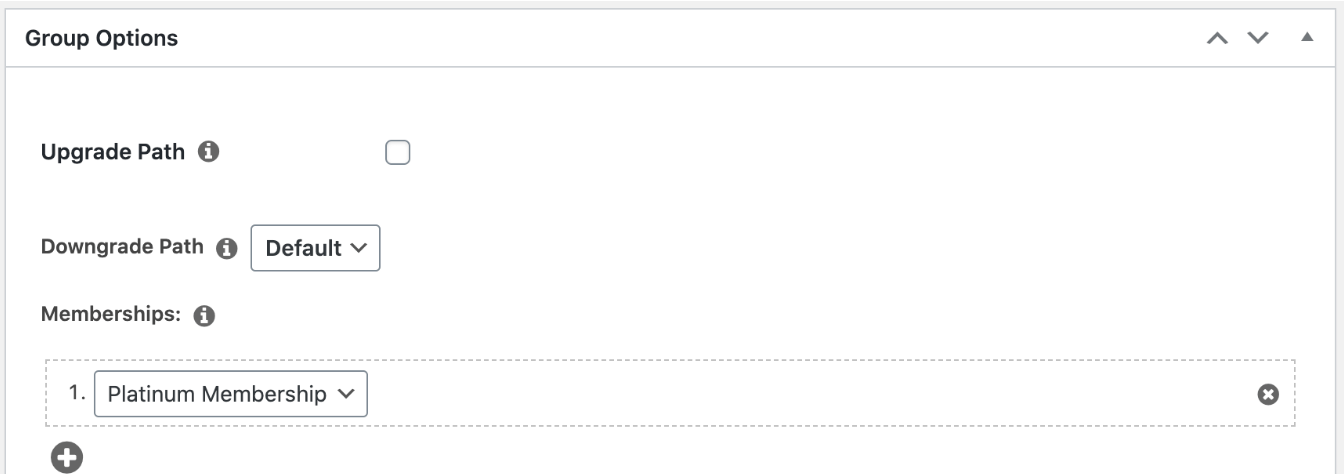
Afterward, scroll down to the ‘Group Options’ meta box and include the memberships that you wish to showcase on the page. To add multiple memberships, click the ‘Plus’ button.
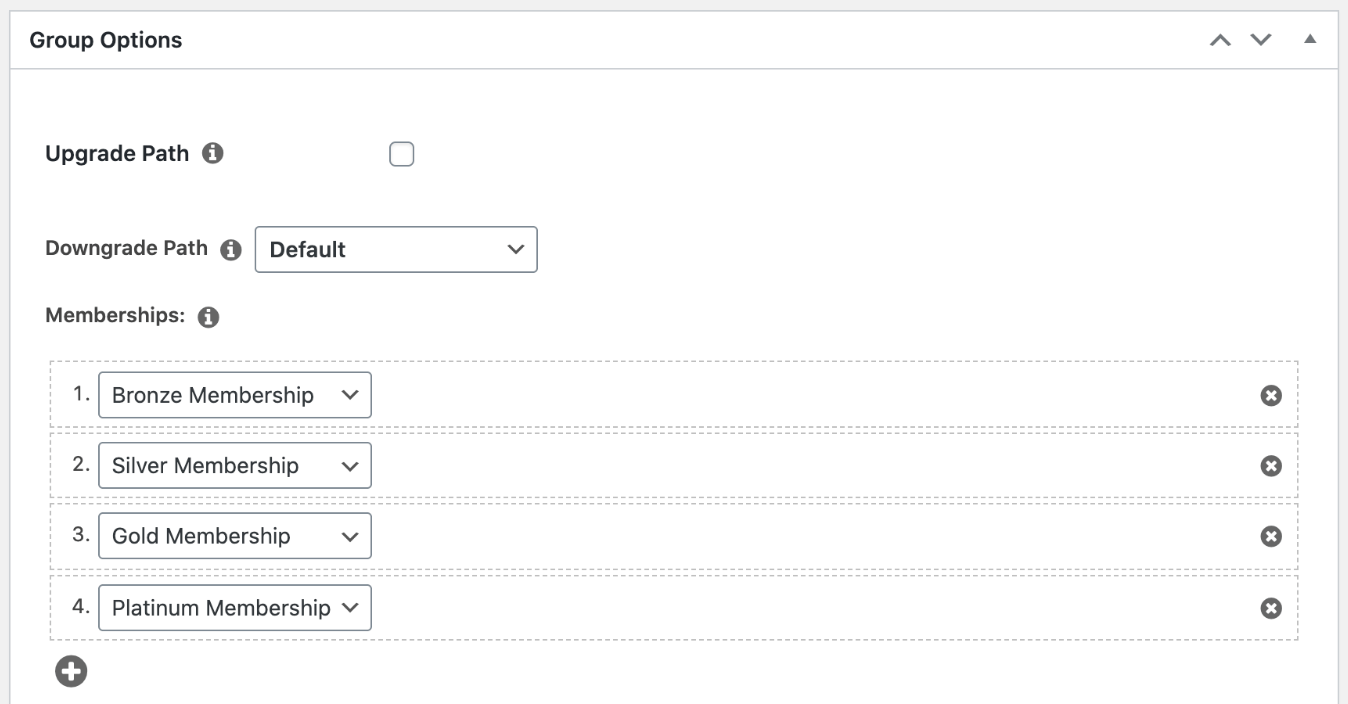
Furthermore, you have the option to choose a theme for the pricing table. MemberPress provides several pre-designed templates for you to select from.
- To choose a template, simply access the ‘Pricing Page Theme’ drop-down and make your selection.
- If you desire further customization, you can add custom CSS to personalize your membership pricing table entirely.
Once you are content with the settings, click on the ‘Publish’ button to make your plan publicly visible.
To preview your pricing page, click on the ‘View Group’ link after publishing it.
Redirect unauthorized people to the pricing page
Now that the pricing page is prepared, the subsequent task involves redirecting unauthorized users to the pricing page.
To achieve this, follow these steps:
- Visit the MemberPress » Groups page.
- Locate the URL associated with the group you created in the previous step.
- Copy the URL for future use in the following steps.
Afterward, navigate to MemberPress » Settings and select the ‘Pages’ menu tab.
Scroll down to the ‘Unauthorized Access’ section.
To redirect unauthorized visitors, ensure that the checkbox next to the ‘Redirect unauthorized visitors to a specific URL’ option is selected. Subsequently, paste the URL of the group you copied earlier into the designated field.
Finally, click on the ‘Update Options’ button to save the settings you have configured.
From now on, unauthorized users attempting to access members-only areas will be automatically redirected to the pricing plans page.
Step 9: Add Sign Up and Login Pages
With all the essential components in place, it’s crucial to ensure that your users can navigate your website seamlessly.
To begin, let’s add a user login form to enable members to sign in to their accounts.
To accomplish this, follow these steps:
- Go to Appearance » Widgets in your WordPress dashboard.
- Locate the ‘Plus’ add block icon and click on it.
Remember to click on the ‘Update’ button to save the changes you have made and make your login form active on your website.
To include the pricing page link in your navigation menu, follow these steps:
- Access the Appearance » Menus page in your WordPress admin area.
- In the left column, locate the ‘Custom Links’ tab and click on it to expand it.
- Enter the URL of your pricing page in the ‘URL’ field.
- Provide a descriptive text for the link in the ‘Link Text’ box.
- Click on the ‘Add to menu’ button to add the link to your menu.
After adding the pricing plan page to your menu, it will be displayed in the right column of the Menus page. To modify its position in the menu, simply use the drag-and-drop functionality to rearrange it as desired.
If you wish to make any changes to the link, such as editing the text, you can click on the menu item and update the details accordingly.
Before concluding, remember to click on the ‘Save Menu’ button to save the modifications you made to your menu.
Once saved, you can proceed to log out of the WordPress admin area and visit your website. This will allow you to see the login form and registration link in action, providing a user-friendly experience for your visitors.
Step 10: Customizing Email Templates
To customize the email notifications sent by your WordPress membership plugin, such as MemberPress, follow these steps:
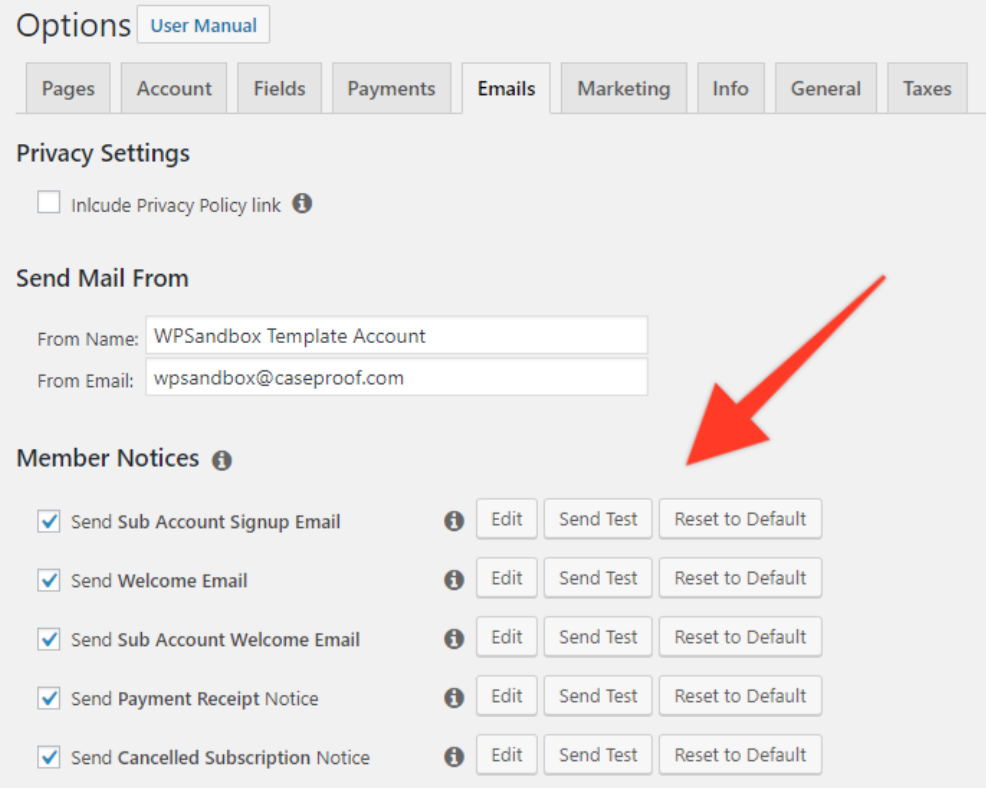
- Access the MemberPress » Settings page in your WordPress admin area.
- Click on the ‘Emails’ tab, which will allow you to manage the email notifications sent by MemberPress.
- On this page, you will find a list of all the email notifications sent to members and administrators.
- To customize a particular notification, click on the ‘Edit’ button associated with it.
By clicking ‘Edit,’ you will be able to modify the content of the email notification to align with your branding or make any necessary adjustments.
Remember to save your changes after customizing each email notification.
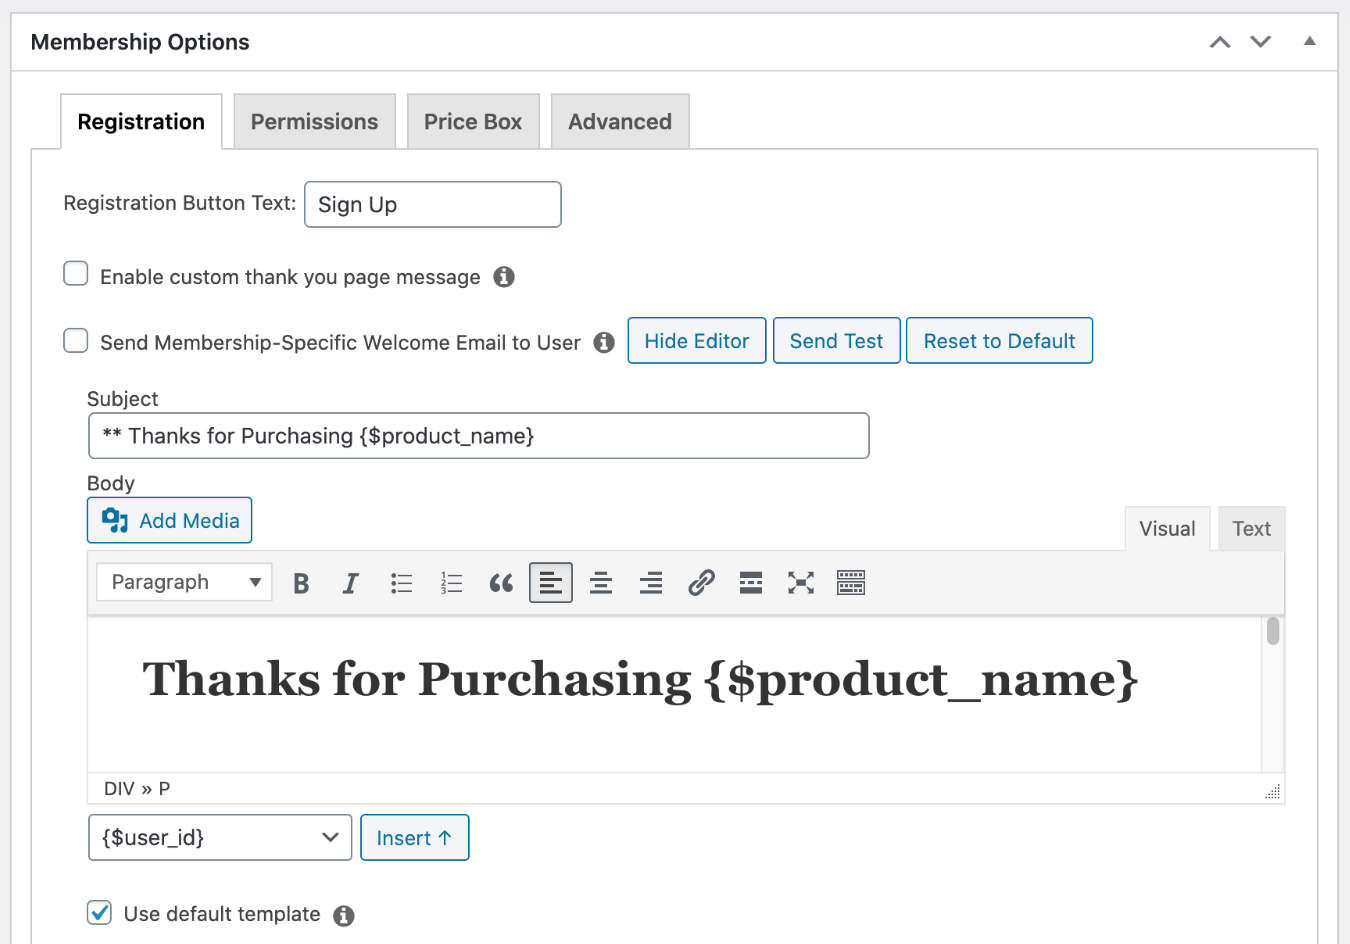
When editing the email notifications in MemberPress, you can use a simple text editor that provides basic formatting options. This allows you to customize the appearance of the email content.
Additionally, MemberPress offers smart tags that you can use to insert dynamic elements into your emails. These smart tags allow you to personalize the emails by including information specific to each member, such as their name, username, membership level, and more.
By incorporating these smart tags, you can create personalized and engaging email notifications for your members.
Remember to save your changes after editing the email messages to ensure they are applied to the corresponding notifications.
By clicking on the “Send Test” button, you can simulate the email notifications and receive them in your inbox. This allows you to verify that the email delivery is functioning as expected and that the content of the notifications appears correctly.
Conclusion
Setting up a WordPress membership site can be a rewarding endeavor, allowing you to monetize your content and build a thriving online community. With the right tools and plugins, such as MemberPress, the process becomes accessible to anyone, regardless of technical expertise.
In this guide, we covered the essential steps to create a WordPress membership site.
We started with choosing the right WordPress platform, setting up the necessary hosting and domain, and installing WordPress. Then, we explored the features and benefits of MemberPress, a powerful membership plugin.
Remember, the journey doesn’t end here. As you grow your membership site, continue to explore the features and possibilities offered by MemberPress and other WordPress plugins to enhance your site’s functionality and meet the evolving needs of your members.
FAQ
A WordPress membership site is a website that offers exclusive content, products, or services to registered members. Users typically pay a subscription fee to access the members-only area and enjoy various benefits based on their membership level.
Yes, you can create multiple membership levels with different pricing plans, perks, and content access. MemberPress and other membership plugins allow you to define membership levels and customize their features to cater to various user needs.
Yes, you can offer free memberships on your WordPress site. You have the flexibility to create free membership levels alongside paid ones. Free memberships can serve as a way to attract users, provide a taste of your content, and encourage them to upgrade to paid plans.
Yes, many WordPress membership plugins, including MemberPress, offer content-dripping functionality. Content dripping allows you to release content to members gradually, giving them access to new content over a specific period or based on their membership duration.
Yes, WordPress is highly extensible, and most membership plugins allow integration with other plugins and third-party tools. This enables you to enhance your membership site with additional features like forums, e-learning platforms, email marketing, and more.
Promoting your membership site involves various strategies such as content marketing, social media engagement, email marketing, search engine optimization (SEO), and partnerships. You can also offer limited-time promotions, discounts, or free trials to attract new members.