How to Change WordPress Theme [Step-by-step Guide]
- What happens to the content?
- Step-by-step guide to change themes
- 7 Things to do after you changed your theme
- Conclusion
Are you seeking guidance on changing your WordPress theme? Switching WordPress themes can be a straightforward process, but there are certain steps you should follow to ensure a seamless transition.
To assist you, I’ll provide an easy-to-follow tutorial on the optimal method for switching themes in WordPress while maintaining your site’s content and functionality.
What Happens to Your Content When You Change a WordPress Theme?
Before delving into the process of changing a WordPress theme, it’s essential to briefly address the impact on your existing content when you make this switch.
When transitioning between WordPress themes, most of your content will remain unaffected. However, if you rely on specific functionalities that are exclusive to your current theme and not provided by a plugin or the core WordPress software, it is likely that you will lose those features when switching themes.
These elements will stay there when switching themes
- Your posts and pages: When you switch themes, your posts and pages will not encounter any negative consequences.
- Core WordPress settings: For instance, if you have set a static homepage, it will remain the same even after transitioning to a new WordPress theme.
- Plugins in use: Unless your plugins are specifically tied to your current theme, they should continue to operate normally after the theme switch.
- Basic site information: Your site name and description will remain intact throughout the theme change process.
It’s important to note that while these elements typically remain unaffected, the appearance and styling may vary depending on the new theme you select.
These elements might be affected by the change in the WordPress themes
- Theme-specific homepage: Certain themes include specialized homepage sections that operate independently of the regular WordPress page system, providing greater flexibility. If you have a customized homepage created with such a theme, it will no longer be available once you change to a new theme.
- Shortcodes specific to the theme: If you are utilizing shortcodes that are specific to your current theme (instead of using a standalone shortcode plugin), those shortcodes will no longer work once you switch to a different theme.
- Theme-specific widgets: Similar to shortcodes, some themes come with their own custom widgets. If you are utilizing these widgets, they will cease to function when you switch to a different theme.
Furthermore, you might need to reconfigure your existing menus and widget areas. However, it’s important to note that you won’t lose any functionality associated with them; you will simply need to adjust their settings to align with the new theme.
Step-by-step: How to Change WordPress Theme?
In the following section, my primary focus will be on the practical steps involved in how to change your WordPress theme.
As a best practice, it is strongly recommended to create a backup of your website before proceeding. If possible, it is advisable to perform the theme change on a staging site rather than directly on your live website.
If you have a plugin you can also turn on maintenance mode, be aware that this time users will not be able to access your website.
Step 1: Install the New WordPress Theme
To begin, you’ll need to install the desired WordPress theme that you wish to utilize.
To accomplish this, navigate to the “Appearance” section and choose “Themes.” Then, click on the “Add New” button located at the top of the page.
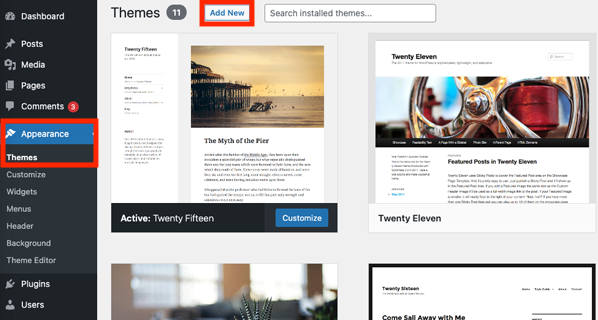
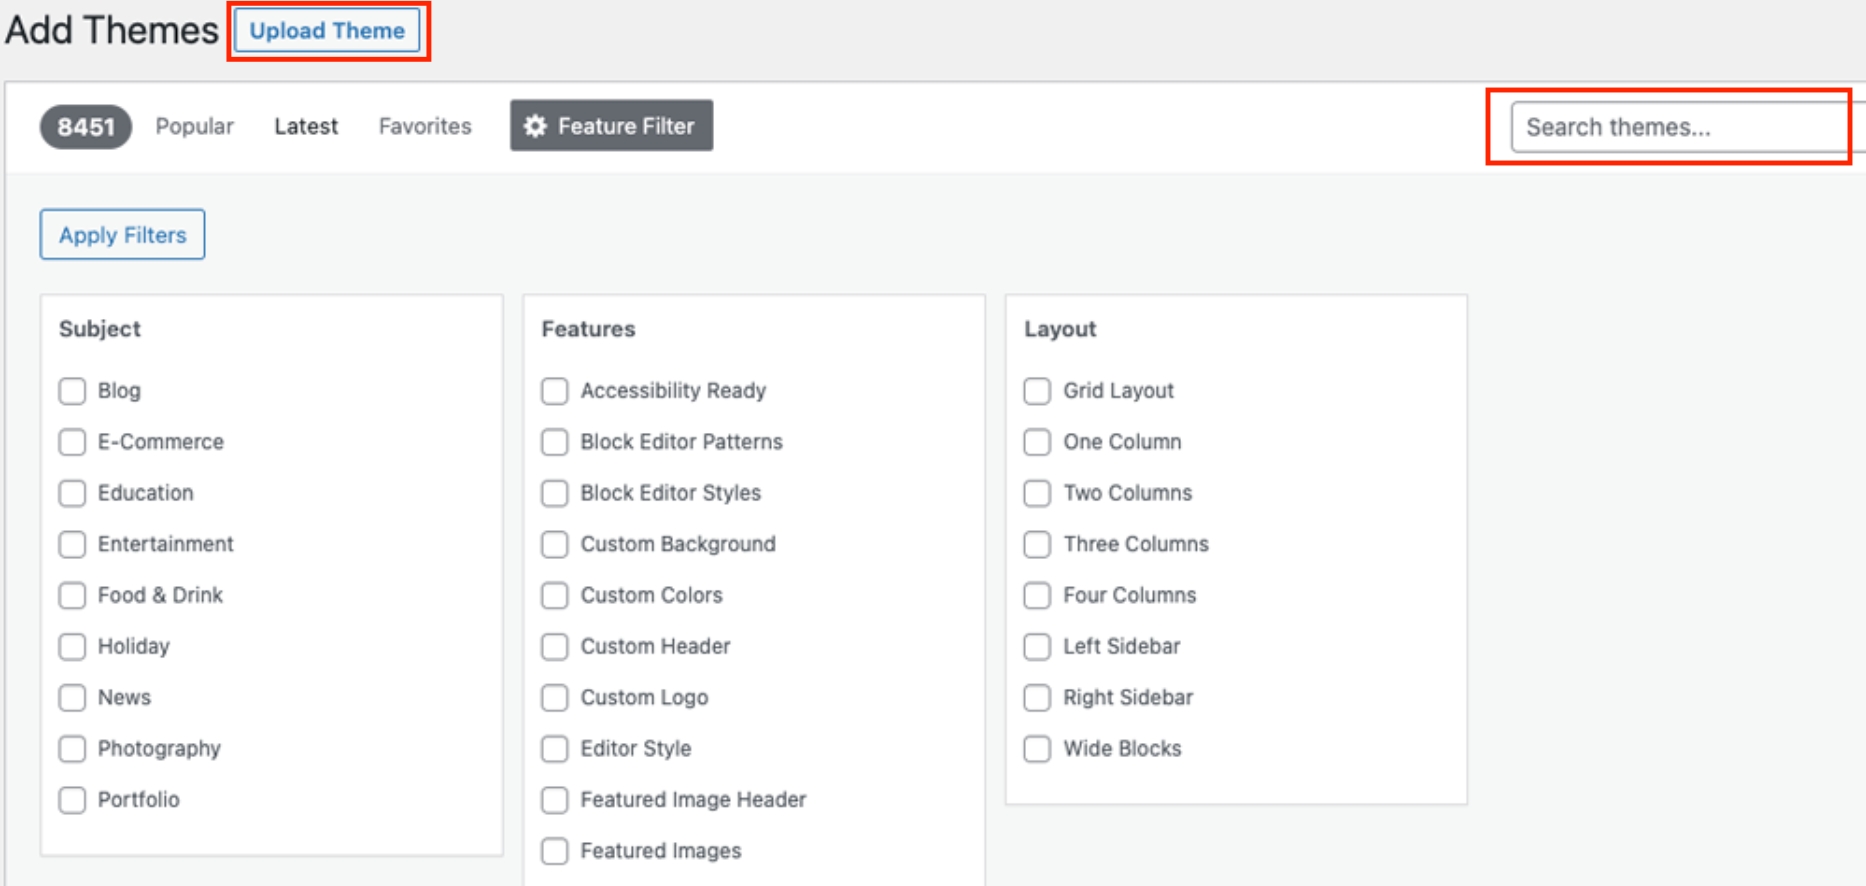
If you have located your desired free themes on WordPress.org, you can simply use the WordPress theme search option to find them and click the “Install” button. Alternatively, if you have obtained a premium theme or have the theme files, you can upload the ZIP file by selecting the “Upload Theme” button.
After successfully installing your new theme, do not click the “Activate” button immediately. There are further steps to follow before activating the theme.
Step 2: Preview and Customize
The WordPress theme customizer includes a useful feature that allows you to experiment with your new theme through a live preview of your site before making it fully active.
This feature is beneficial because it enables you can visualize how your existing content appears with the new theme. It also makes you able to identify and resolve any potential issues related to menus or widgets.
To utilize the WordPress Customizer for previewing your new theme, follow these steps:
- Access your WordPress dashboard and navigate to “Appearance” in the sidebar menu.
- Click on “Customize” from the options available.
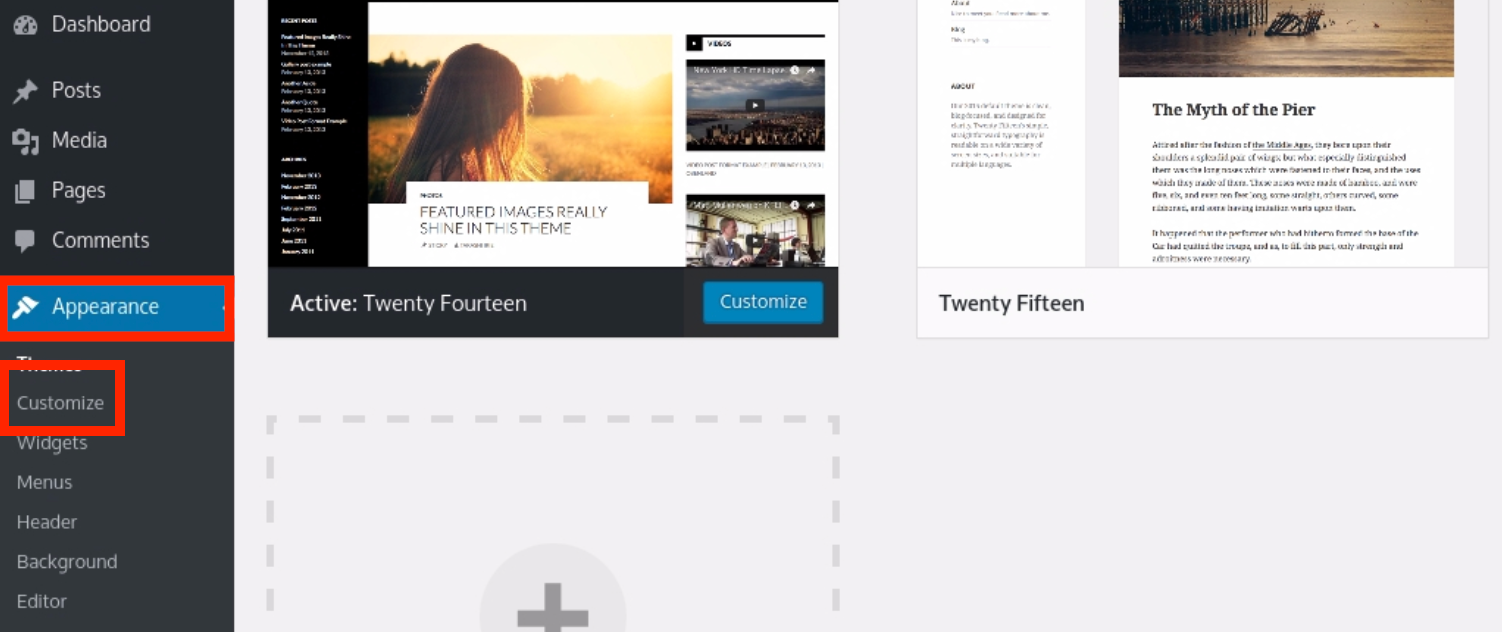
By doing so, you will be directed to the WordPress Customizer interface, where you can preview and customize various aspects of your website, including the appearance and settings of your new theme.
Upon entering the WordPress Customizer, you will be presented with a real-time preview of your current theme. In the Customizer sidebar, locate and select the “Change” option. Then, click on the “Live Preview” button that corresponds to the newly installed theme from the previous step.
At this point, you will have the opportunity to view a live preview of your current content displayed with the new theme you selected.
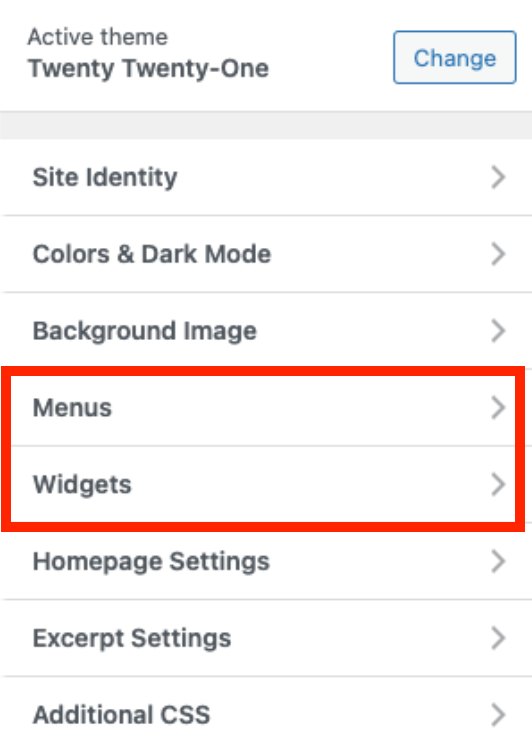
WordPress may successfully synchronize your existing menus and widgets with the new theme. However, if any issues arise, you can utilize the “Menus” and “Widgets” options within the Customizer sidebar to address and resolve them accordingly.
In case your new theme incorporates the WordPress Customizer, you have the flexibility to make additional adjustments. Additionally, you can navigate through your website and explore other pages to observe how they appear with the new theme.
For instance, clicking on an article will load that particular post using the preview of your newly selected theme. This way, you can assess the overall look and feel of your content across different pages and ensure a cohesive design.
Step 3: Activate your new theme
Once you are satisfied with the visual representation of your website using the new theme, you can proceed to make it live by simply clicking the “Activate & Publish” button. Congratulations, you now have a new active theme!
Clicking on “Activate & Publish” will deactivate your old theme and the changes you made will be available on your live WordPress site.
As you can see changing themes is something average WordPress users can easily do. Just find the desired theme and follow the steps mentioned in this article
7 Things to Do After You Changed Your WordPress Theme
1. Perform Website Testing
Before finalizing the theme change, it’s crucial to thoroughly test your website’s functionalities, plugins, and widgets. Take the time to explore various aspects such as posts, comments, images, and contact forms to ensure everything is working as expected.
2. Ensure Cross Browser Compatibility
Different web browsers may display your website differently. To ensure a consistent and visually appealing experience across major browsers like Google Chrome, Firefox, Safari, and Internet Explorer, test your website in each of them.
3. Incorporate Tracking Code
Once you have confirmed the functionality and cross-browser compatibility, integrate your analytics and Adsense tracking codes into your site. To simplify this process, consider using the MonsterInsights plugin, which enables easy addition of Google Analytics tracking code, allowing you to view detailed website statistics within your WordPress dashboard.
4. Deactivate Maintenance Mode
To make your website live and accessible to visitors, you need to disable the maintenance mode.
If you have the SeedProd plugin installed, follow these steps: Access your WordPress dashboard and navigate to SeedProd » Pages. Look for the maintenance mode page, and click on the toggle to inactivate the mode
5. Test Loading Time
To assess the impact of the new theme on your website’s loading time, revisit the Pingdom website and conduct a loading time test specifically for your homepage. Compare the results with the loading time when your previous theme was active. If significant differences are observed, refer to our guide on improving WordPress speed to optimize performance.
6. Monitor Bounce Rate
Following the theme switch, closely monitor the bounce rate of your website. A non-user-friendly or challenging-to-navigate theme may increase the bounce rate. To mitigate this, consider incorporating elements such as related posts, a popular posts widget, and breadcrumbs to enhance user engagement and reduce bounce rates while increasing page views.
7. Seek User Feedback
Gathering feedback from your users can provide valuable insights for improving your site’s design. Utilize survey forms, online polls, or email marketing services to solicit feedback from subscribers. Share the new design with them and encourage suggestions, allowing you to gain ideas for further enhancements based on user preferences.
Conclusion
In conclusion, changing a WordPress theme allows you to refresh and redefine the appearance of your website. By following a few simple steps, you can seamlessly transition to a new theme while preserving your existing content and functionality.
It is important to remember to create a backup of your website and consider using a staging site for the changes. The WordPress Customizer becomes a valuable tool in previewing and customizing the new theme, ensuring a cohesive design across your site.
By taking the time to explore and test different themes, you can find the perfect match that enhances your website’s aesthetics and user experience. So don’t hesitate to embark on the journey of changing your WordPress theme and give your website a fresh new look.
FAQ
Changing the theme primarily affects the visual appearance of your website. Most of your content, including posts, pages, and core settings, will remain intact. However, theme-specific features, such as custom shortcodes or widgets, may no longer function.
It is highly recommended to create a backup of your website before making any significant changes, including changing the theme. This ensures that you have a restore point in case anything goes wrong during the process.
WordPress offers the Customizer feature, which allows you to preview the new theme in real-time. You can access it by going to “Appearance” and selecting “Customize” in the WordPress Dashboard. This way, you can see how your content looks with the new theme before activating it.
Yes, you can switch back to the same WordPress theme you used before if you’re not satisfied with the new one. Simply go to the “Themes” section in the WordPress Dashboard and reactivate your previous theme.
In general, if you change themes it should not impact the functionality of your plugins. However, if your plugins rely on specific theme integrations, they may not work as expected with the new theme. It’s essential to thoroughly test your website’s functionality after changing the theme and ensure that all plugins are still working correctly.
Yes, you can further customize the new theme after activating it. WordPress provides various customization options, including colors, fonts, header/footer settings, and more. You can access these customization options through the Customizer or the theme’s specific customization settings.