How to Create a WordPress E-commerce Website – Plugin and Theme Reviews [2023]
- What is e-commerce?
- How to build an e-commerce website
- Plugin and theme recommendations
- Why plugins and themes are important
- Tips for SEO and marketing
- Why Choose WordPress for eCommerce?
- Conclusion
Are you looking to make an extra income with WordPress e-commerce?
With the right tools and strategies, you can build a thriving WordPress e-commerce store that generates revenue and attracts loyal customers.
In this article, we’ll walk you through the process of creating a WordPress e-commerce site from start to finish.
From choosing the right platform and hosting provider to selecting the best e-commerce themes, plugins and themes, we’ll cover everything you need to know to launch a successful online store.
What is e-commerce?
E-commerce (also known as electronic commerce) refers to the buying and selling of goods and services over the Internet. It involves the exchange of products, services, or money through online platforms or electronic devices.
It can take many forms, including online marketplaces, online storefronts, digital products, and online auctions.
Due to the growth of the internet and the increasing number of people who prefer to shop at online stores, it has become increasingly popular over the past few decades. Online shopping provides several advantages over traditional brick-and-mortar shopping, including convenience, accessibility, and often lower prices.
E-commerce can take many forms, including business-to-business (B2B), business-to-consumer (B2C), and consumer-to-consumer (C2C) transactions.
Some of the most popular e-commerce platforms include Amazon, eBay, Shopify, and maybe your WordPress e-commerce site.
8 steps to build a WordPress e-commerce website
Let’s see how you can build an e-commerce site in a nutshell. Don’t worry, I will explain everything in detail later on!
Step 1: Choose your domain name and hosting provider
Your domain name is your website’s address on the internet, while your hosting provider is the company that stores your site files and makes them accessible online.
Step 2: Install WordPress
Many hosting providers offer a one-click installation process for WordPress, which makes it easy to get started.
Step 3: Install an e-commerce plugin
The most popular e-commerce plugin for WordPress is WooCommerce, which enables you to add products, manage orders, and process payments.
Step 4: Choose an e-commerce theme
A theme determines the appearance and layout of your site, so choose a theme that is optimized for e-commerce websites and aligns with your brand.
Step 5: Customize your theme and add your products
Customize your theme by adding your logo, changing colors, and tweaking the layout. Then, add your products to your site and optimize your product descriptions and images for search engines.
Step 6: Set up payment and shipping options
Choose payment and shipping that work for you and your customers. Popular payment gateways include PayPal, Stripe, and Square.
Step 7: Test your site
Before launching your site, make sure to test it thoroughly to ensure that everything is working as expected. Test your payment and shipping, check for broken links, and optimize your website’s speed and performance.
Step 8: Launch your website
Once you’re confident that your site is ready to go, launch it and start promoting your products!
Remember, building an e-commerce website is a process, and it takes time and effort to create a successful online store.
Guide to building an e-commerce site
Step 1: Choose your domain name and hosting provider
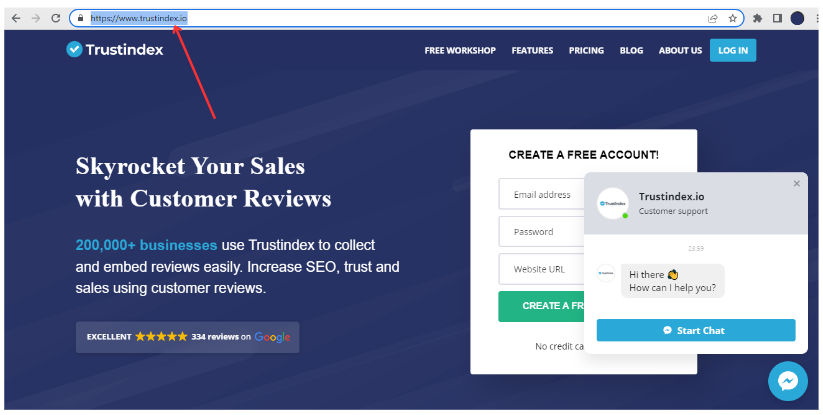
To create any type of website, including a WordPress e-commerce site, you’ll need both a domain name and a web hosting service. Your domain name is the unique web address that your website will have, such as Trustindex.io.
Web hosting is a service that allows you to store your website files on a remote computer and make them accessible to visitors. There are many WordPress hosting providers to choose from, but my top recommendation is Bluehost. It offers reliable service, fast loading speeds, and affordable subscription plans that even include a free domain name for your e-commerce platform.
The setup process of Bluehost
Go to the Bluehost website and click on “Get Started”.
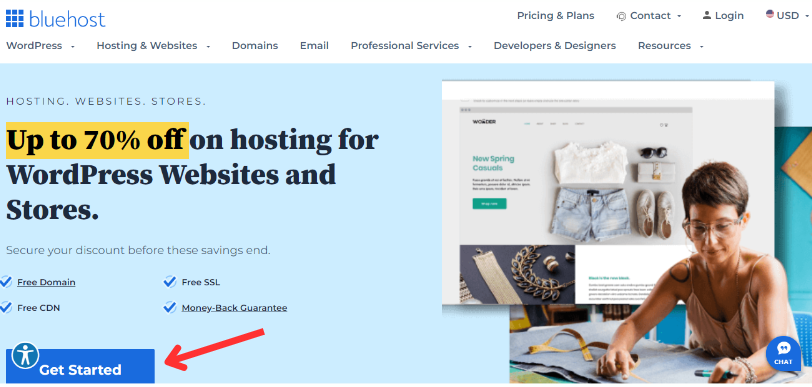
Then it will take you to the page where you can choose your hosting plan:
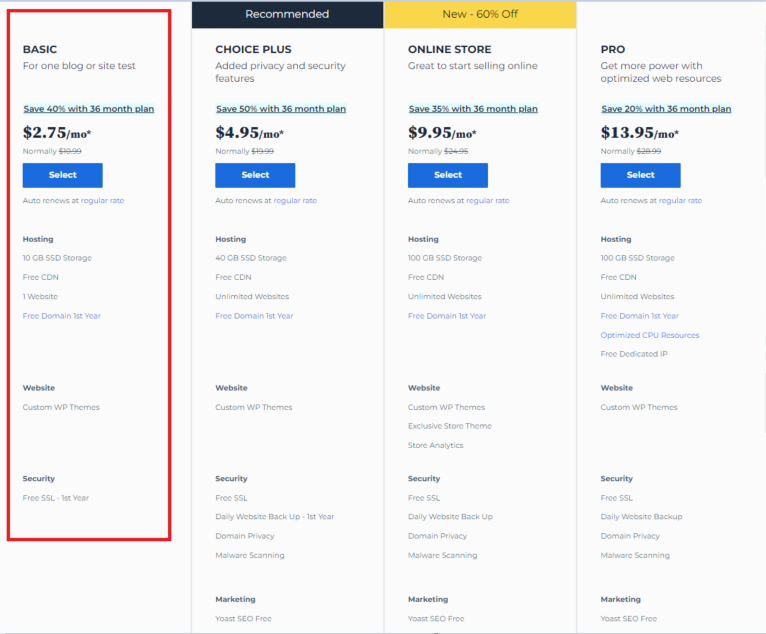
As a first-time WordPress e-commerce site owner, I suggest starting with the Basic plan, which is only $2.75 per month and includes a free domain name for the first year.
Choose a domain name
After selecting a subscription plan, the next step is to choose your domain name for your new online store. Click on “Create a new domain” and enter your desired domain name.
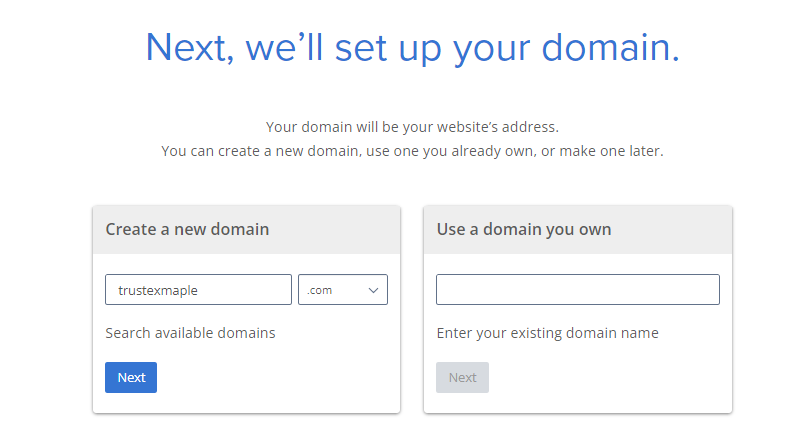
Bluehost will then display a list of available or similar domain extensions for you to choose from automatically.
In case you already have a registered domain name, you can continue with that.
Enter the existing domain to “Use a domain you own” and click on “Next”. Your domain will be transferred from where it is now to Bluehost.
Final steps of creating a domain
To finalize the deal, you need to provide your personal information to create your Bluehost account.

You will also need to confirm your plan details and select any relevant add-ons, which may come at an additional cost.
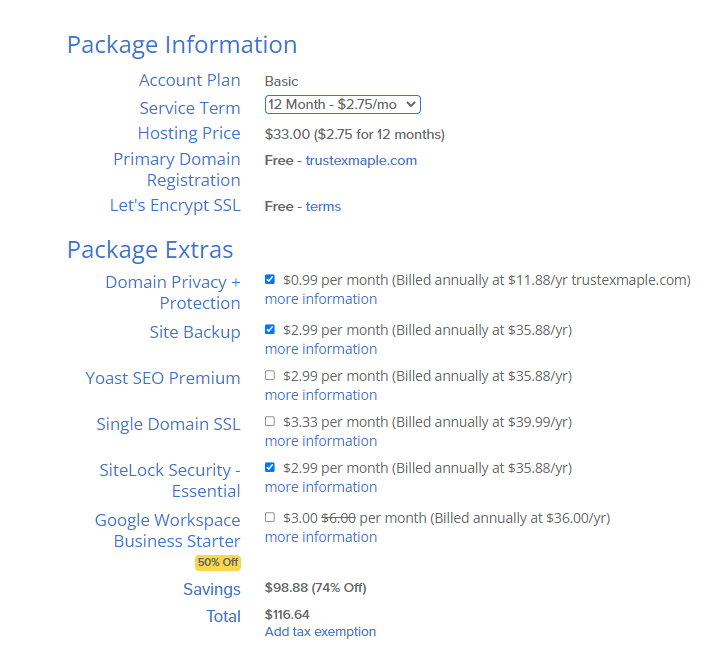
When selecting the number of years to sign up for, I recommend going for the three-year option as it provides the best value for money.

While it may seem like a long commitment, it ensures that your e-commerce store remains online and profitable for an extended period. If you have any doubts or change your mind, Bluehost offers a 30-day money-back guarantee.
To complete the process, you simply need to pay your subscription fee, which can be done through various payment options, including credit card.
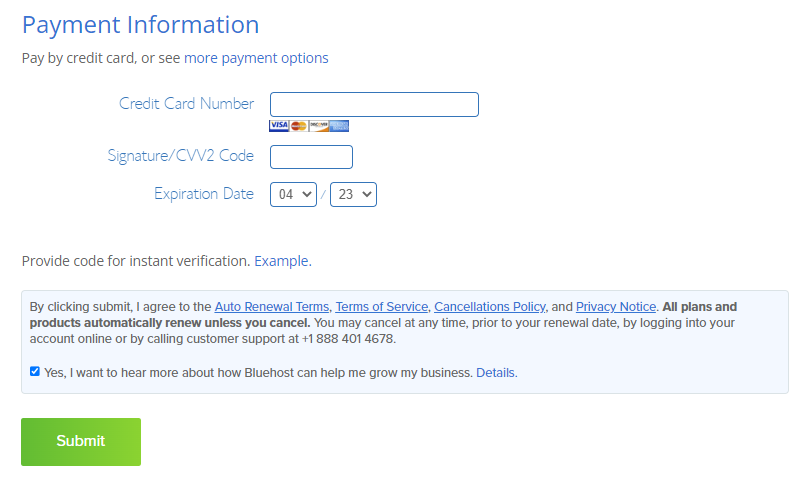
Once this is done, you will have a domain name and hosting plan to go with it, so let’s continue with the next step.
Step 2: Install WordPress
Your journey with WordPress e-commerce begins with installing it on your hosting account, and the best part is that it’s completely free. There are no installation charges involved, and Bluehost will take care of the entire process for you!
Upon signing up with Bluehost, you will receive a confirmation email containing your login credentials. Use this information to log in to your Bluehost account, and the hosting service will walk you through the process of installing WordPress.
You can install WordPress from your Bluehost dashboard. Simply click on “My Sites” followed by “Create Site,” and the installation process will begin immediately.
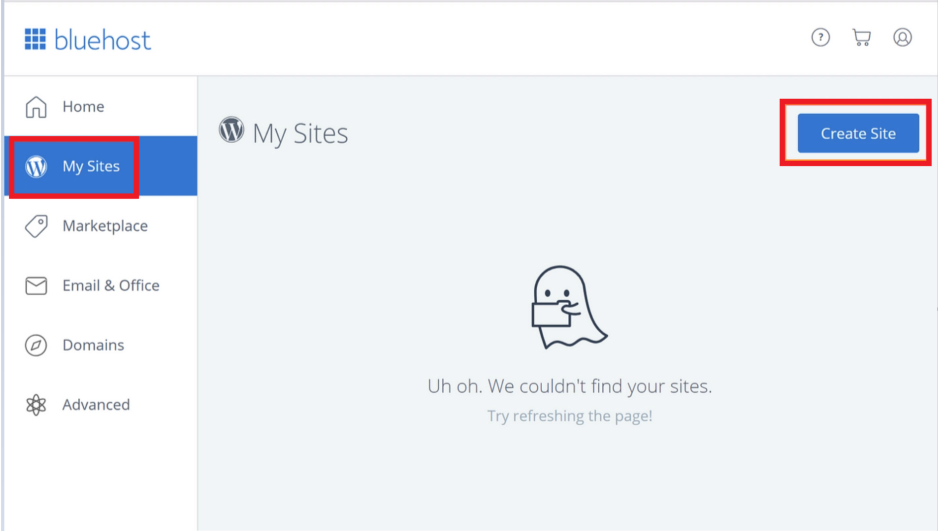
After the installation is finished, you will need to enter your website’s name, followed by the username and password.
Once you have a blank WordPress website set up, you can begin the process of transforming it into a fully functional e-commerce store.
Step 3: Install an e-commerce plugin
A significant distinction between a standard WordPress website and a WordPress e-commerce webpage is the ability to sell products directly through the site.
Since WordPress does not have built-in e-commerce capabilities, you will need to install an e-commerce plugin to add this functionality to your WordPress site itself.
My top pick is WooCommerce.
Here are the steps to install the WooCommerce plugin:
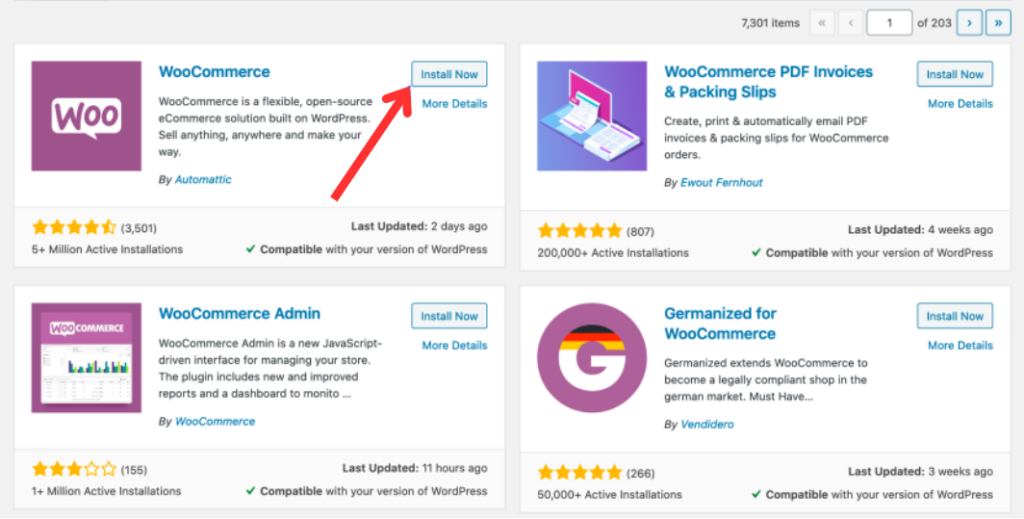
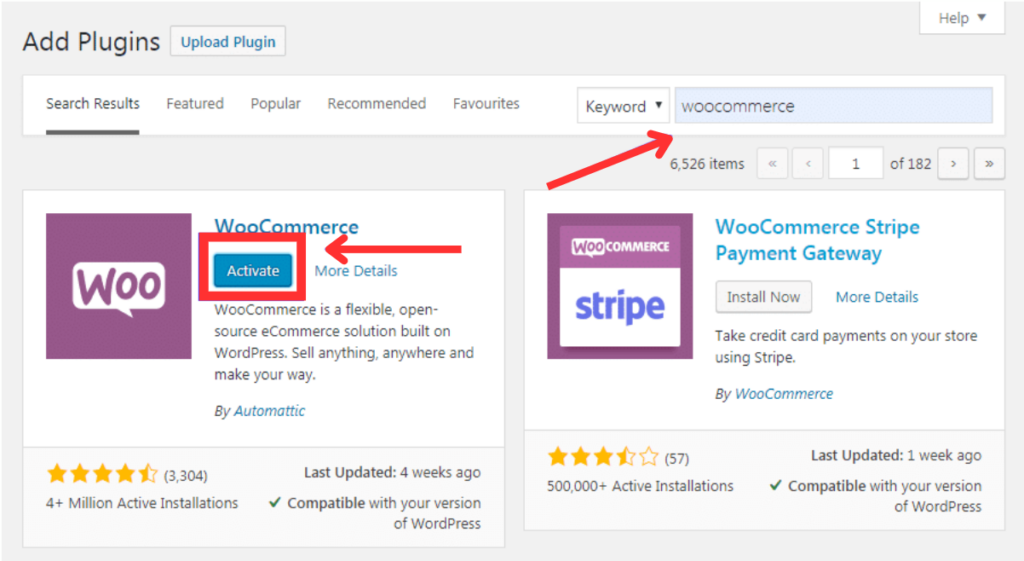
To install the WooCommerce plugin, go to your WordPress dashboard and click on the Plugins tab, then select Add New. Type ‘WooCommerce’ in the search bar at the top right corner of your screen. Next, click on the Install Now button beside the plugin.
Once installed, the button will turn blue and display ‘Activate’. Click on it to activate the plugin.
After activating, you will be prompted to complete the setup process through WooCommerce’s on-screen wizard. This process is straightforward and should only take a few minutes to complete.
Step 4: Choose an e-commerce theme
The appearance of your site is determined by the theme you use. One of the advantages of using WordPress is that you have the flexibility to change and personalize your themes whenever necessary, providing your store with a unique design that distinguishes it from competitors.
However, be cautious when customizing your theme, as it is only recommended for experienced coders. If you lack this skill, it’s better to choose a pre-made theme that aligns with your vision.
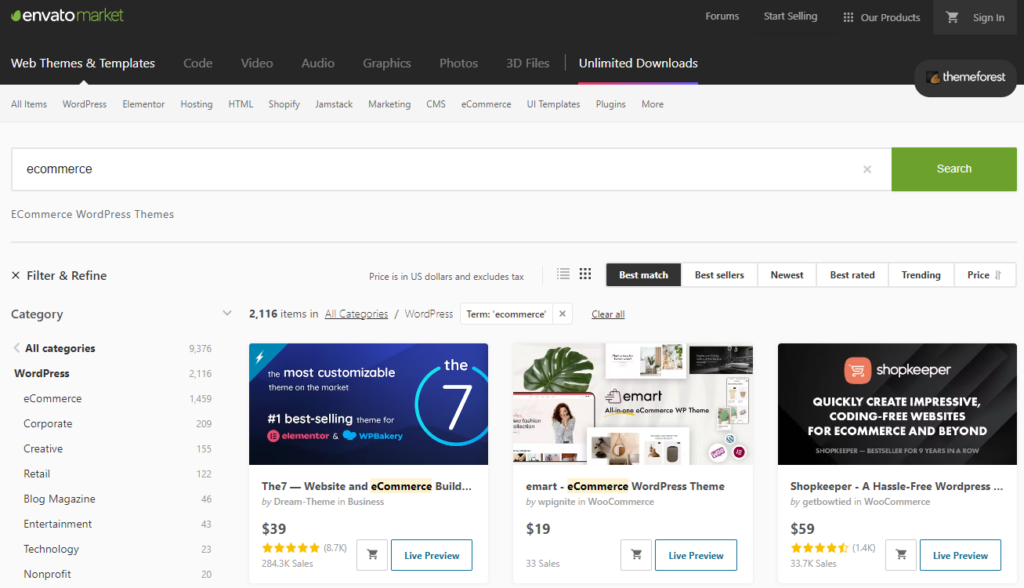
You can begin by visiting a third-party site like ThemeForest, where you can browse through hundreds of thousands of themes, giving you limitless options to choose from.
Another option is WordPress.org, where you can find every theme for your e-commerce site that is compatible with WordPress itself.
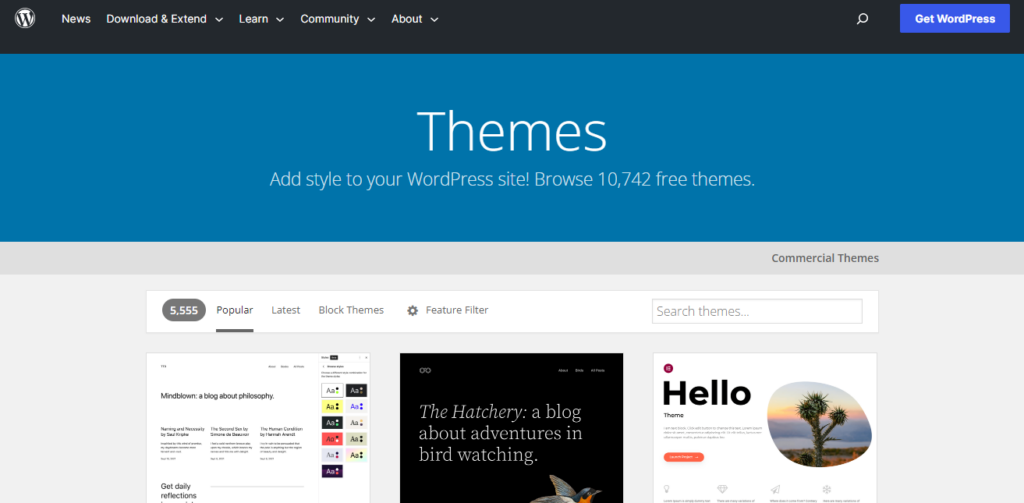
How to Install a Theme from the Official WordPress.org Directory:
- Access your WordPress dashboard and click on Appearance, followed by Themes.
- Browse through the theme selection and click on Add New. You can demo some of them to test how they will look in your store.
- Select the theme you like and click on Install. Wait for a few seconds, and the button will change to Activate. Click on it, and the theme will be applied to your site.
How to Install a Premium Theme:
- Download the .zip file of the theme you want to use.
- Log in to your WordPress dashboard, and go to Appearance, followed by Themes.
- Click on Add New, which will take you to the WordPress theme dashboard.
- Select the Upload Theme option and choose the .zip file from your computer when prompted.
Step 5: Customize your theme and add your products
After installing and activating your desired theme, it’s time to customize it to match your brand identity and add your products.
1.) Go to Appearance and click on Customize to access the theme customizer. From here, you can adjust various settings such as colors, fonts, and layout.
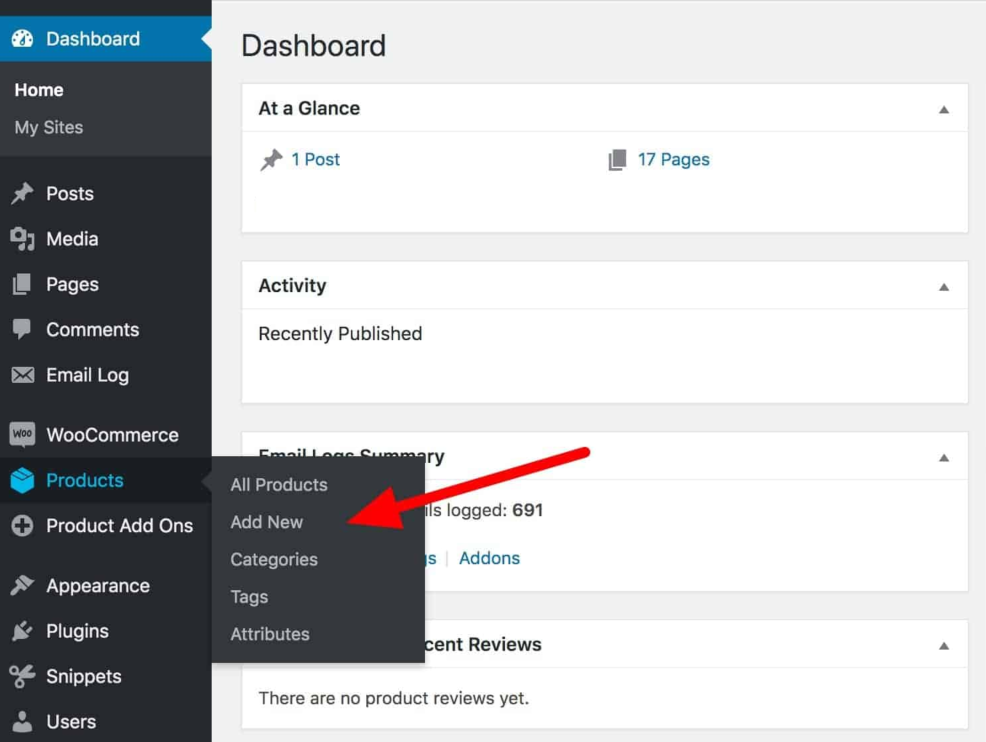
2.) To add products, go to Products and click on Add New. Here, you can add product descriptions, prices, images, and more.
3.) Don’t forget to organize your products into categories and tags, as this will make it easier for customers to find what they’re looking for.
Step 6: Set up payment and shipping options
To complete the setup of your WordPress e-commerce store, you need to configure payment and shipping.
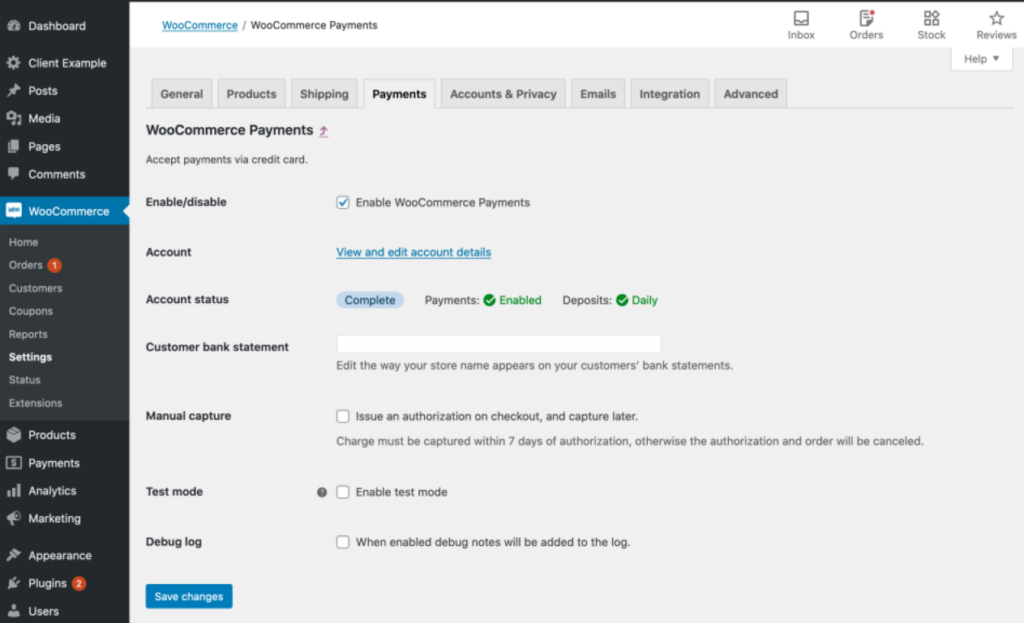
1.) Navigate to your WordPress dashboard and click on WooCommerce, followed by Settings.
2.) Click on the Payments tab to set up your payment gateway. By default, WooCommerce comes with several payment options, such as PayPal and Stripe. Choose the payment options that best suit your business needs.
3.) Next, click on the Shipping tab to configure your shipping settings. This will depend on the type of products you’re selling and where you’re shipping them to. WooCommerce offers several shipping methods, including flat rate, free shipping, and local pickup.

4.) Once you’ve set up your payment and shipping for your online store, don’t forget to test them to ensure they’re working correctly. You can do this by placing a test order on your site.
Step 7: Test your webpage
After you have added products, payment, and shipping, besides customizing your WordPress e-commerce theme, it’s important to test your site to ensure everything is working smoothly.
Step 8: Launch your website
Congratulations, you have reached the final step! You are now ready to launch your e-commerce website and start selling your products. Remember to continually monitor and optimize your website to ensure the best possible user experience for your customers. Good luck!
6 things to test on your online store
- Check that your products are displaying correctly on your site and that customers can add them to their cart and checkout without any issues.
- Test your payment and shipping by making a test purchase to ensure that customers can make payments and receive their products without any errors.
- Make sure that your site loads quickly and that all the pages and links are working properly.
- Check that your site is mobile-friendly and looks good on different devices and screen sizes.
- Conduct a thorough review of your website content to make sure it is free from spelling or grammatical errors.
- Get feedback from friends or family members to identify any issues or improvements that can be made.
E-commerce solution plugins & themes – recommendation
Take a look at additional plugins and themes that help you with your business and selling physical or digital products.
WordPress E-commerce plugins
1.) Easy Digital Downloads
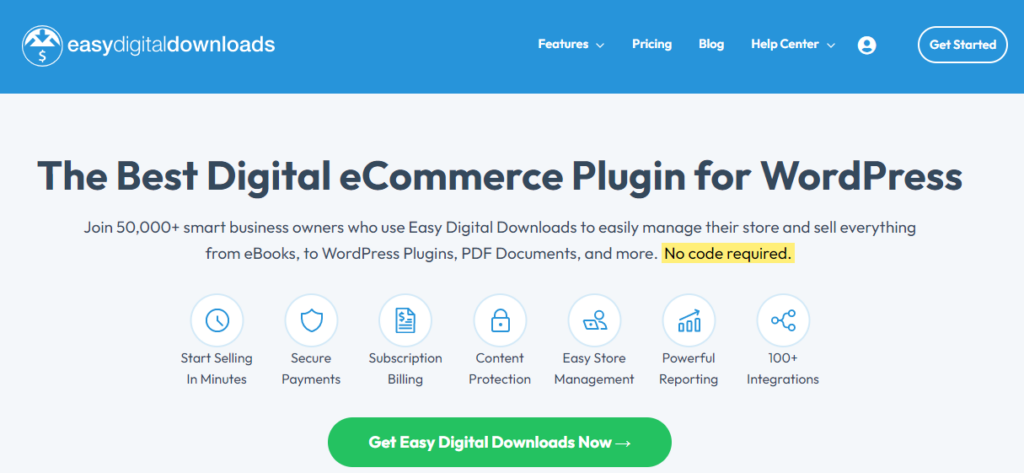
EDD (Easy Digital Downloads) is a user-friendly plugin for WordPress that enables you to sell digital downloads with ease. It is specifically designed for digital goods, providing a better experience compared to other eCommerce plugins that can sell all kinds of products.
We recommend using EDD as it comes with powerful features and hundreds of extensions, allowing you to create a beautiful and functional digital goods store.
Additionally, there are now managed EDD hosting offerings that come with EDD pre-installed, making it even easier to get started.
Some of the benefits of using EDD:
- ease of use
- extensive extension library
- software licensing support
- affiliate management.
- integration with growth tools like MonsterInsights, AIOSEO, and OptinMonster.
However, it’s worth noting that EDD is only suitable for selling digital products, and if you want to sell non-digital goods along with digital downloads, it can become quite complicated.
Furthermore, if you want to add an external or affiliate product to your EDD store, you will need to install a third-party addon for it.
Pricing
The Easy Digital Downloads plugin has a free version that can be downloaded from WordPress directly. However, they also offer premium pricing plans that start at $99 per year for a single site license and go up to $499 per year for an all-access pass.
2.) BigCommerce

BigCommerce is an eCommerce solution that seamlessly integrates with WordPress. With its integration plugin for WordPress, you can easily embed your products on your e-commerce platform. BigCommerce automatically creates important pages such as sign-in, cart, and account pages for you, making it easy to use.
Some of its e-commerce features:
- It offers all the features you need with enterprise-grade security, high performance, and easy scalability.
- Less maintenance
- You can use it to sell not only on your website but also on other channels like Facebook, Instagram, and Amazon.
- It does not charge you for each transaction and offers many payment gateway options.on the other hand,
- its app store is still growing, and you may not find an integration for some less popular apps.
- They have a yearly threshold on sales for each plan which may increase your costs as your business grows.
BigCommerce is an easy-to-use eCommerce platform that takes away the pains of scaling your hosting requirements as your e-commerce business grows.
With its BigCommerce WordPress plugin, you can have the best of both worlds. It takes care of technology infrastructure so that you can focus on growing your business. It’s also a rising contender in WordPress for headless eCommerce.
Pricing
They offer four pricing plans: Standard, Plus, Pro, and Enterprise. The Standard plan starts at $29.95/month, Plus at $79.95/month, Pro at $299.95/month, and Enterprise pricing is customized.
3.) Shopify
Shopify is an all-in-one eCommerce platform that has been rapidly gaining popularity. It provides a hassle-free e-commerce solution without the need for plugins.
Advantages of the e-commerce platform
- Beginner-friendly
- Supports digital and physical products
- Complete inventory management
- Payment and shipping options
- Facebook store and buyable pins – With Shopify, it’s easy to create a Facebook store or make buyable pins on Pinterest.
on the other hand,
- Monthly platform fee – it charges a monthly fee to use its platform, which is comparable to purchasing hosting and individual add-ons for other plugins.
- Shopify payments – While Shopify encourages using their payment platform, there’s an extra charge for using external payment systems.
If you’re looking for a powerful eCommerce platform that’s free of technical issues, Shopify may be the answer.
Though the monthly fee may seem daunting at first, the hassle-free approach and peace of mind make it worthwhile, allowing you to focus on what you do best – running your business!
Note that Shopify doesn’t integrate natively with WordPress. Some business owners switch from Shopify to WordPress to reduce costs while getting more e-commerce features.
WordPress E-commerce themes
1.) Neve

Neve is a great one-page WordPress theme that is suitable for building any kind of website, including online stores. Apart from being Gutenberg-compatible, it seamlessly integrates with the most widely used WordPress page builders like Elementor and Divi Builder.
This implies that you can choose from a collection of more than 40 e-commerce-focused starter sites and personalize e-commerce features to craft a truly distinctive e-commerce website.
Pricing
It has both a free and a pro version. The free version is available for download from the WordPress repository.
The pro version has three pricing plans: Personal ($69/year), Business ($129/year), and Agency ($249/year). The pricing is for use on unlimited websites and includes one year of support and updates.
2.) OceanWP
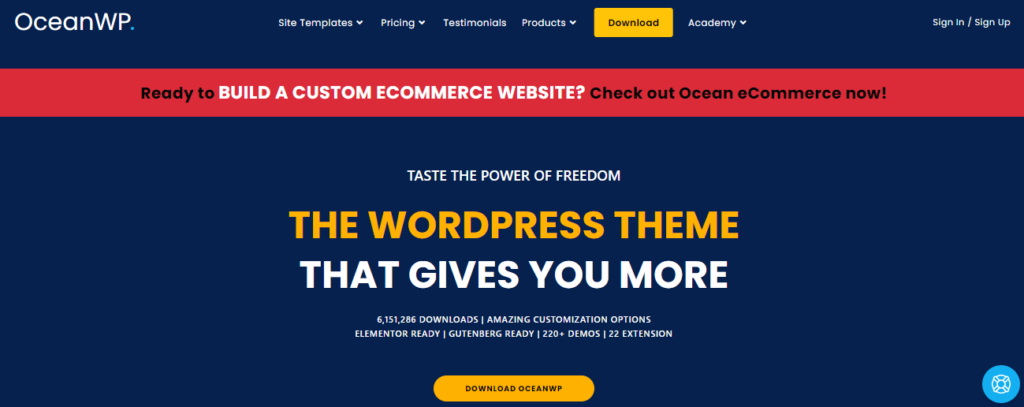
OceanWP is a lightweight, fast, and highly extendable WordPress theme that is suitable for building various types of websites, including eCommerce stores. It offers a clean and modern design with multiple customizable layouts and options to make your site stand out.
Some of its key features include a responsive design, support for popular page builders like Elementor and Beaver Builder, compatibility with WooCommerce for eCommerce functionality, integration with popular WordPress plugins like Yoast SEO, WPForms, and Contact Form 7, and a range of demo templates and starter sites to get you started quickly.
Pricing
It offers a free version with basic features and a premium bundle with more advanced features starting at $59 for a single website license. They also offer yearly and lifetime license options for multiple websites.
3.) E-commerce Solution
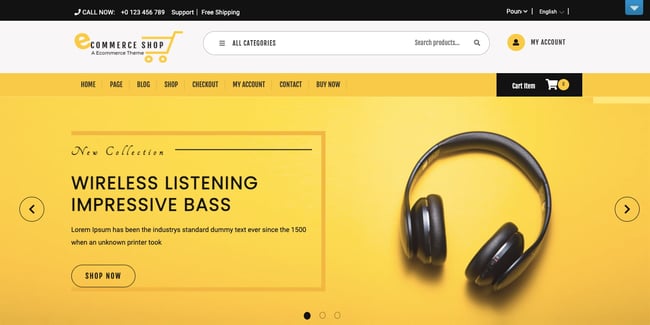
The E-commerce Solution WordPress theme boasts a responsive design with a clean and minimalistic layout. With an image gallery, multiple sidebar layouts, and customizable options for the header, footer, and CTA buttons, this theme is perfect for converting visitors into customers.
Pricing
The E-commerce Solution theme is free to download and use from the WordPress themes repository.
Why is it important to use WordPress themes and plugins?
Using plugins and themes is crucial in enhancing a website’s functionality and design. E-commerce plugins are software components that can be added to a website to extend its functionality, add new features, and improve performance. E-commerce themes, on the other hand, are collections of files that determine a website’s appearance, layout, and design.
By using the right WordPress themes and plugins, website owners can optimize their site’s performance, add custom features, and improve user experience. For instance, e-commerce plugins like WooCommerce can help to create an online store, while WordPress themes like Neve can help to design a professional-looking website with various customization options.
In addition, e-commerce plugins and themes can help to improve website security, search engine optimization (SEO), and mobile responsiveness. However, it is important to choose reputable and well-supported plugins and themes to avoid potential security risks or compatibility issues.
5 tips for SEO and marketing
E-commerce site owners need to think about search engine optimization as well as the right marketing tools to promote their e-commerce WordPress website.
- SEO
Search engine optimization (SEO) is the practice of optimizing your e-commerce webpage to rank higher in search engine results pages (SERPs). This involves optimizing your site structure, content, and metadata for relevant keywords, building quality backlinks, and ensuring your site is mobile-friendly, fast-loading, and easy to navigate.
- Content Marketing
Content marketing involves creating and sharing valuable content to attract and engage your target audience. This could include blog posts, videos, infographics, social media posts, and more. By creating high-quality content that educates and informs your audience, you can establish your brand as a thought leader in your industry and drive more traffic to your site.
- Social Media Marketing
Social media is an excellent platform for promoting your e-commerce site and engaging with your target audience. You can use social media to share your content, run promotions and contests, showcase your products, and engage with customers through comments and direct messages. It’s important to choose the right social media channels for your business and post consistently to build a following.
- Paid Advertising
Paid advertising is an effective way to drive targeted traffic to your e-commerce site. Platforms like Google Ads and Facebook Ads allow you to target specific demographics and interests, and you only pay when someone clicks on your ad. By creating compelling ad copy and targeting the right keywords and audiences, you can generate more sales and grow your business.
- Email Marketing
Email marketing is a powerful tool for building relationships with your customers and driving repeat business. By collecting email addresses from your customers and prospects, you can send them targeted promotions, newsletters, and other communications that keep them engaged with your brand. It’s important to segment your email list and personalize your messages to maximize the effectiveness of your email marketing efforts.
Why Choose WordPress for eCommerce?
WordPress is an open-source Content Management System (CMS) with an array of uses and functionality. It allows you to create a unique online store that matches your branding and design preferences. With WordPress, you have access to numerous eCommerce plugins and themes that can help you add various features to your website, such as product catalogs, shopping carts, and payment gateways.
Moreover, the content management system has a user-friendly interface that makes it easy for you to manage your online store, even if you have limited technical expertise.
As it is SEO-friendly, it can help your eCommerce store rank higher on search engines, such as Google. You can optimize your website for search engines by using plugins and tools that can help you with on-page optimization, such as adding meta descriptions, optimizing images, and improving page load speeds.
Finally, its large and active community of developers and users are constantly creating and sharing resources and tutorials on how to build and manage an eCommerce website on WordPress. This can be beneficial, as you can learn from others’ experiences and get help and support when you need it.
Conclusion
In this article, we’ve discussed how to create an eCommerce website using WordPress. To get started, you’ll need to choose a plugin and theme that best fits your needs. We reviewed some popular options and highlighted their key features to help you make an informed decision.
Once you have your host and domain install WordPress. After you’ve installed choose a plugin and theme, and you can start customizing your site and adding products. It’s important to optimize your website for search engines, as well as create a smooth checkout process for customers.
We hope this guide has been helpful in getting you started on your eCommerce journey with WordPress!