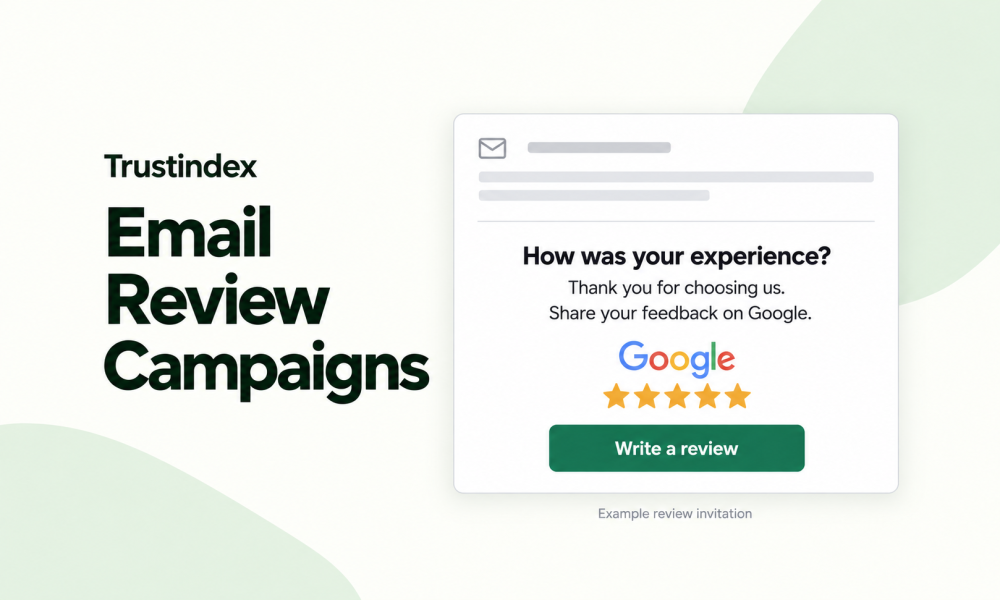
An email review campaign gives customers a friendly reminder to share their experience. With Trustindex, you can personalize each request, choose when to send it, and add a reminder.
Start with an existing customer list, or set up automatic invitations to make review collection part of your routine.
What is an email review campaign?
It is an email that asks customers to review your business after a purchase, visit, or completed service. You write the message once, choose the review platform, and add the customers you want to invite.
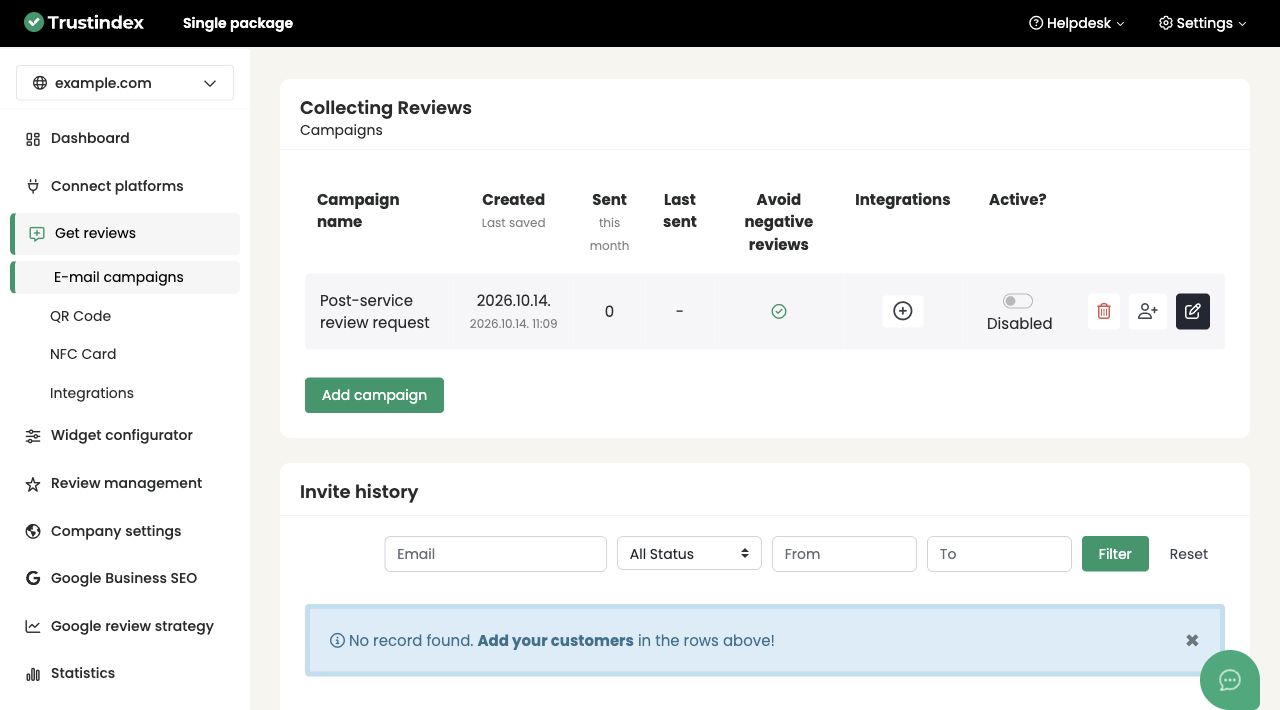
You will find it in Get reviews → E-mail campaigns → Add campaign, or you can open the campaign editor here.
The benefits of email review campaigns
Email review campaigns help you collect more customer feedback without asking everyone individually. You can personalize your message, send it at the right time, and add a reminder for customers who may have forgotten to respond.
Automating these requests saves time and makes review collection part of your everyday routine.
These reviews help potential customers get to know your business and feel more confident about choosing you. As a result, they may be more willing to enquire, book or buy.
Why Google reviews matter
When someone finds your business on Google Search or Maps, reviews help them picture what it is like to buy from you. They can read about other customers’ experiences before deciding to call, book, or place an order.
Reviews can help with local visibility, too. The opportunity is simple: help more people find your business, then give them the confidence to choose you. Reviews can support that journey.
Set up your email review campaign, step by step
To get started, sign in to your Trustindex account and go to Get reviews → E-mail campaigns → Add campaign or click this link. This opens the campaign settings, where you can choose your review platform, customize your email and set the sending schedule. Have your review link, business name and a reply email address ready, then follow the steps below.
1. Choose your review platform
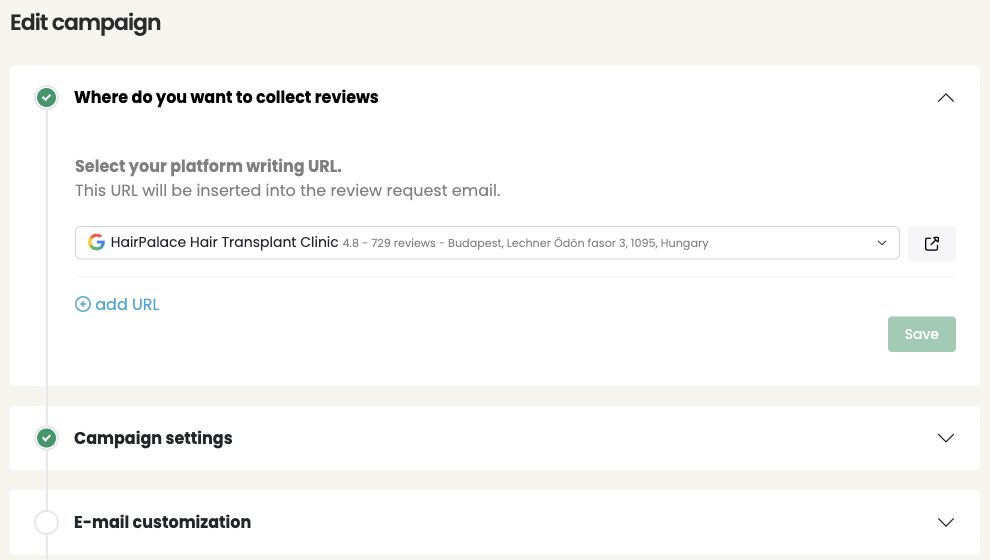
Under Where do you want to collect reviews, select where customers should leave their feedback. For Google, check that you have chosen the right business and location. The preview icon lets you check the link before continuing.
To collect reviews on multiple platforms in the same campaign, use add URL to add another review destination. Trustindex will distribute review requests across the selected platforms according to the proportions you set. Select Next step to continue. When editing an existing campaign, use Save to confirm your changes.
2. Decide when to send your request
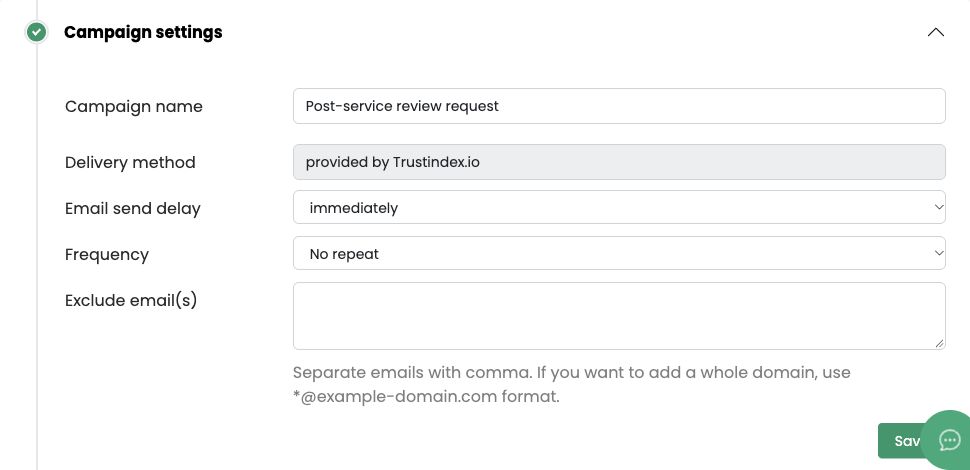
Open Campaign settings and give your campaign a name you will recognize later, such as “After an appointment.”
- Email send delay: send straight away or choose a delay from the menu, up to 30 days.
- Frequency: choose No repeat or a limit on how often a customer can receive an invitation.
- Exclude email(s): leave out specific addresses or a whole domain, such as your own company’s domain. Separate addresses with commas; use
*@example-domain.comfor a domain.
Choose the right time to send your review request. Give customers enough time to experience your product or service before asking for feedback. For example, you can send a request shortly after an appointment, but for a delivered product, it’s best to wait until the customer has received and had time to use it.
3. Make the email sound like your business
In E-mail customization, add your Sender name, Reply to e-mail and E-mail subject. Use a name customers recognize, and a reply address someone checks regularly. Select Change to choose or verify the address if needed.
The Default customer name is the greeting used when a customer’s name is missing.
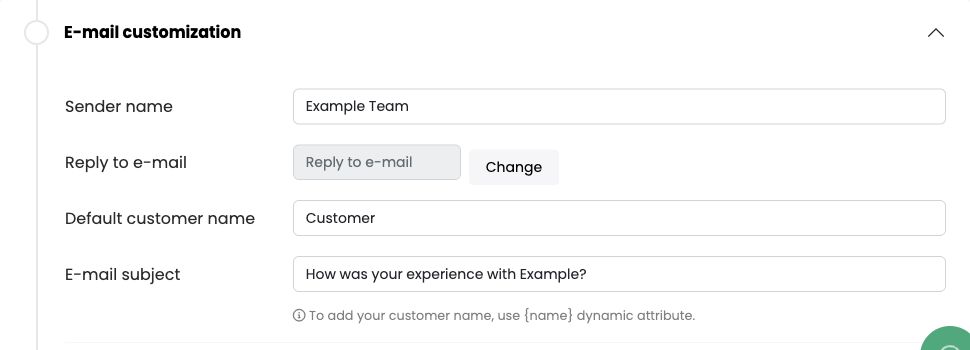
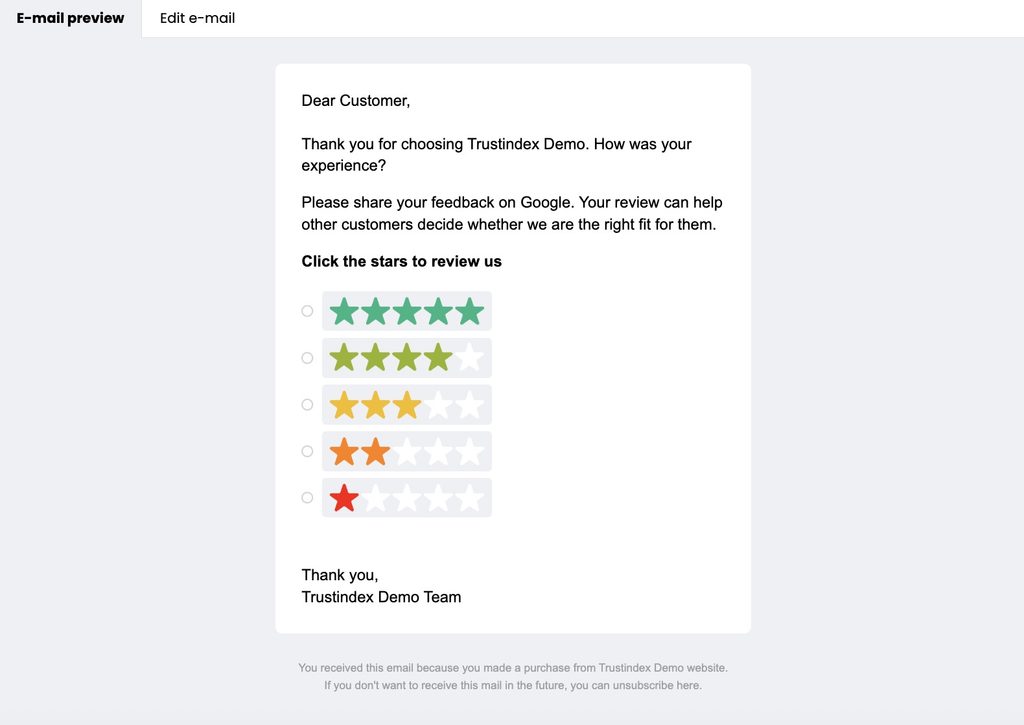
Add your logo with Browse image, then choose a Review collect method: by link or by stars. Edit the message under Edit e-mail and check it in E-mail preview.
A short thank-you and a clear request are enough.
4. Test your email and add a reminder
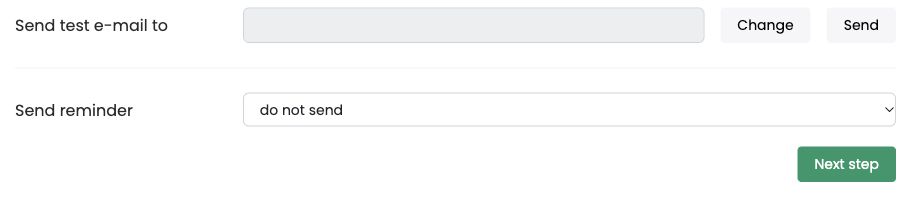
Choose your own address under Send test e-mail to, then select Send. Open the test email on your phone and computer, and check how it looks.
Customers sometimes need a reminder. Under Send reminder, choose a delay of 2-30 days, or leave do not send selected if you do not wish to send a reminder.
5. Give unhappy customers a way to reach you
Open Avoid negative reviews with intelligent invitation system to set up the feedback flow. When a customer selects 1, 2 or 3 stars, the system offers a way to contact your business about the problem. They can still choose to leave a public review.
This gives you a chance to understand what went wrong, offer help, and improve the customer’s experience. In this section, you can enable the system, choose the feedback form language, and preview the form.
6. Add your customers
Go to the campaign list and select the person-plus icon beside your campaign. Choose how to add customers:
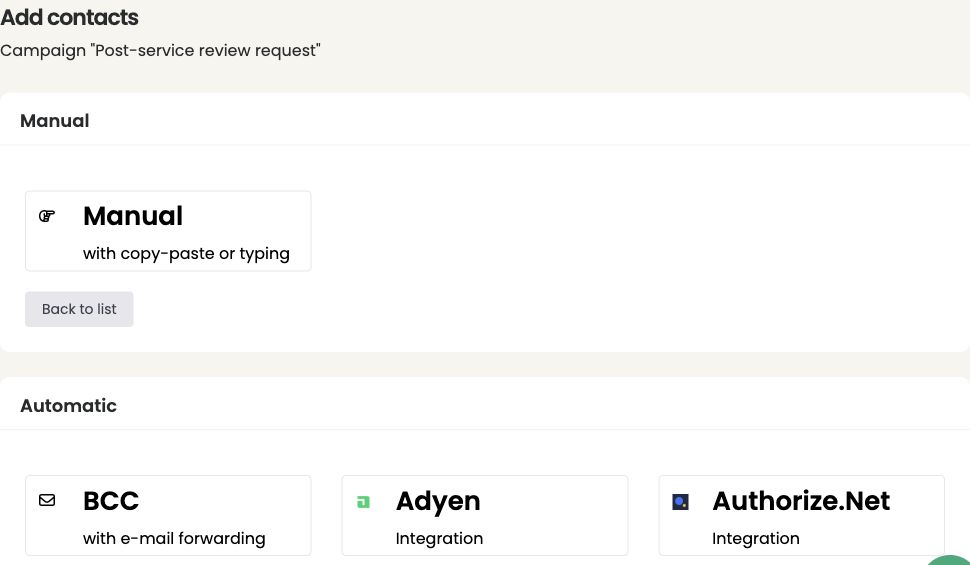
Automatically with an integration
Select the service you use from the available options, which include Stripe, PayPal, Make.com, Zapier and many more. Follow its connection instructions and check the trigger before using it for customer invitations.
If you do not use any of the integrations, choose BCC — with e-mail forwarding. Add the campaign-specific address shown by Trustindex to the BCC field of your customer confirmation emails. These forwarded emails can trigger review invitations. Match the sending delay to when customers can review their experience.
Manually
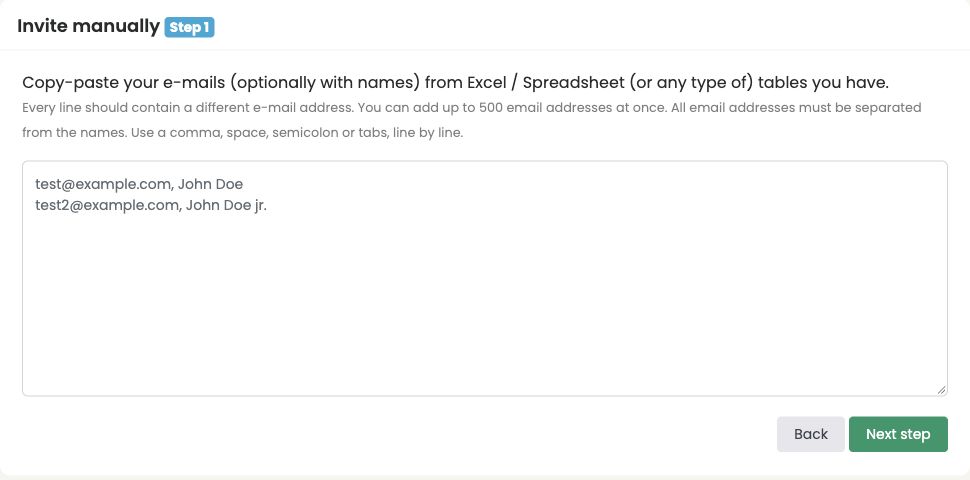
Choose Manual — with copy-paste or typing. Paste one email address per line, with an optional name. You can copy from a spreadsheet.
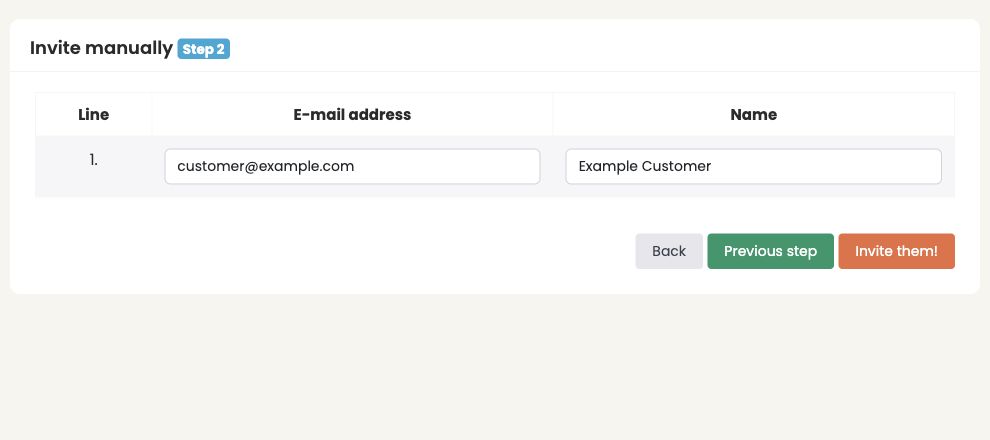
Review the names and addresses. Use Previous step to make corrections. Complete the final checks in step 2 before selecting Invite them!.
7. Check everything and launch
Save your settings. Check the review destination, reply address, message, reminder, and customer list, then enable your campaign using Active? in the campaign list when it is ready.
For manual invitations, select Invite them! on the recipient check screen when you are ready to send. Afterwards, check Invite history to follow the invitations.
Turn reviews into more sales
Once you are collecting feedback, put it where new customers will see it.
- Build trust on Google. Keep asking for honest reviews after completed purchases or services, so people researching your business can hear from customers.
- Show reviews near your next step. Add them beside a booking button, quote form or service description. Open the Trustindex widget configurator to prepare a review widget for your website.
- Respond to feedback. Thank customers and help resolve concerns. Your replies show future customers how you treat people.
For example, a plumber can ask for a review after finishing a job, then show customer feedback beside the website’s “Request a quote” form. Someone comparing local plumbers can read about previous jobs while deciding whether to get in touch.
The goal is to turn the trust you have earned into more enquiries, bookings and sales.
Check your results
Open Invite history below the campaign list. Filter by email, status or date to check invitations. The campaign list also shows this month’s send count and the last sending date.
Alongside invitation activity, follow your new Google reviews and the business results that matter to you: enquiries, bookings or purchases. Compare similar periods and allow for seasonal changes or promotions.
Remember that clicking a Google review link does not confirm that a review was published. Track clicks, reviews and sales as separate results.
Frequently asked questions
Where do I create a campaign?
Go to Get reviews → E-mail campaigns → Add campaign, or open the editor directly.
Can review requests go out automatically?
Yes. Choose BCC forwarding or an available integration, complete its setup, and check your campaign’s timing and active status.
Can I customize my review request emails?
Yes. You can change the sender name, subject line, and message, add your logo, and choose where replies go. Use a familiar sender name and keep the request short so customers quickly understand what you are asking.
How can I check whether my campaign is working?
Check Invite history to follow invitation activity, then monitor new reviews on your chosen platform. For Google campaigns, remember that clicking the review link does not confirm that a customer published a review.
Can I send a reminder?
Yes. Use Send reminder to choose a follow-up delay. A friendly reminder gives customers another opportunity to respond if they missed the first email. Leave do not send selected if you prefer a single invitation.