
Create Facebook Page for Business step by step guide
Your business does not have a Facebook Page yet?
You can reach 5 million active Facebook users in Hungary, thus a successful business cannot afford itself the luxury of not having a well-set business page, with a minimum of 1-2 posts every week.
Additionally, Google is indexing Facebook Pages – it is worth to create one, as it will be visible to many more people besides the registered users.
If you do not have a Facebook Page yet, we will guide you through creating a Business Page step by step.
Even if your business already has a Facebook Page, it’s still worth to check the steps, just in case you missed something during the setup.
Why is creating a Facebook Business Page important?
If you’re a business owner and you don’t yet have a Facebook business page, then you’re doing yourself a disservice.
While it’s of course possible to thrive without a presence on Facebook, you could potentially be missing out on a lot of exposure through word of mouth. Facebook is like a local community that’s digital, except unlike in a local community there’s the possibility for your words to reach the eyes and ears of thousands or more on the social media platform.
How to create a Facebook Business Page?
To create a Facebook Business Page you will need a personal profile, thus first – if you have not already – you will need to register a profile.
Though the business profile is subject to your personal profile, they operate separately. You can find your pages by clicking the drop-down menu on the far right.
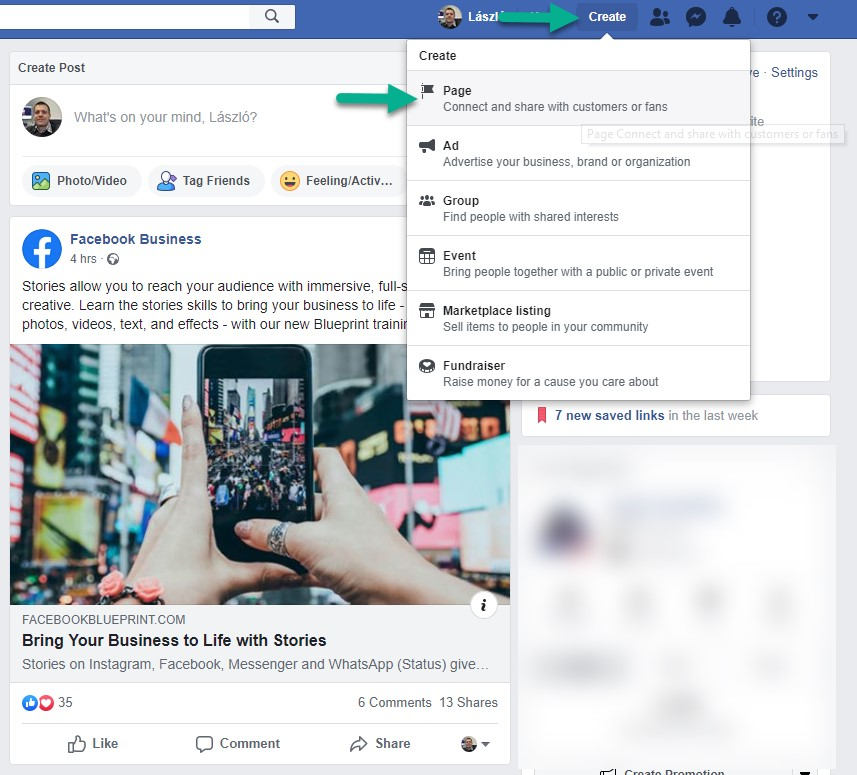
Step #1: Creating a Facebook Page
If you have registered already, you can create a new Facebook Page after logging in, by opening the Create menu item at the top, and clicking Page.
https://www.facebook.com/help/135275340210354/?helpref=hc_fnav
By clicking Page, you will get to the same page as by entering the following URL into your browser:https://www.facebook.com/pages/creation/.
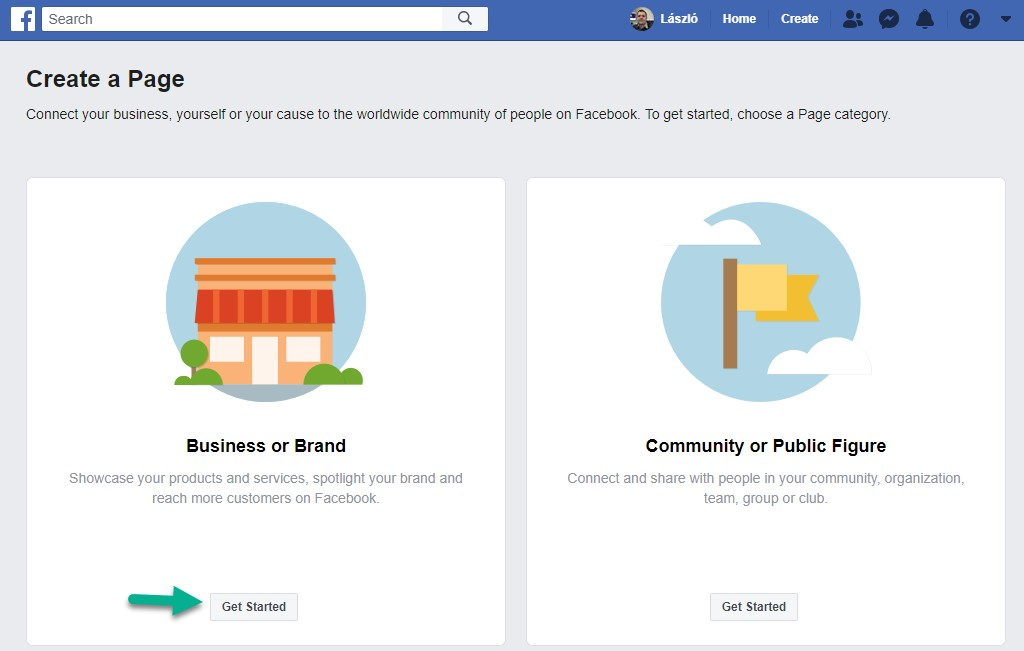
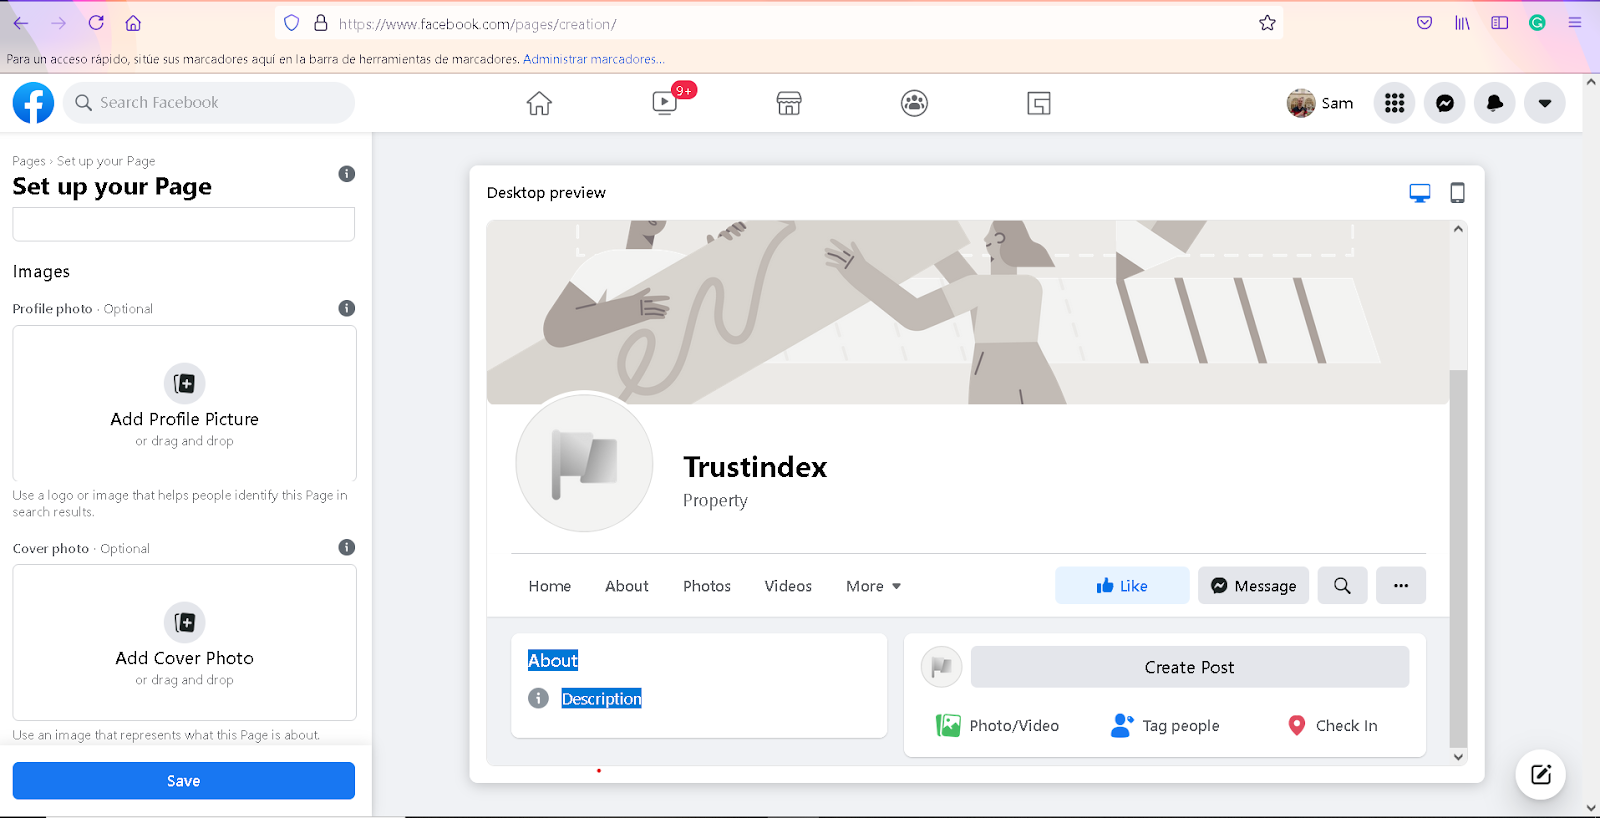
Step #2: Choosing the Facebook page category
https://www.facebook.com/pages/creation/
First, choose from the two categories the type of Facebook Page you want to create.
I assume that you would create the page with business purposes, so I recommend you to choose the first category.
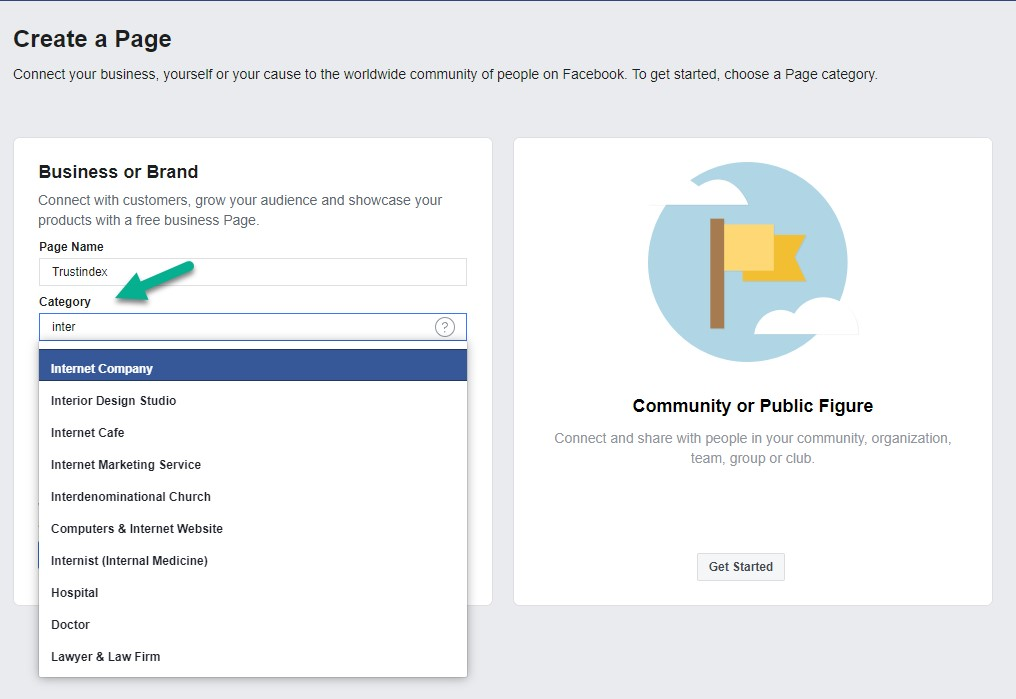
Step #3: Naming and categorising the Facebook Page
On the next page, you will be able to give a more precise category, and you can enter the name of your Facebook Business Page.
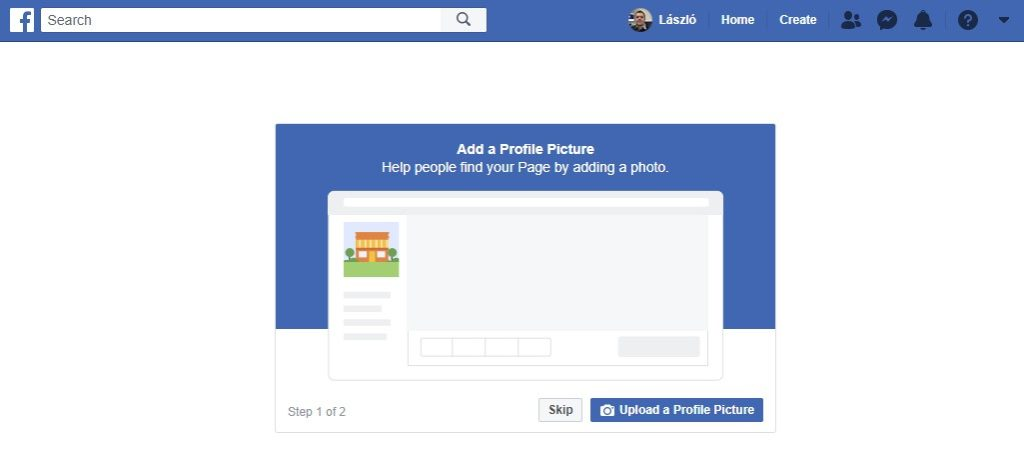
Step #4: Uploading a profile picture for your Facebook Page
The next part is choosing and uploading a profile picture.
The profile picture is displayed in 170×170 pixels on PC, in 128×128 pixels on smartphones, and in 36×36 pixels on regular mobiles.
If your business has a quality logo summarising your identity, or it is already widely recognised, it is recommended to use that as your profile picture.
Facebook cuts the profile picture on the corners, displaying it in a circle in Facebook Ads and posts. But if the users visit your Facebook Business Page, the profile picture is displayed in a square.
Step #5: Setting a Cover picture for your Facebook Page
The Cover Photo is displayed 821 pixels in width and 312 pixels in height on PC, and 640 pixels in width and 360 pixels in height on smartphones.
Considering the size, an 851 pixels wide and 315 pixels high image or video is the best choice.
https://www.facebook.com/help/125379114252045
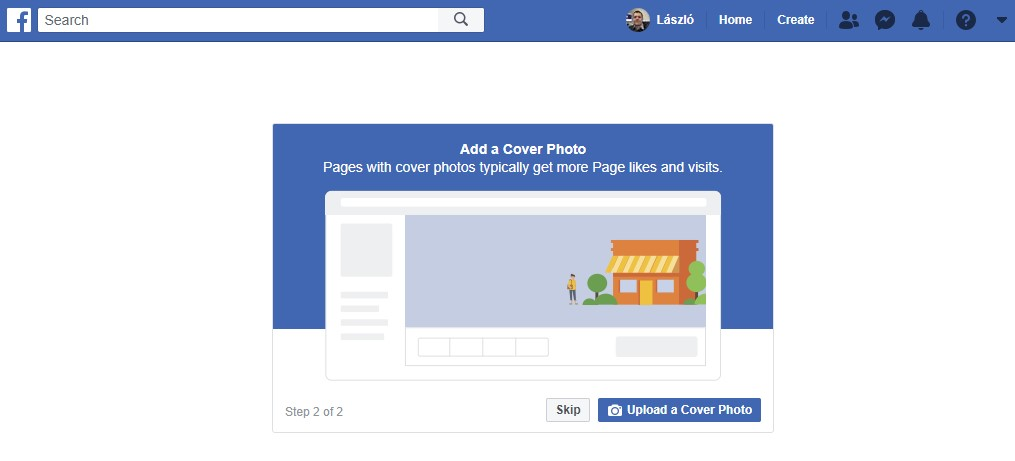
Now that the Cover Photo is set, our Business Page is ready for use.
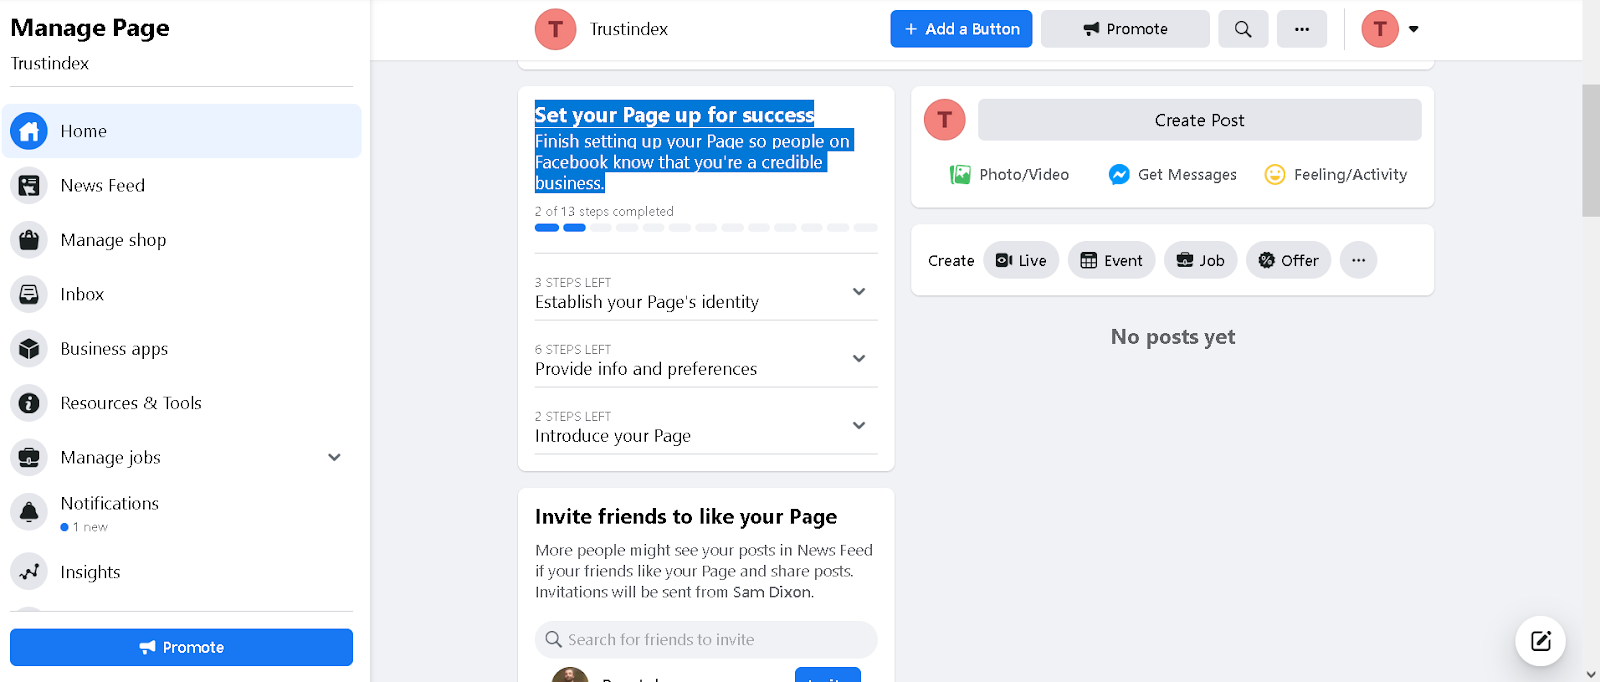
Step #6: Inviting your Facebook friends
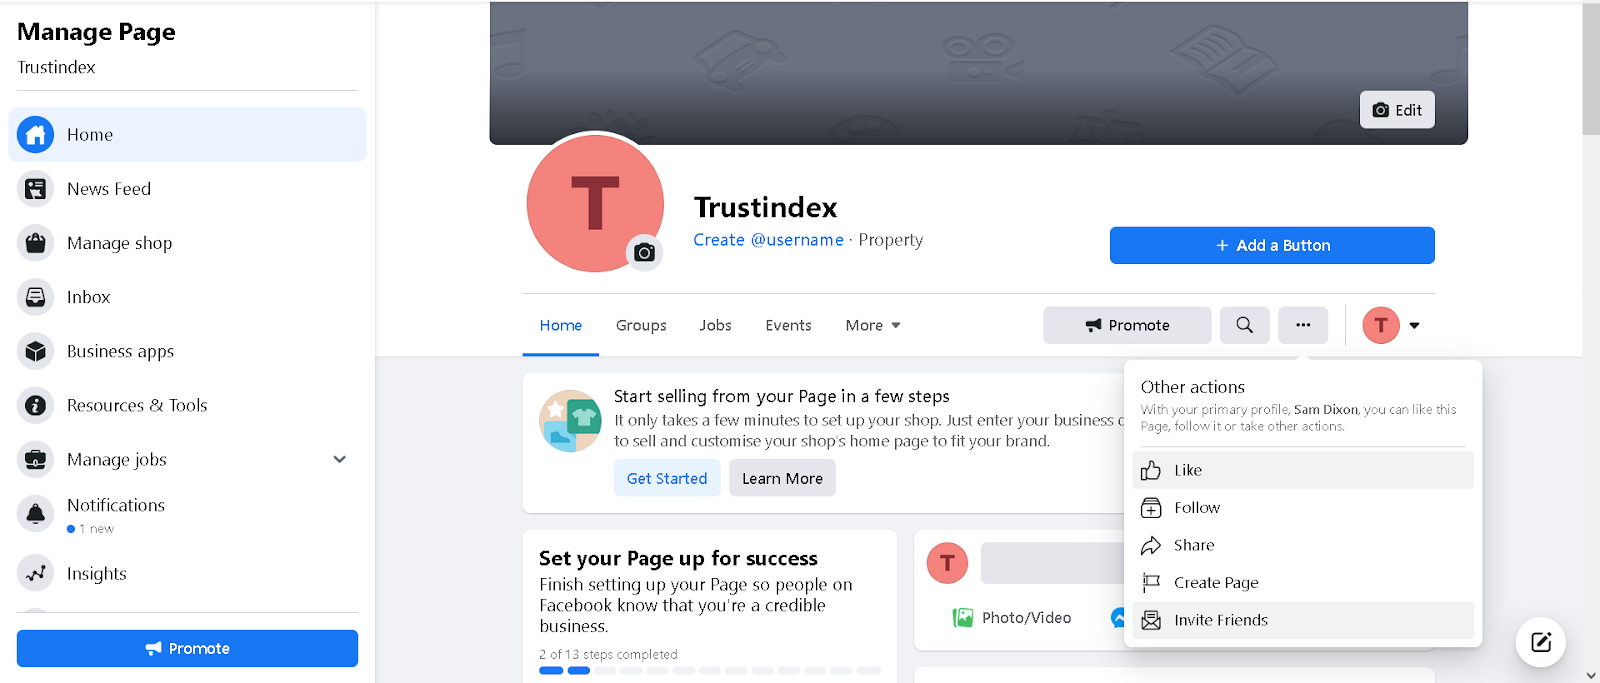
I suggest using the “Set Your Page Up For Success” feature to increase the number of your followers in a short time.
It is a crucial step because very often you can create the unique username, that is the vanity URL of your Facebook Page, only after reaching 25 likes.
There are instances (as shown above) when the system allows setting the username right after creating the Facebook Page.
Step #7: Setting the Button below the Cover Photo (main action button, CTA)
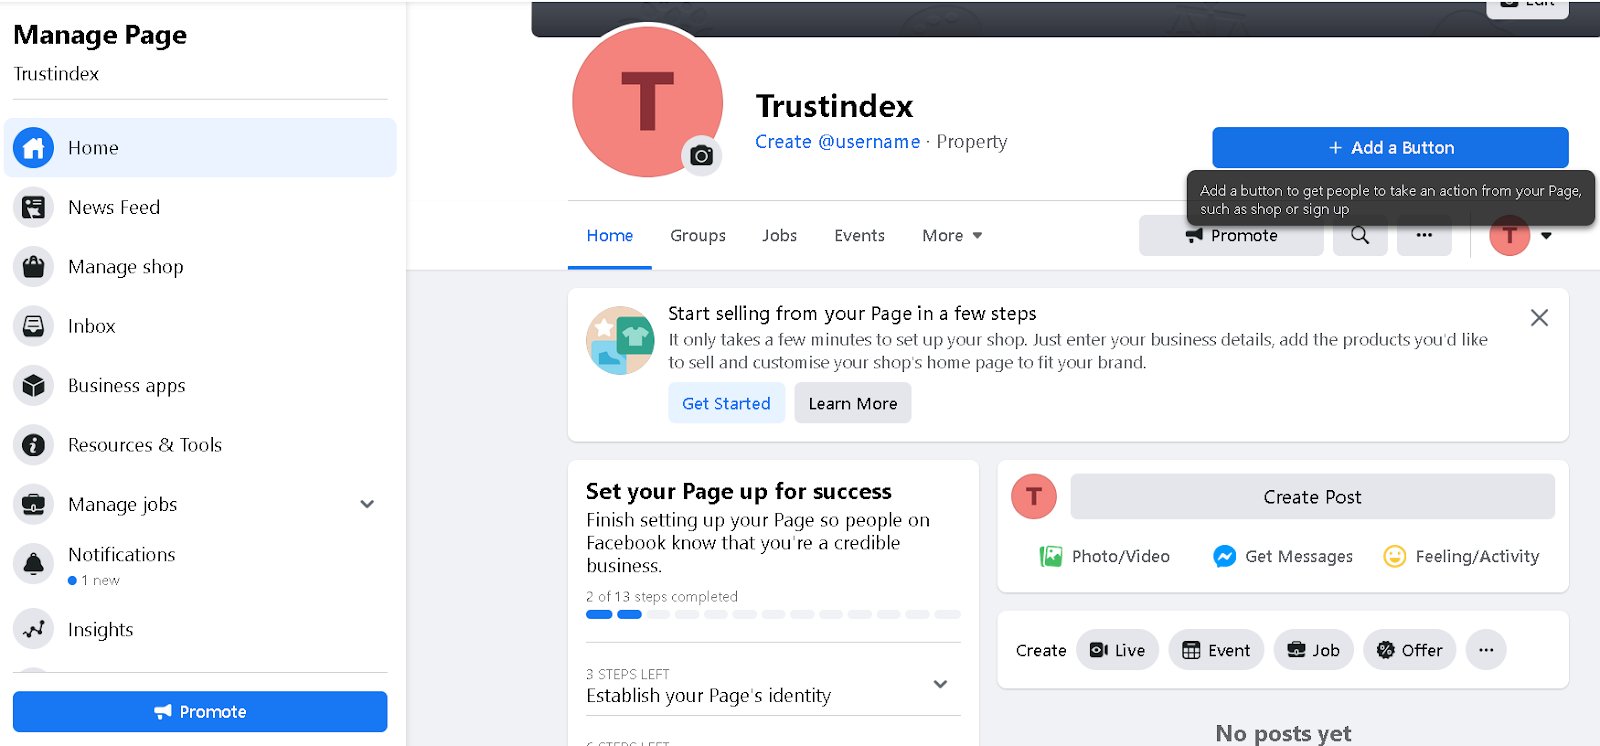
Take this opportunity and redirect your visitors to your website, or to the landing page of your current promotional offer.
You have several options when you set the Button up: linking your website, direct call, starting a chat in Facebook Messenger, downloading an application.
I recommend choosing the option that fits your current business goal best.
Step #8: Setting the Profile picture and the Cover photo if you have not already
In Steps #4 and #5, I have detailed what kind of profile and cover pictures are best to be uploaded and why. If you have not uploaded them yet, read the steps again and set these elements on your Facebook Business Page now.
In case you have a high-quality introductory video, I recommend using it as the Cover on your Facebook Page.
Step #9: Entering basic data, if you have not set them yet
After creating your Facebook Page, the set-up wizard immediately suggests to simply and quickly set the basic data and information worth knowing about your business.
As a first step, it is best to set a concise introduction in a sentence or two.
If your business has a separate website, it is good to put in its URL, so visitors reading your About section can easily get to your website.
If you have fixed opening hours, or you are available over the phone in set times, it is good to display your opening hours on Facebook.
Many users could be interested in this detail, but only a few have the time to search for it on the go. Make it easier for your clients!
Step #10: Setting the missing details in About
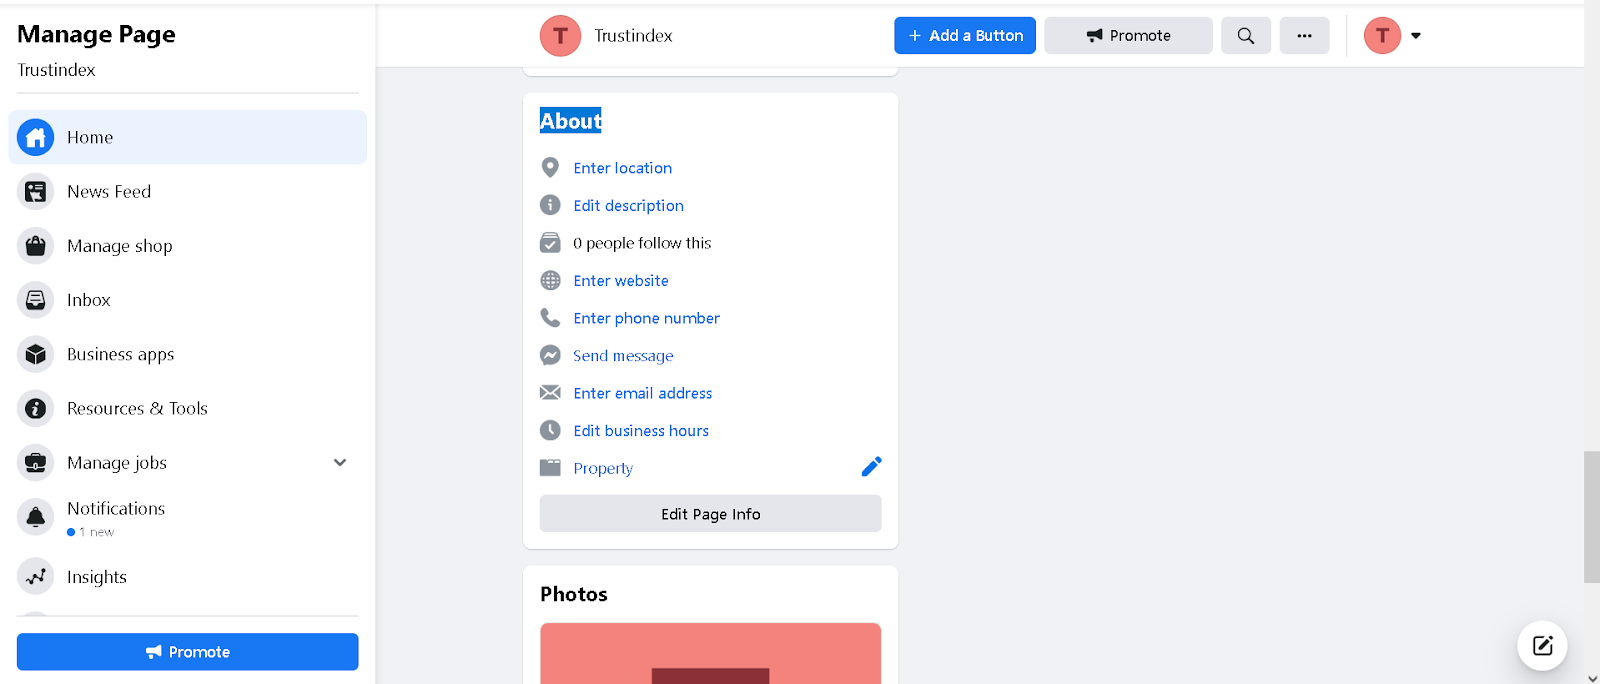
You have already put many details in previously. But if you click on About, you might still find a lot of information missing.
I recommend you to fill these in thoroughly. Always aim for short, brief phrasing. Those who visit this page are interested in the gist.
Step #11: General setup of the Facebook Page
You will find the Settings on the admin surface of the page, at the top right.
I recommend you to first go through these settings one by one because there are several important ones:
- Page Visibility
- Visitor posts
- Messages
- Page Moderation
- Profanity Filter
- Similar Page Suggestions
Step #12: Show reviews posted on the Facebook Page
Normally the user reviews and recommendations are enabled on your Facebook page.
If it is turned off on your page, but you would like to turn it on, or it is turned on and you would like to turn it off (WE STRONGLY DISCOURAGE IT), you can go to Settings->Templates and Tabs->Reviews Settings to change it.
Step #12+1: Regular handling of incoming messages
Those wishing to chat with your Facebook Business Page can send a message in Messenger; you can handle the messages in Inbox.
I suggest visiting this subpage regularly (it’s good to set an email notification) and try to answer the messages with short response time.
Step #12+2: Share new posts regularly on your Facebook Page
You can have a great Facebook Business Page, but if you do not post regularly, it will be perceived poorly by potential clients.
Thus, it is essential to regularly post pictures, videos for your followers and target audience, whom you can effectively reach with ads.
Aim for open communication on your Facebook Business Page: feel free to ask, and answer your visitors’ questions.
Summary
With the help of the step by step guide above, anyone can create and correctly set up a Facebook page for their business.
However, I’d like to call your attention to the importance of not stopping here to lean back after a job well done!
Without practising the 12+2 steps regularly, you will be unable to build out a considerable Facebook presence; and truthfully, without substantial presence advertising is rendered to pointless, as most of the successful Facebook campaigns are built on various shared content.
If you liked the article, please share so it can reach more readers. If you have any questions, feel free to ask away, we are all ears!


